How To Install NumPy In Python?
Learn via video courses
Overview
Numpy is an open-source python library that can be installed using Python packages like pip and conda on different operating systems like macOS, Linux, and Windows.
Scope
- In this article, we are going to learn about the installation of NumPy on different operating systems.
- Some Important Numpy Packages in Numpy are also covered in this article.
- We will also discuss the methods for upgrading Numpy and the concept of troubleshooting.
Introduction
To run the NumPy program, first, Numpy needs to be installed. Numpy is installed from www.python.org using pip and conda by running different commands on different operating systems. Many important packages are automatically installed within the Numpy library.
Pre-Requisites
- It is mandatory to install Python from www.python.org before installing NumPy.
- Compilers are needed for building any extension modules. NumPy is developed mainly using GNU compilers.
Steps for Installing NumPy
- Download and Install Python.
- Python should be installed before installing NumPy.
- Download Python from www.python.org according to the operating system. After installing Python, Numpy is installed using different commands in different operating systems.
Let's see how NumPy is installed on different operating systems.
Installing Numpy
1. Installing NumPy on Mac Operating System
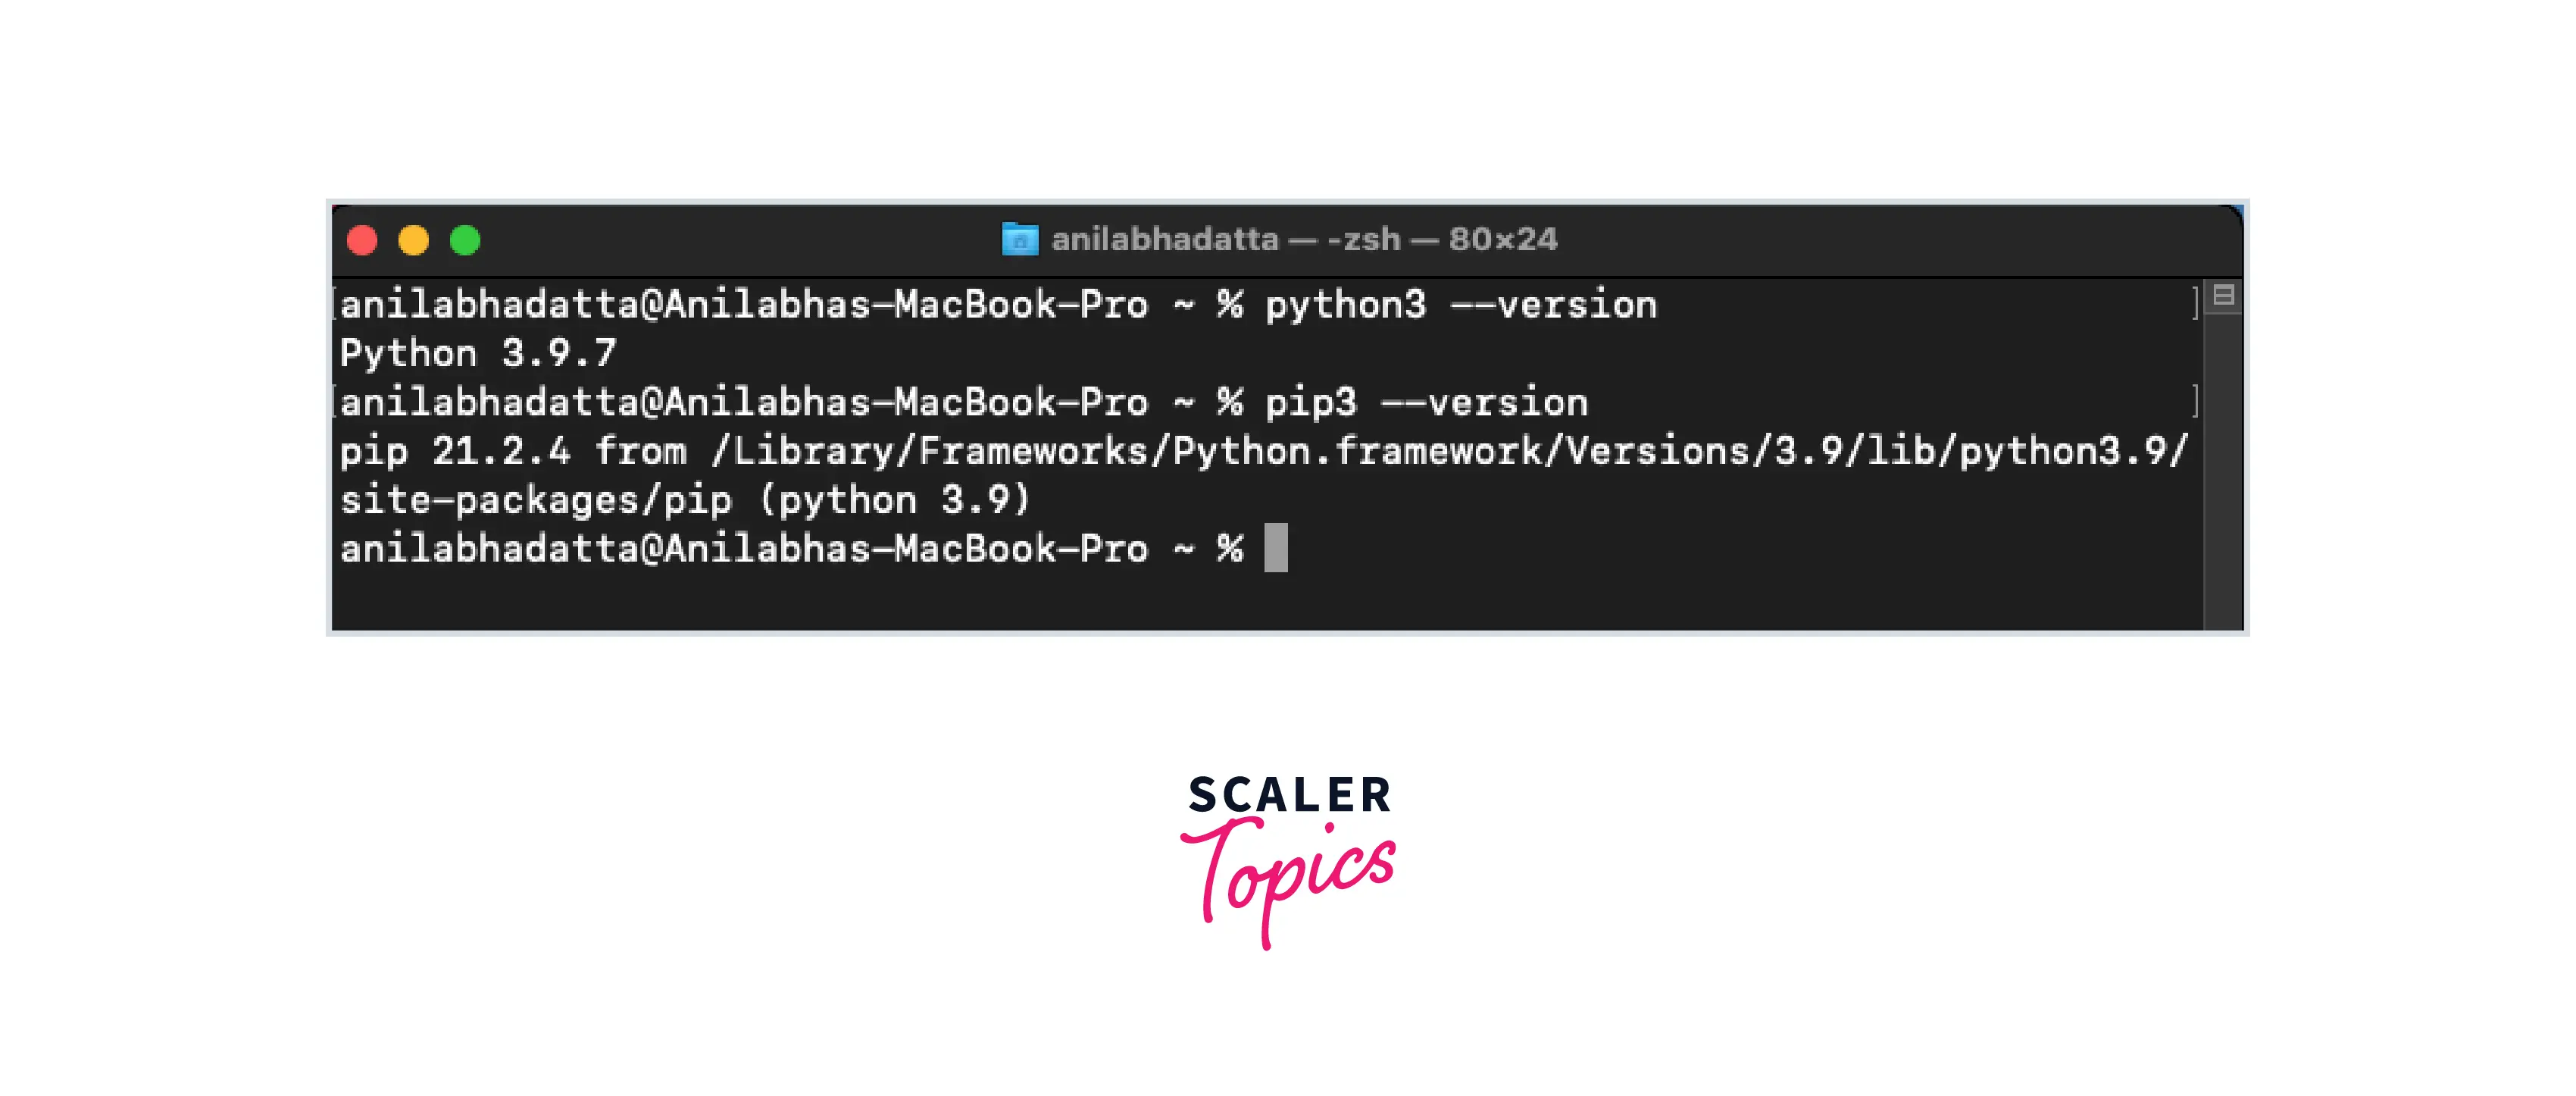
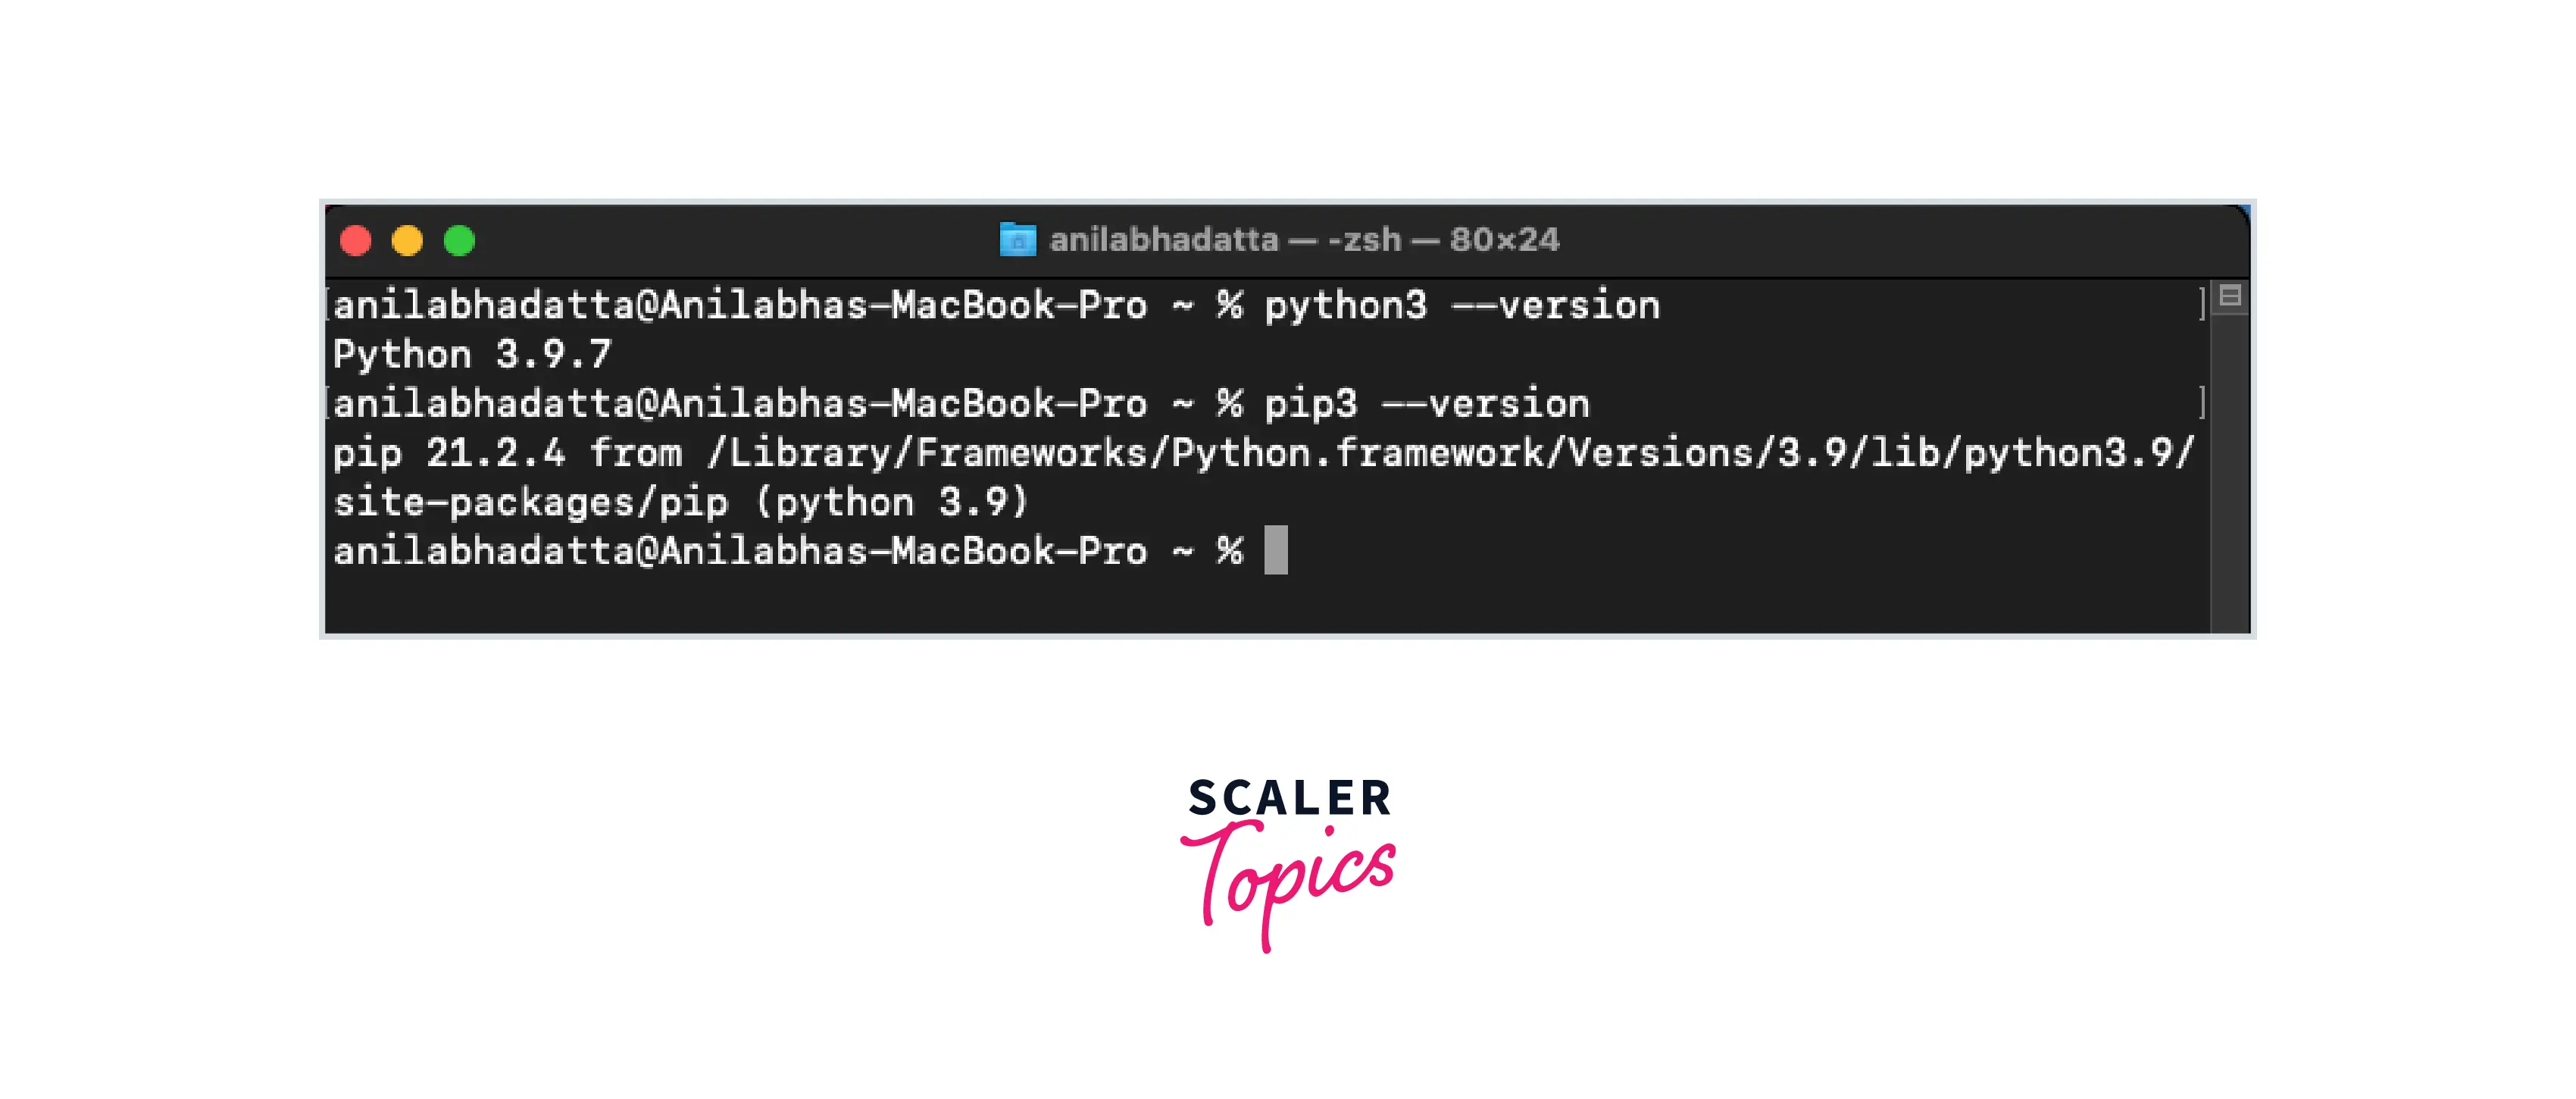
- Check if pip3 and python3 are installed correctly by running the following command:
- Install numpy by using the pip command:
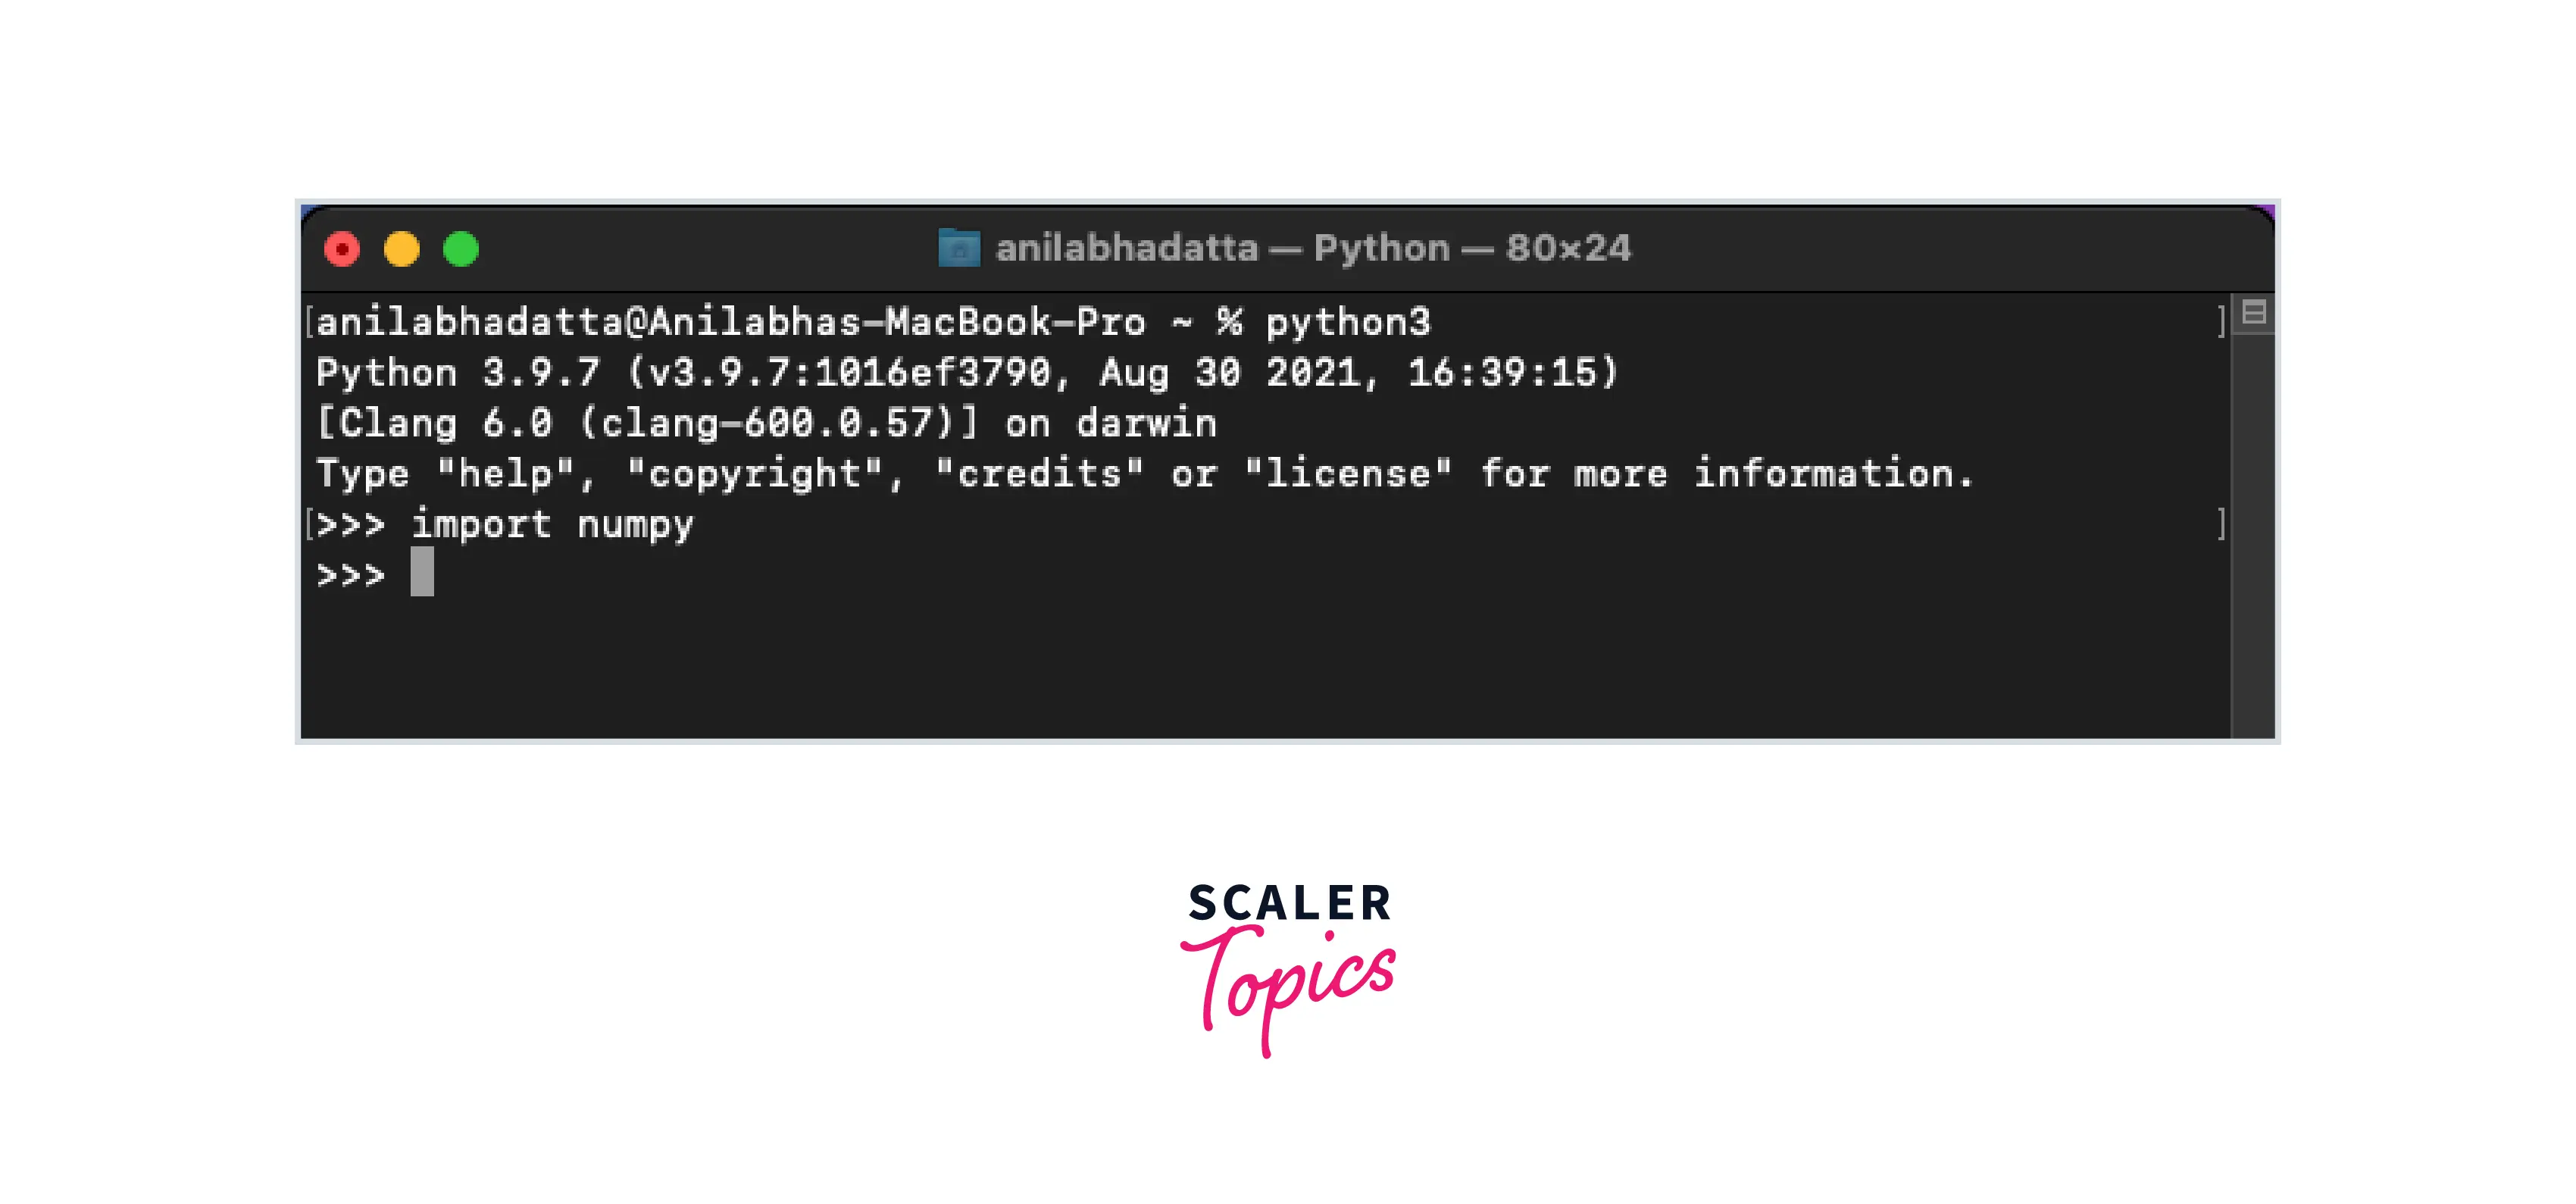
- Verify installation by typing the following command:
2. Installing NumPy on Windows Operating System
Steps for installing NumPy on Windows:
1. Install NumPy using the following PIP command in the command prompt terminal:
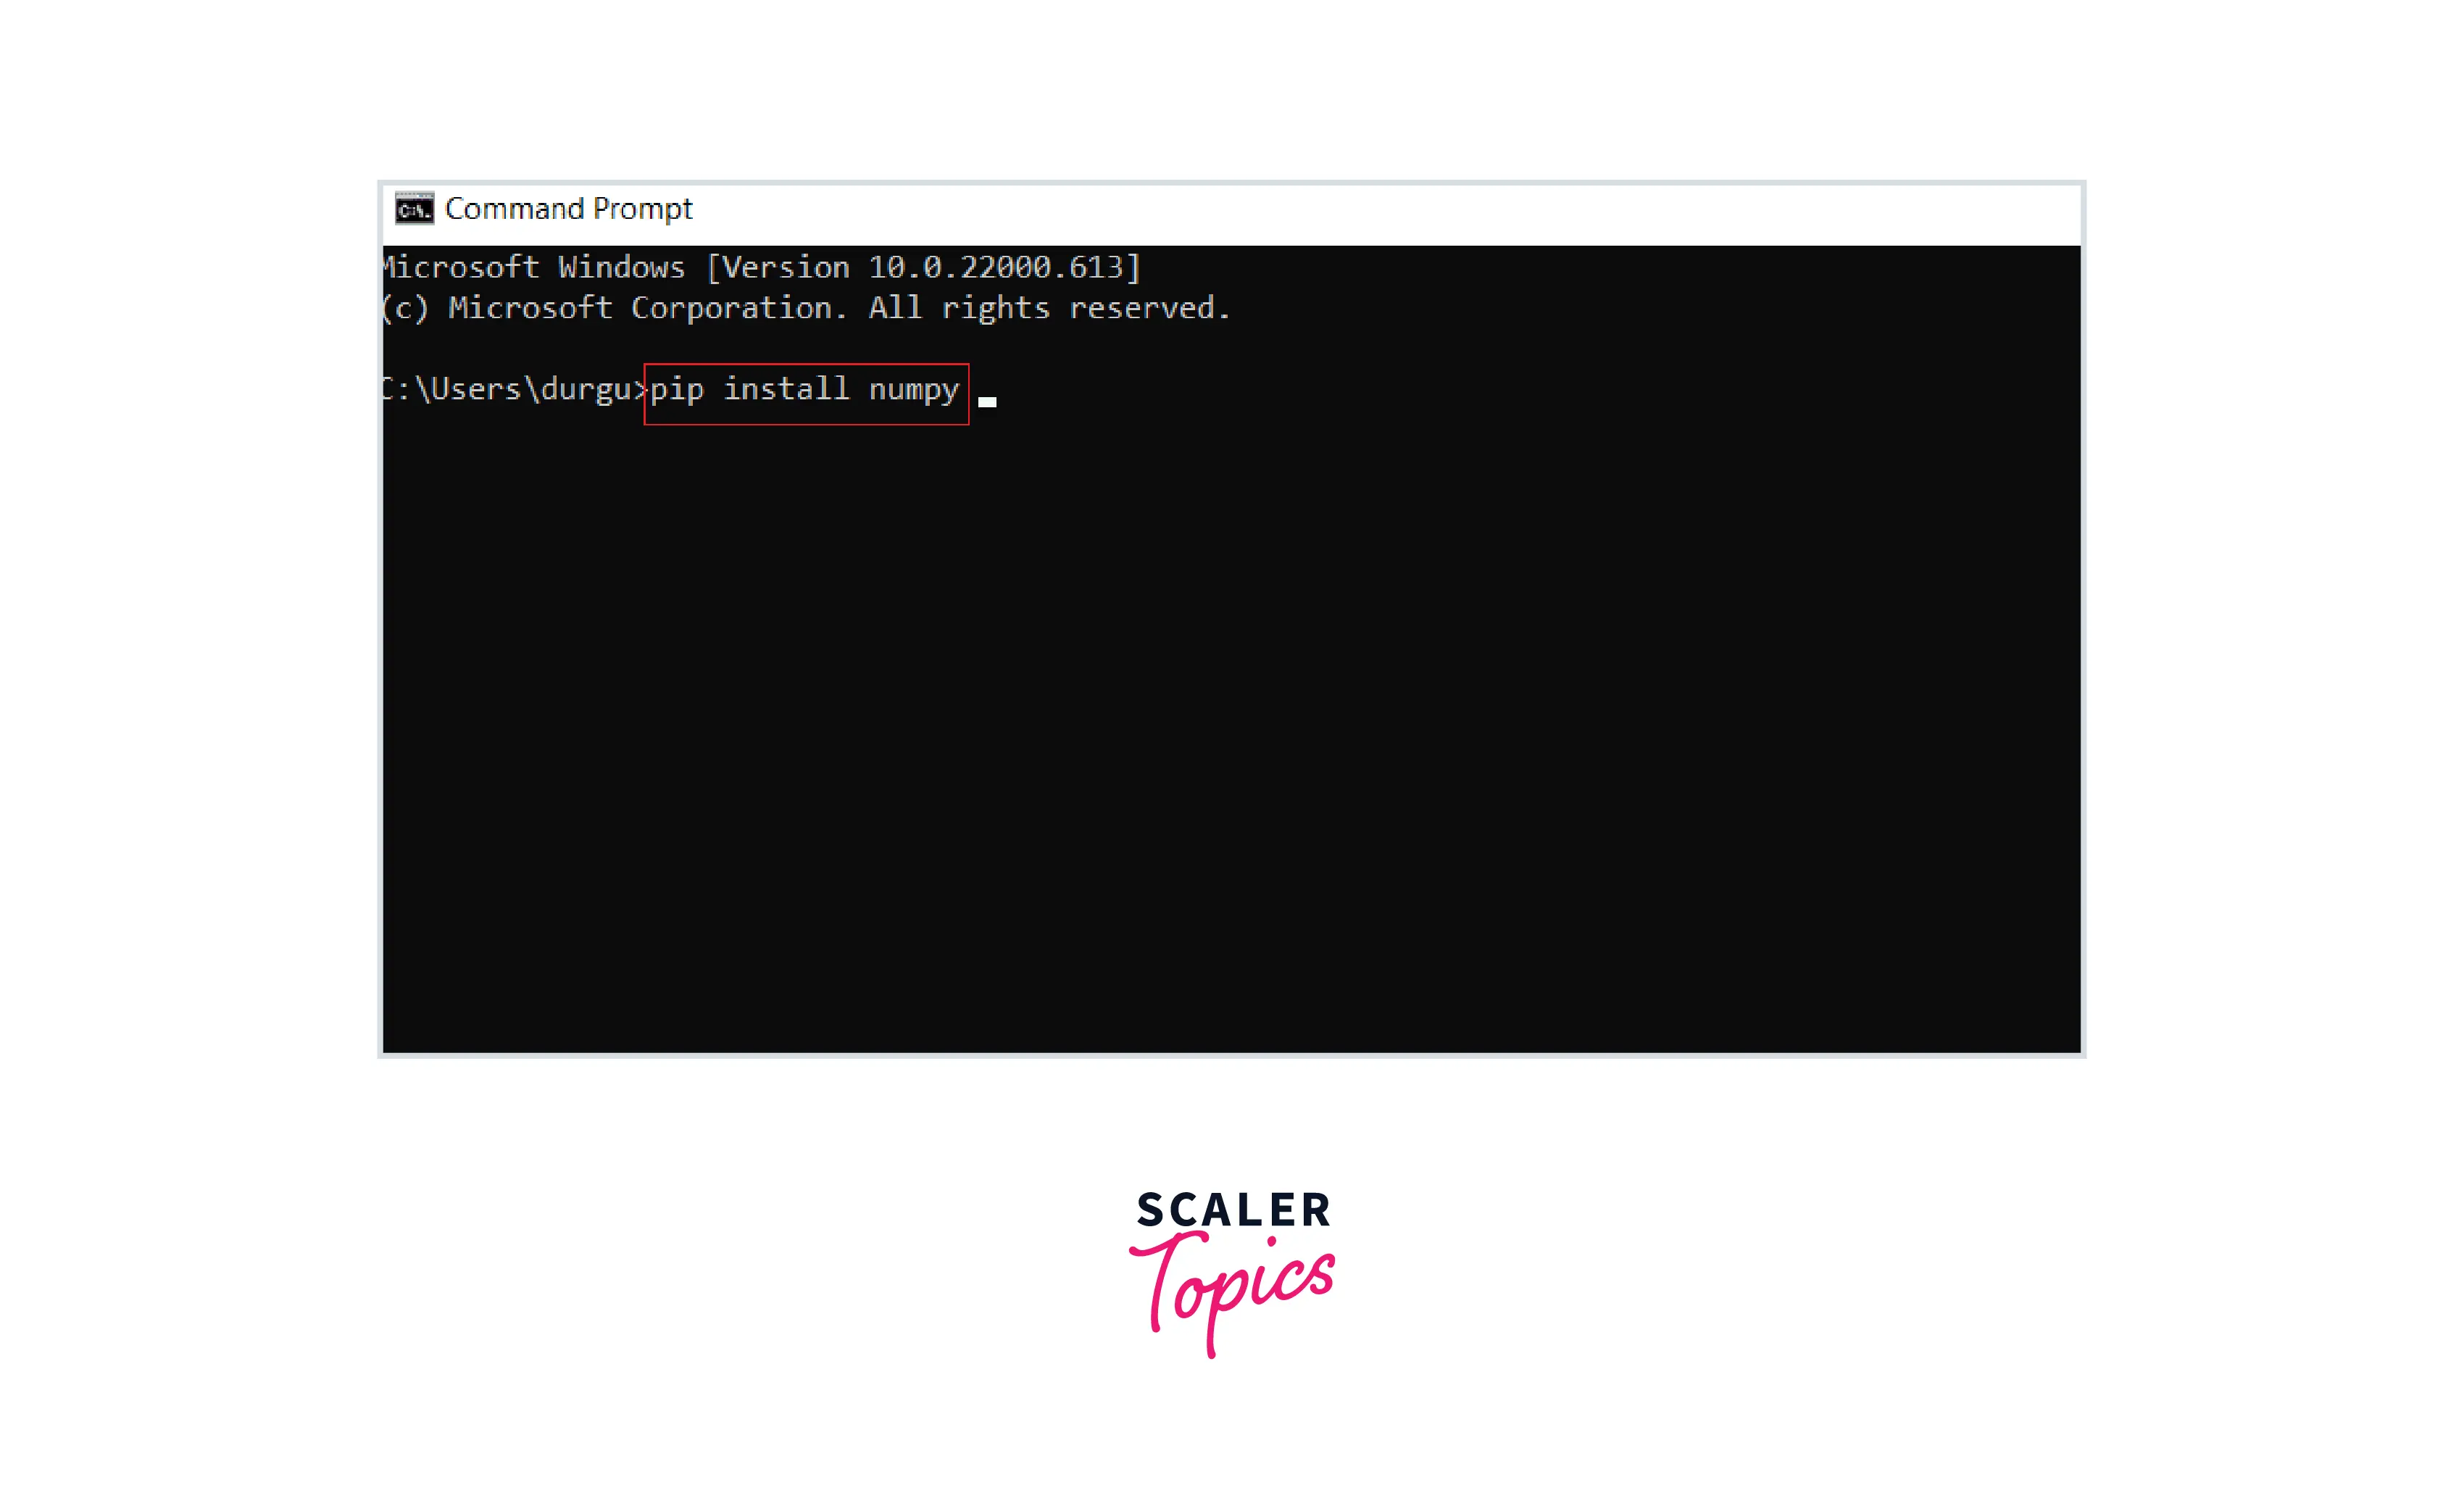
The installation will start automatically, and Numpy will be successfully installed with its latest version.
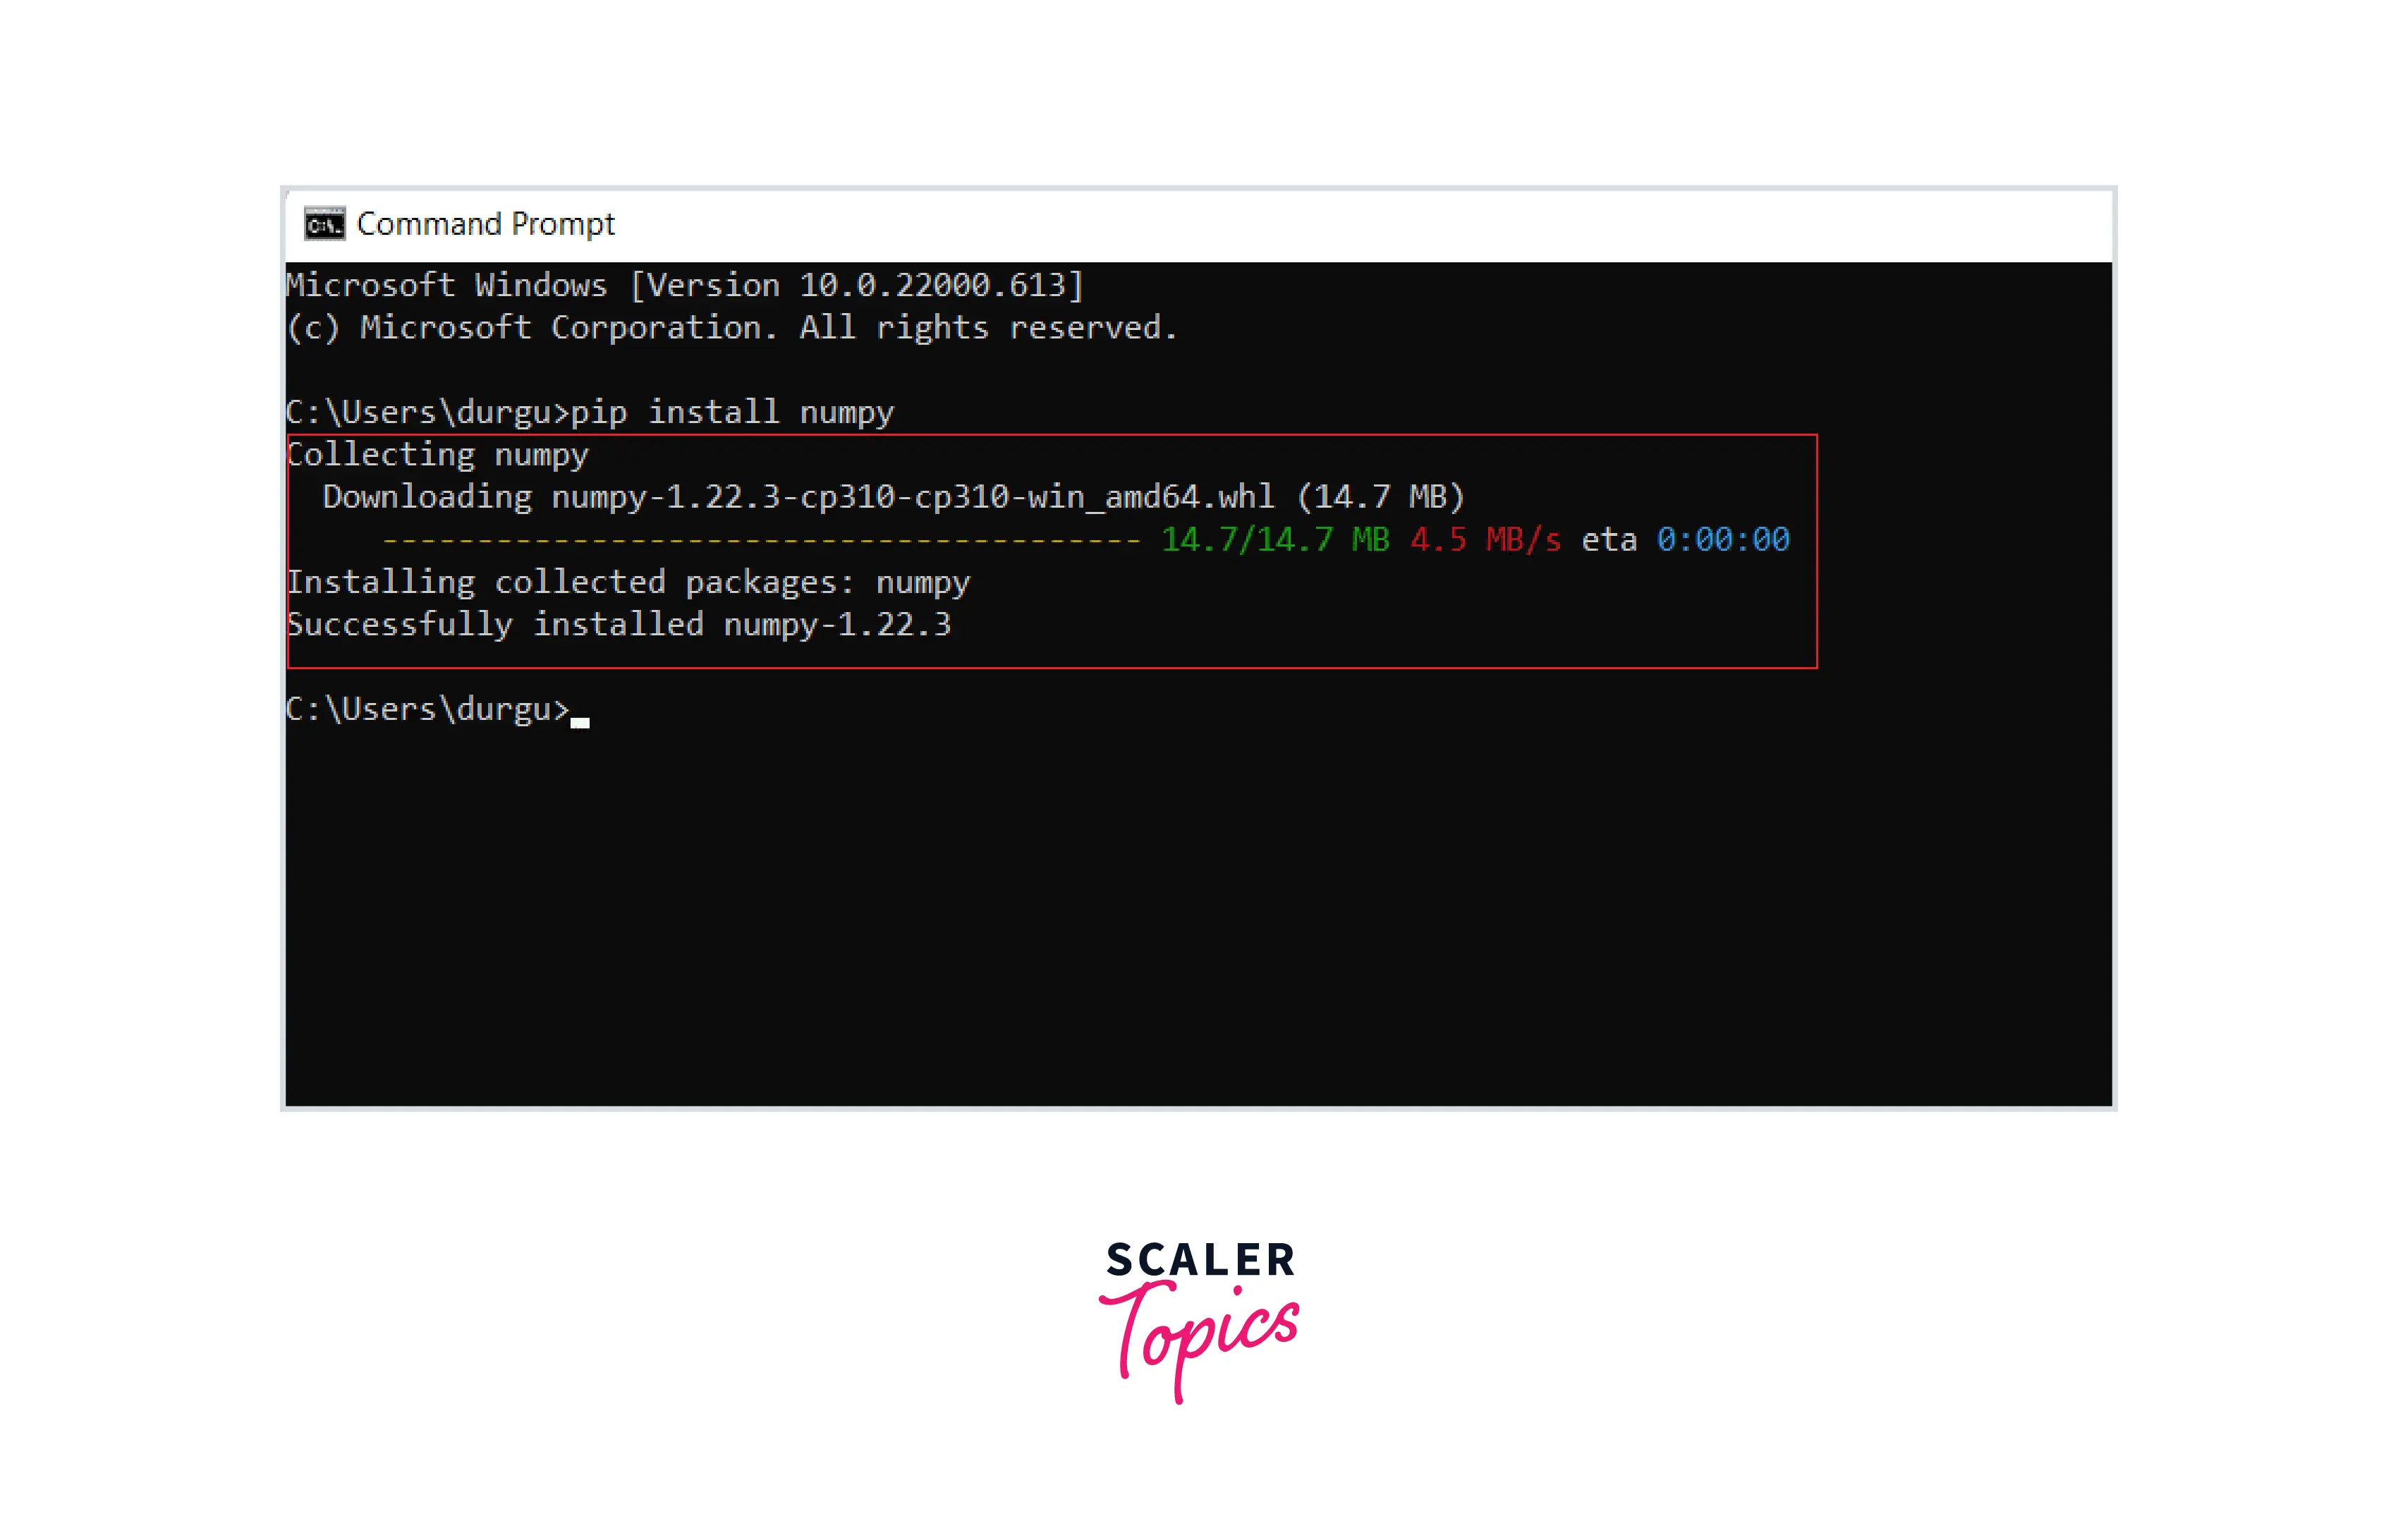
2. Verify NumPy Installation by typing the command given below in cmd:
It will show the location and numpy version installed.
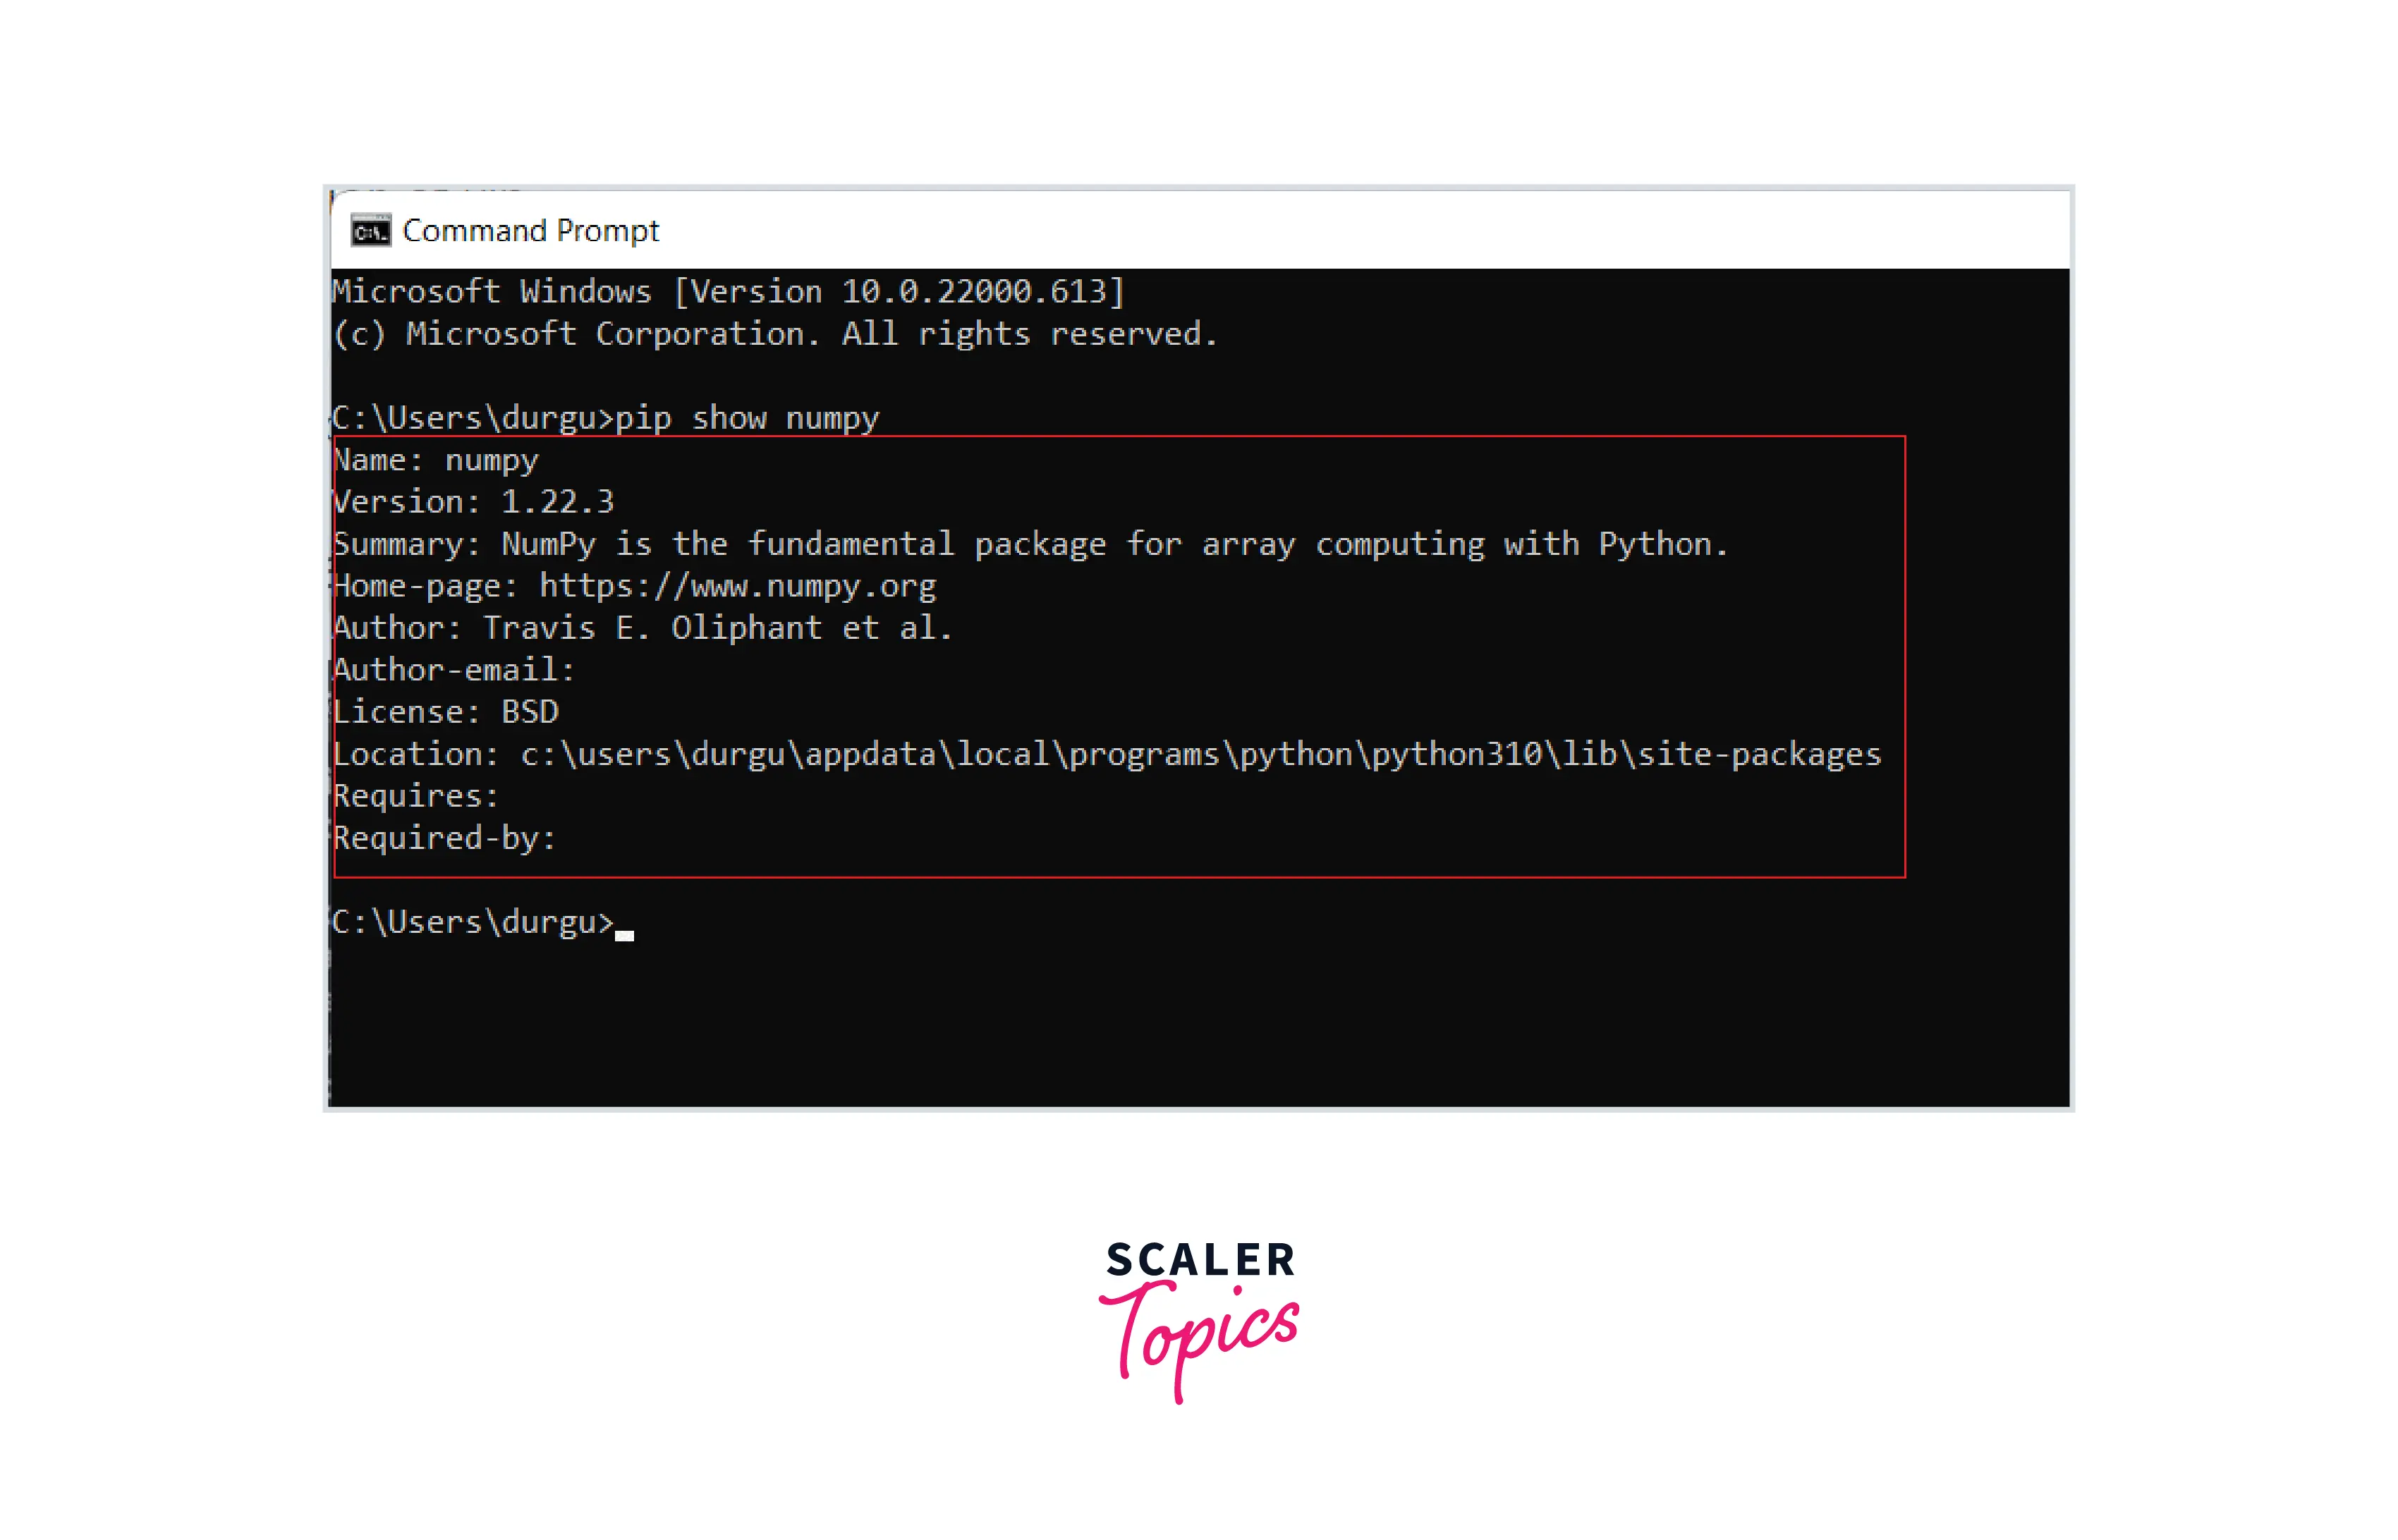
3. Import NumPy Package
- Create python Environment in cmd by typing:Python
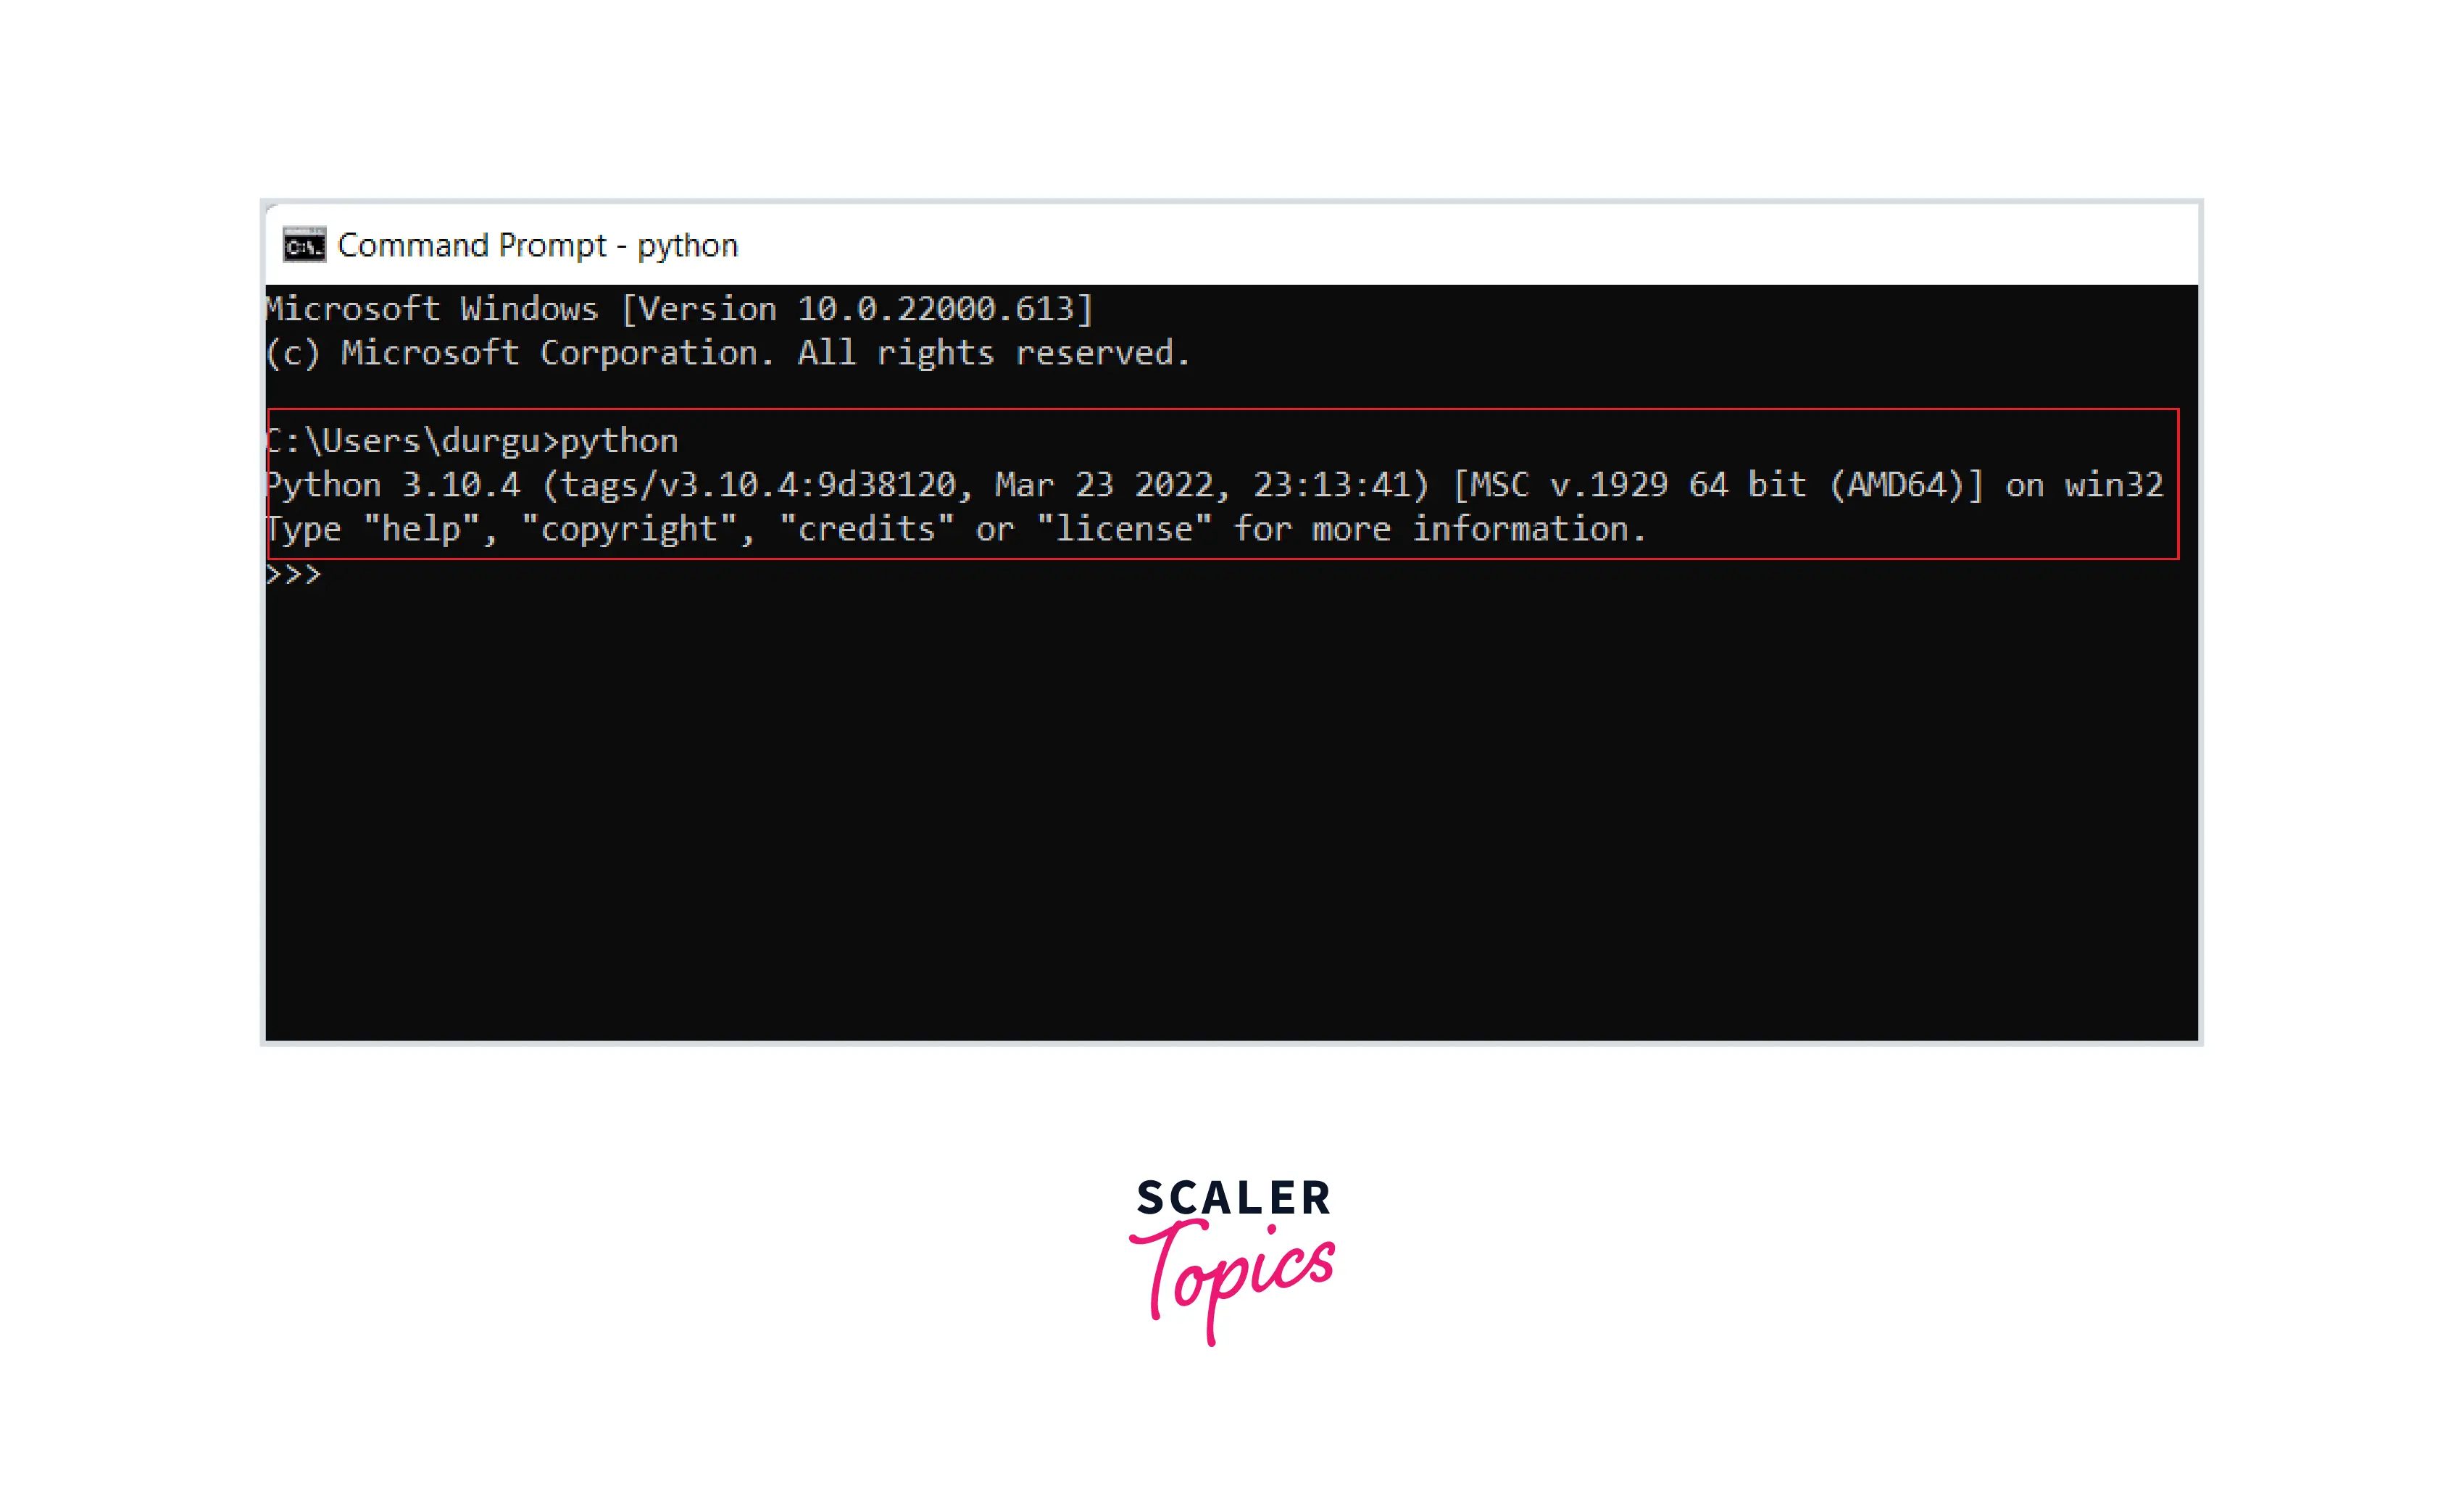
- Type command import numpy as np
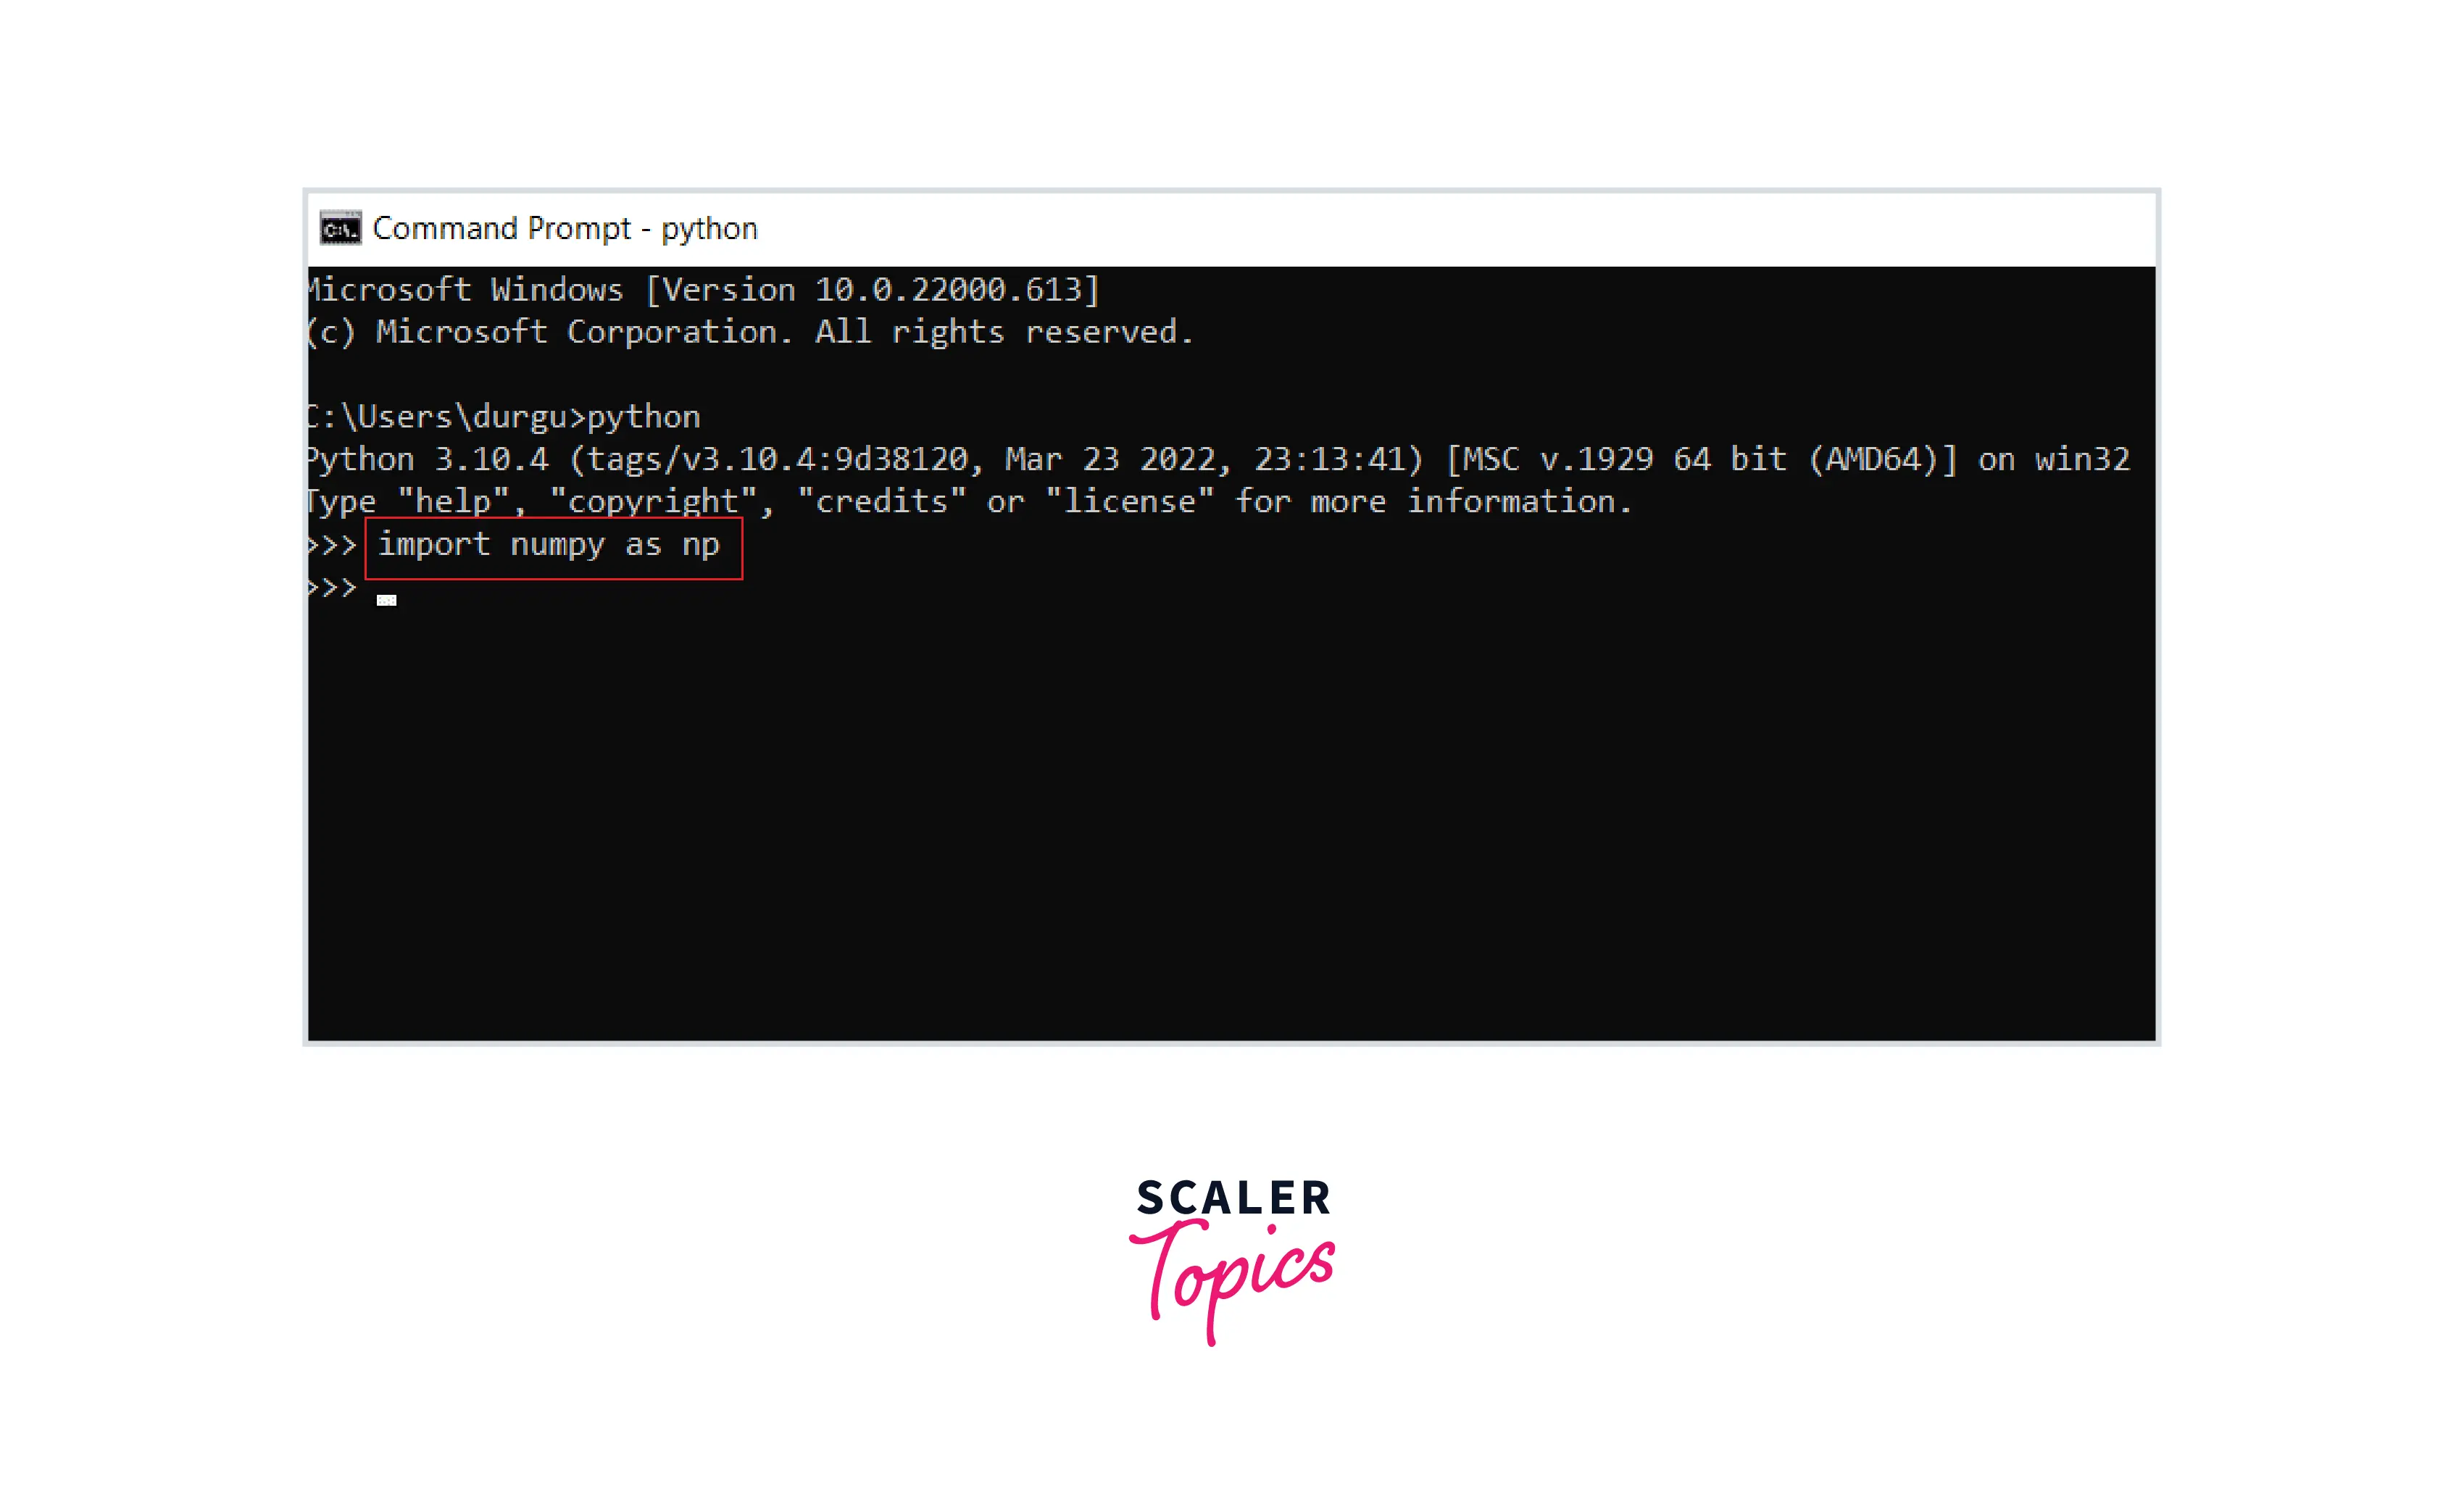
4. Upgrade NumPy by using the following command:
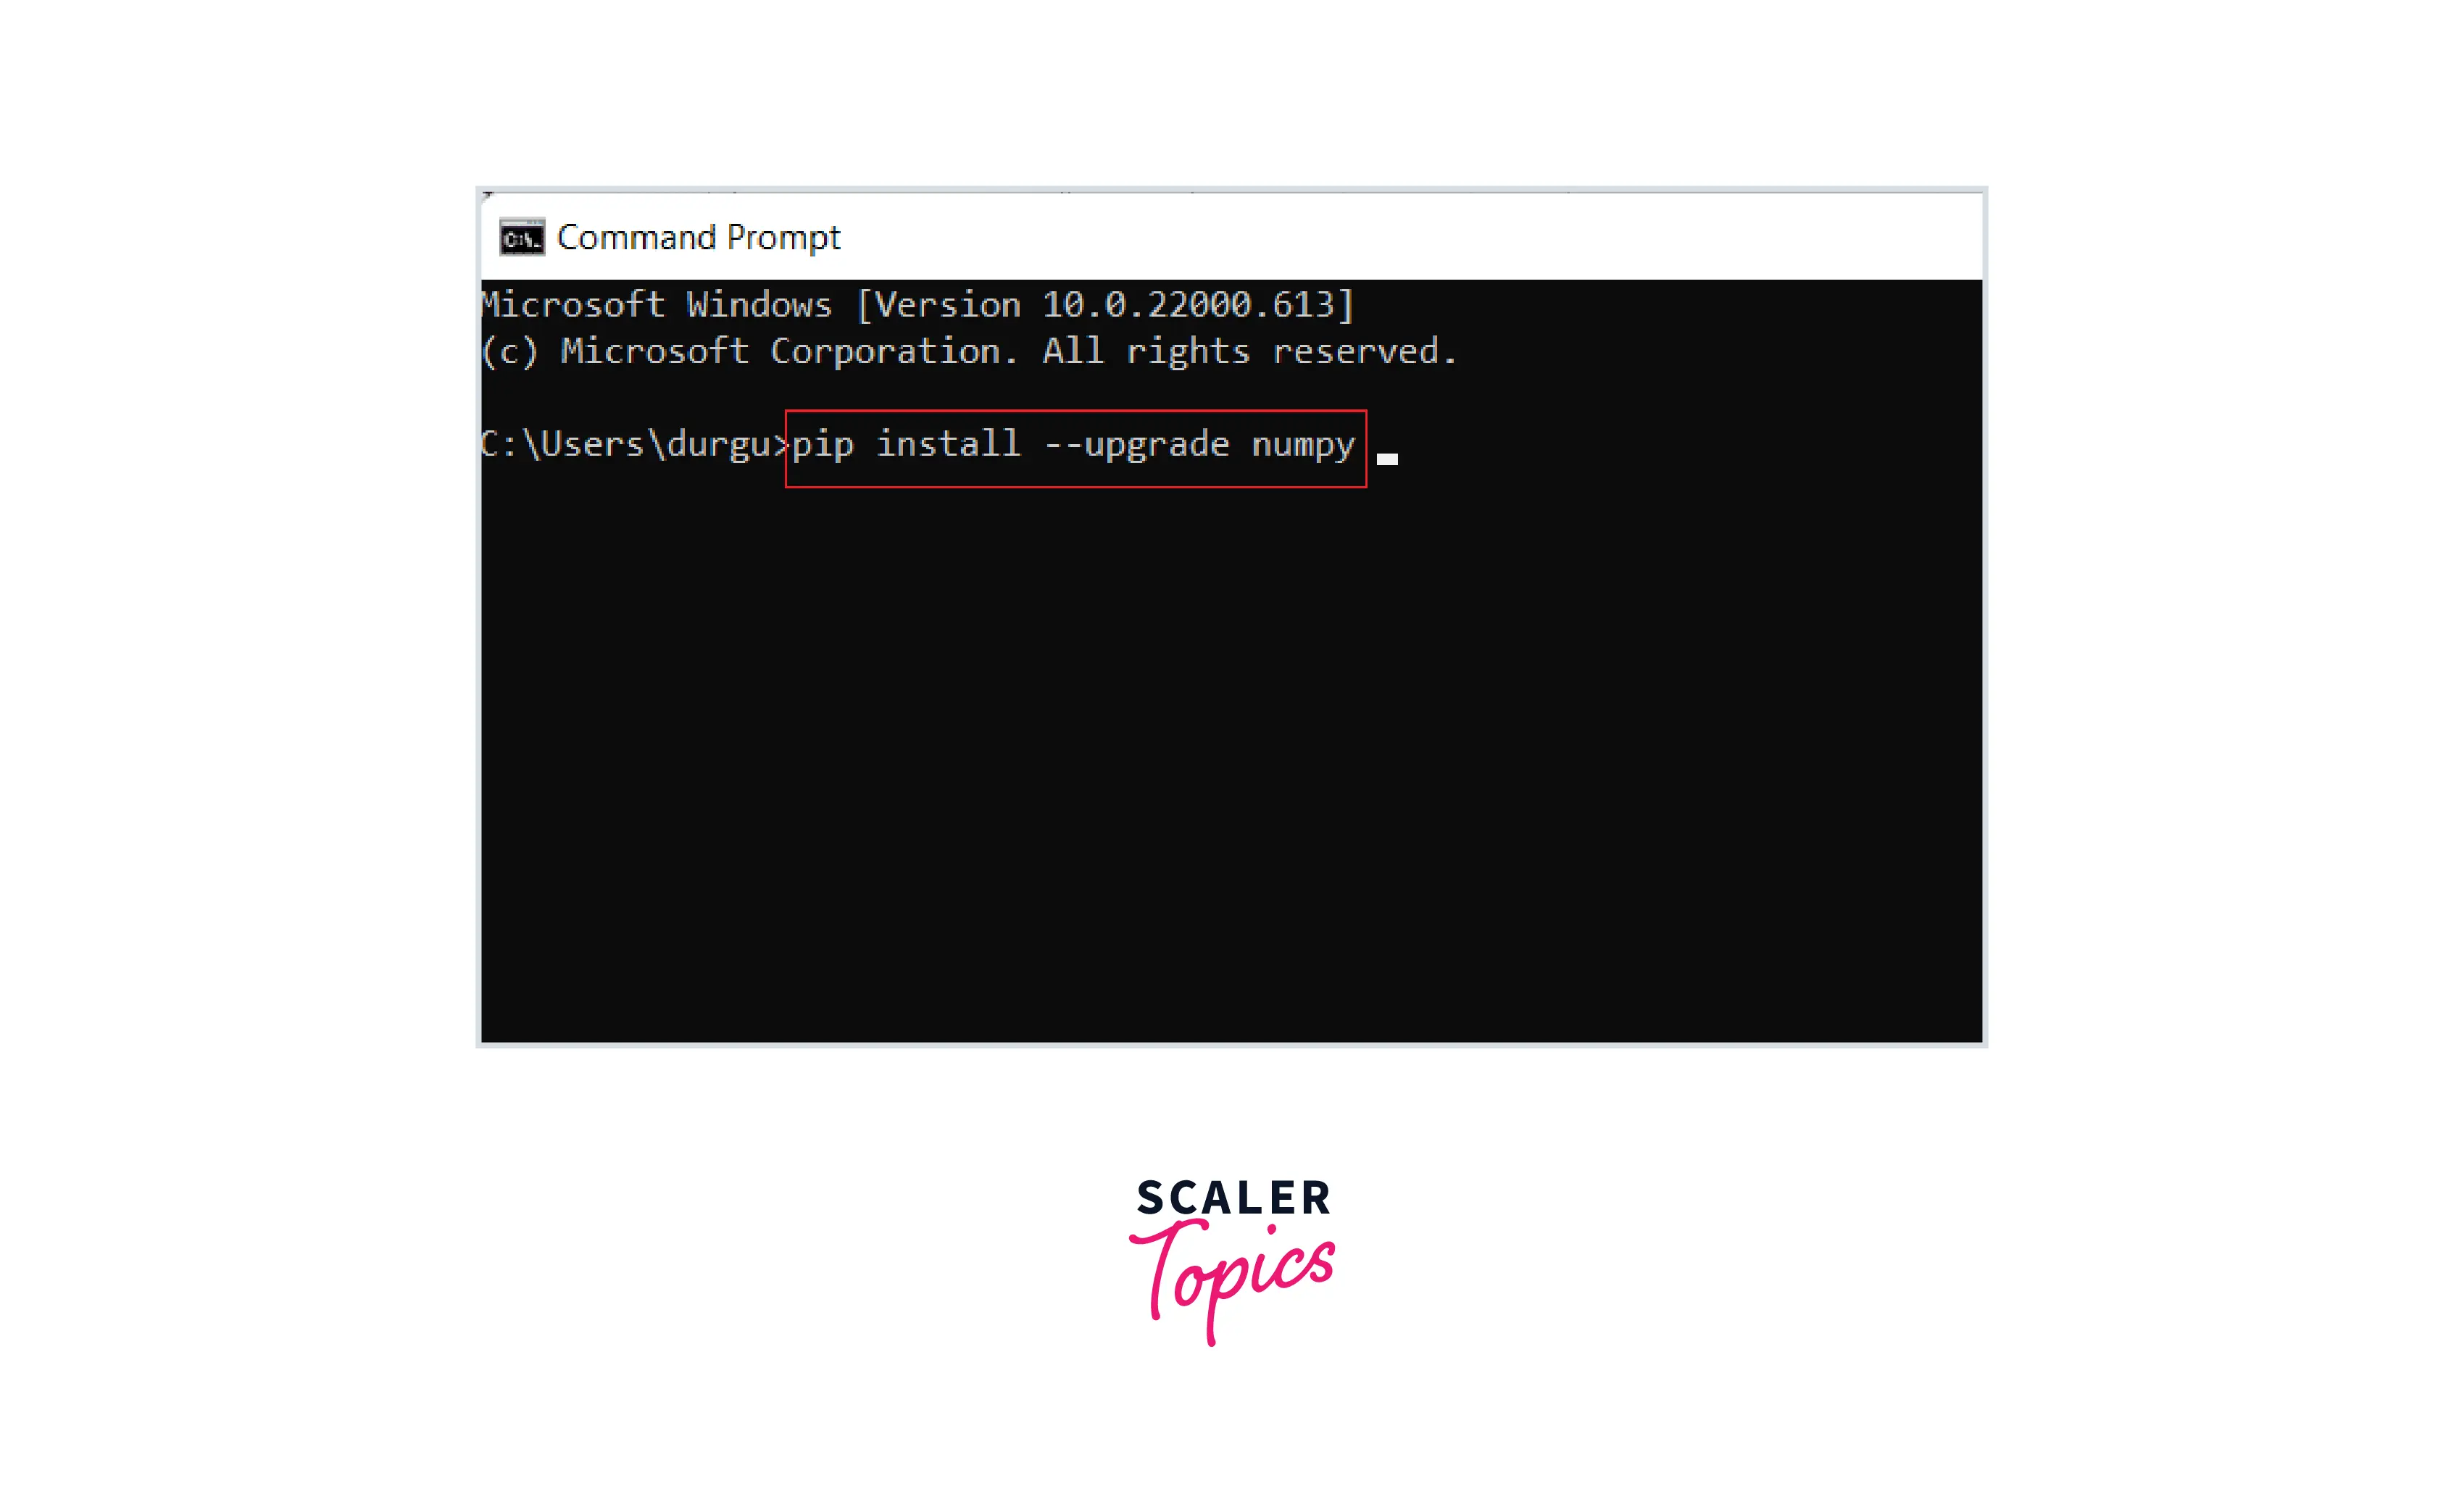
Shows message: Requirement already satisfied: numpy in [location (version)]
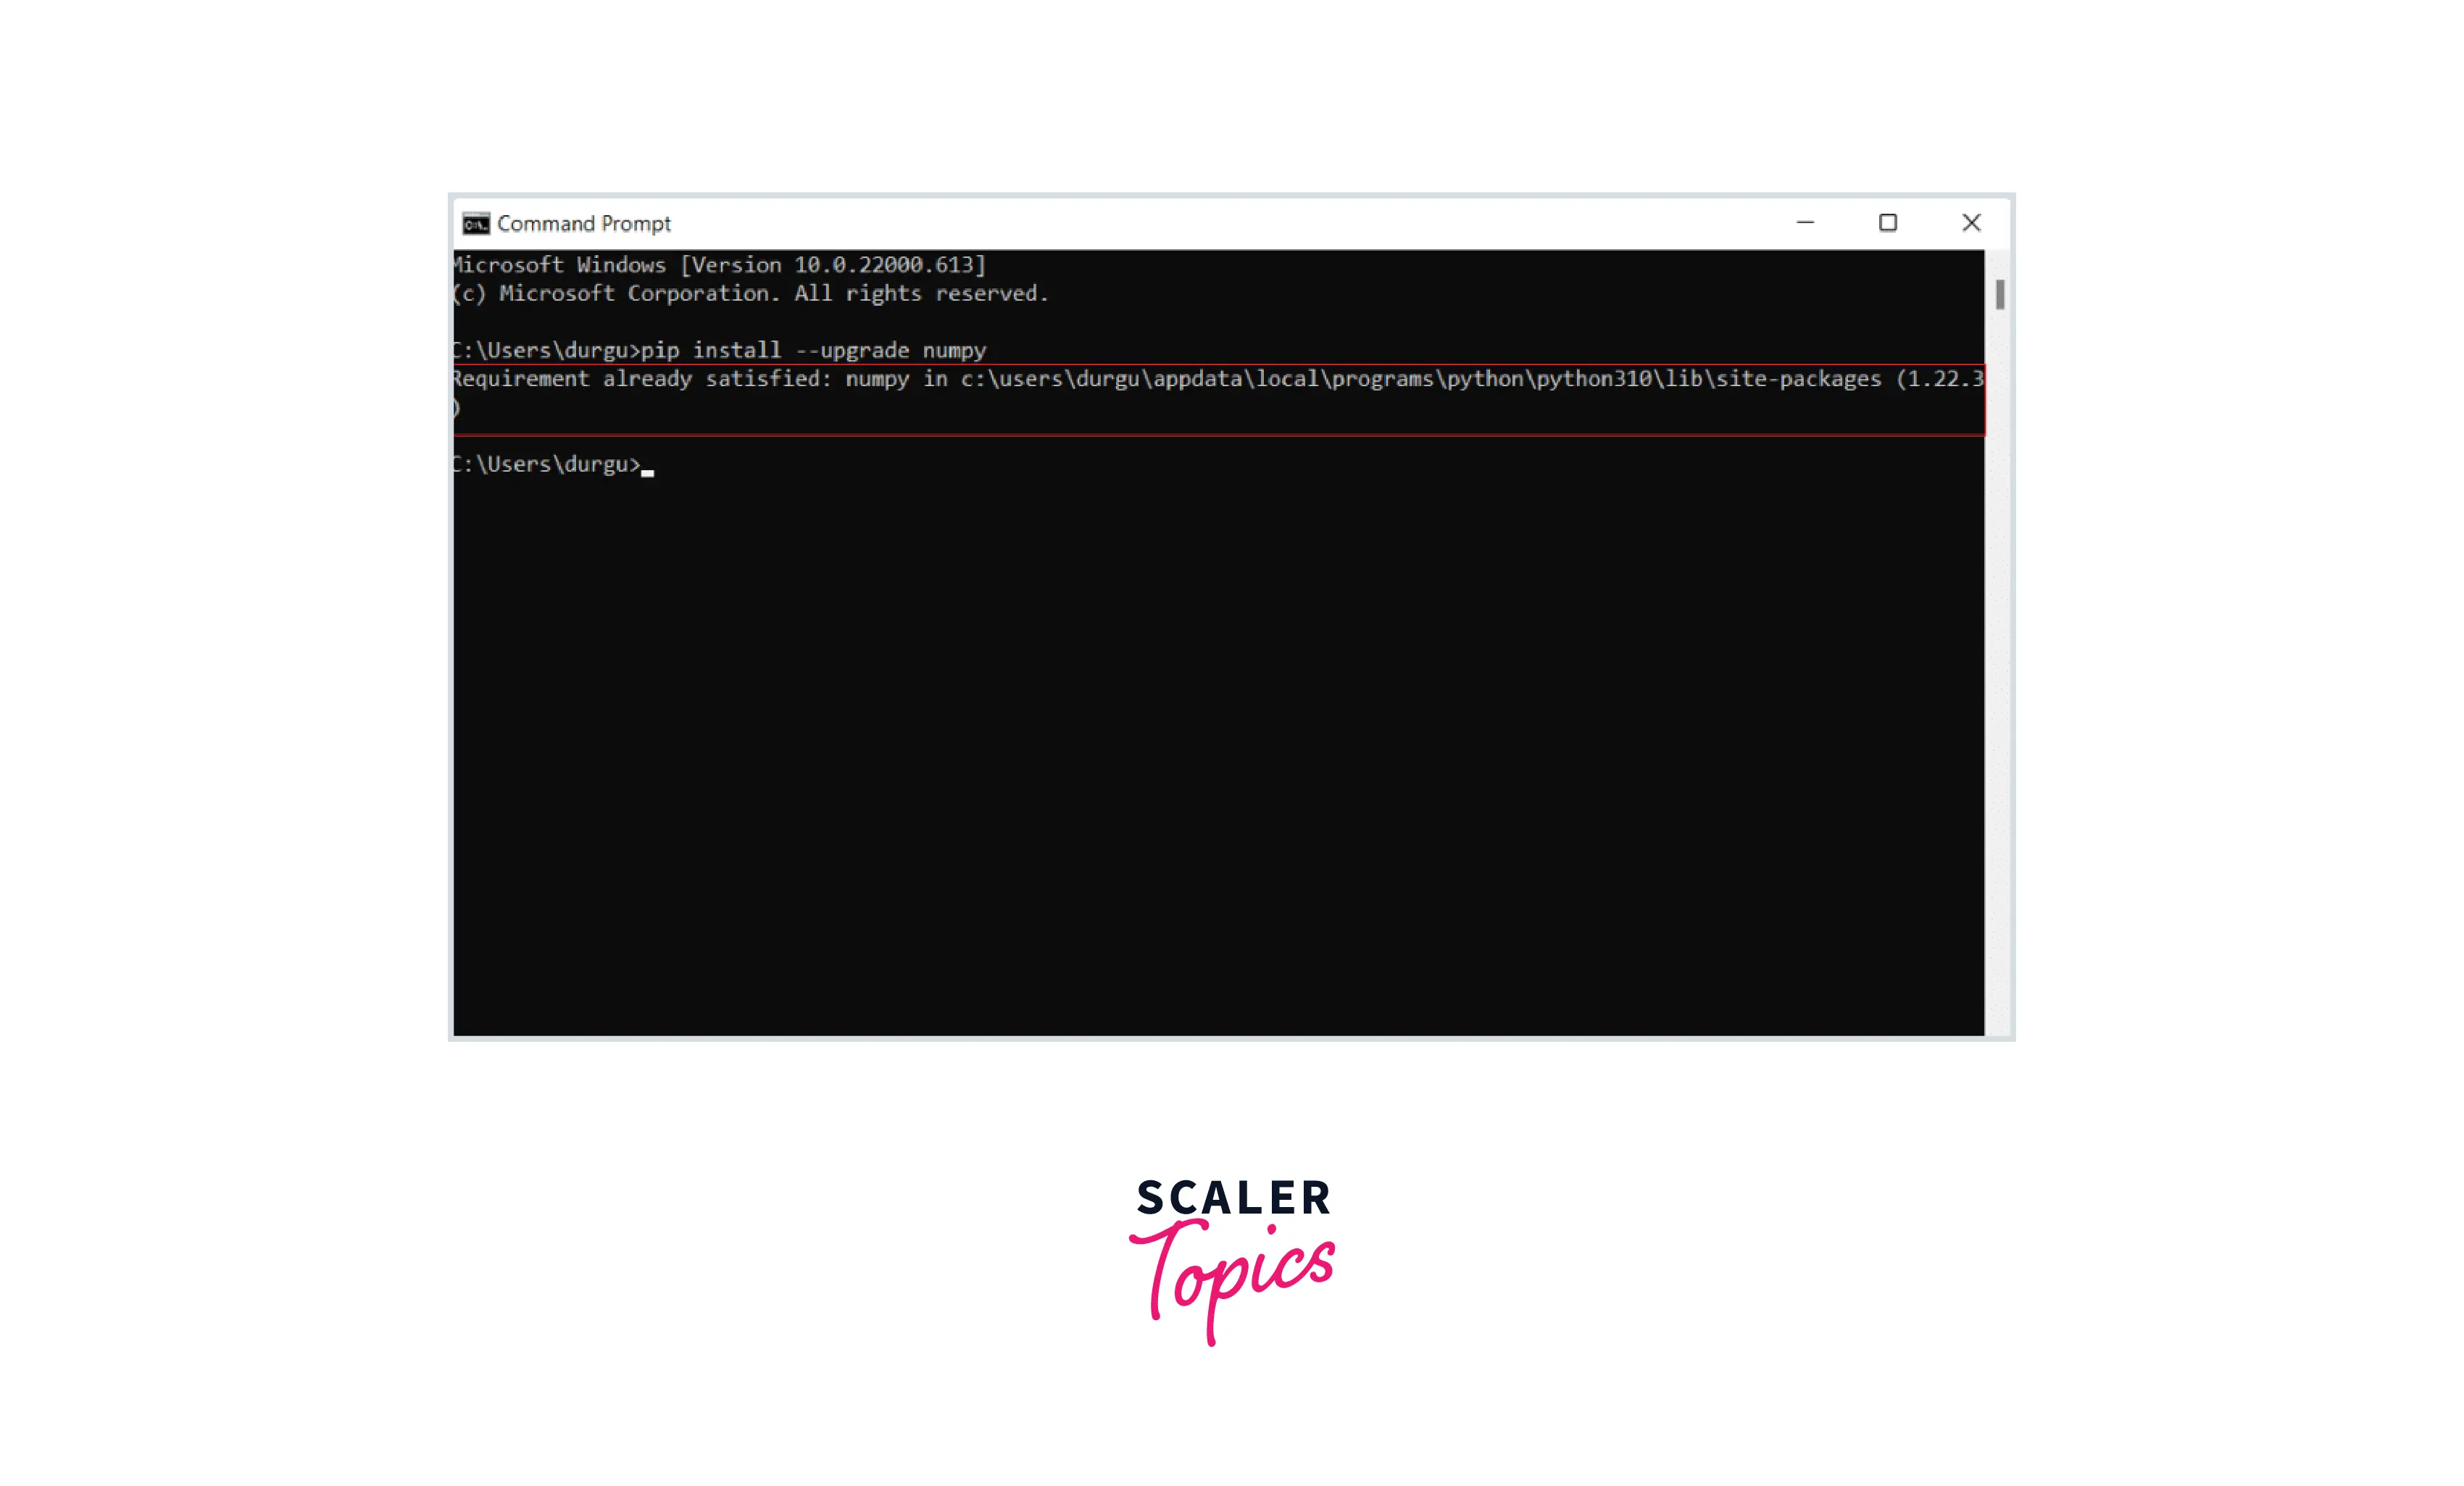
By performing all the above steps, Numpy will be successfully installed.
3. NumPy Installation on Ubuntu Operating System
Python is pre-installed on Ubuntu computers. Pip, on the other hand, is not installed. There are two ways to install pip:
- Install the complete package by downloading python from python.org, then use the apt install command for installing on the Ubuntu system.
- Another way is to directly install pip first on Ubuntu and then install NumPy by performing the following steps:
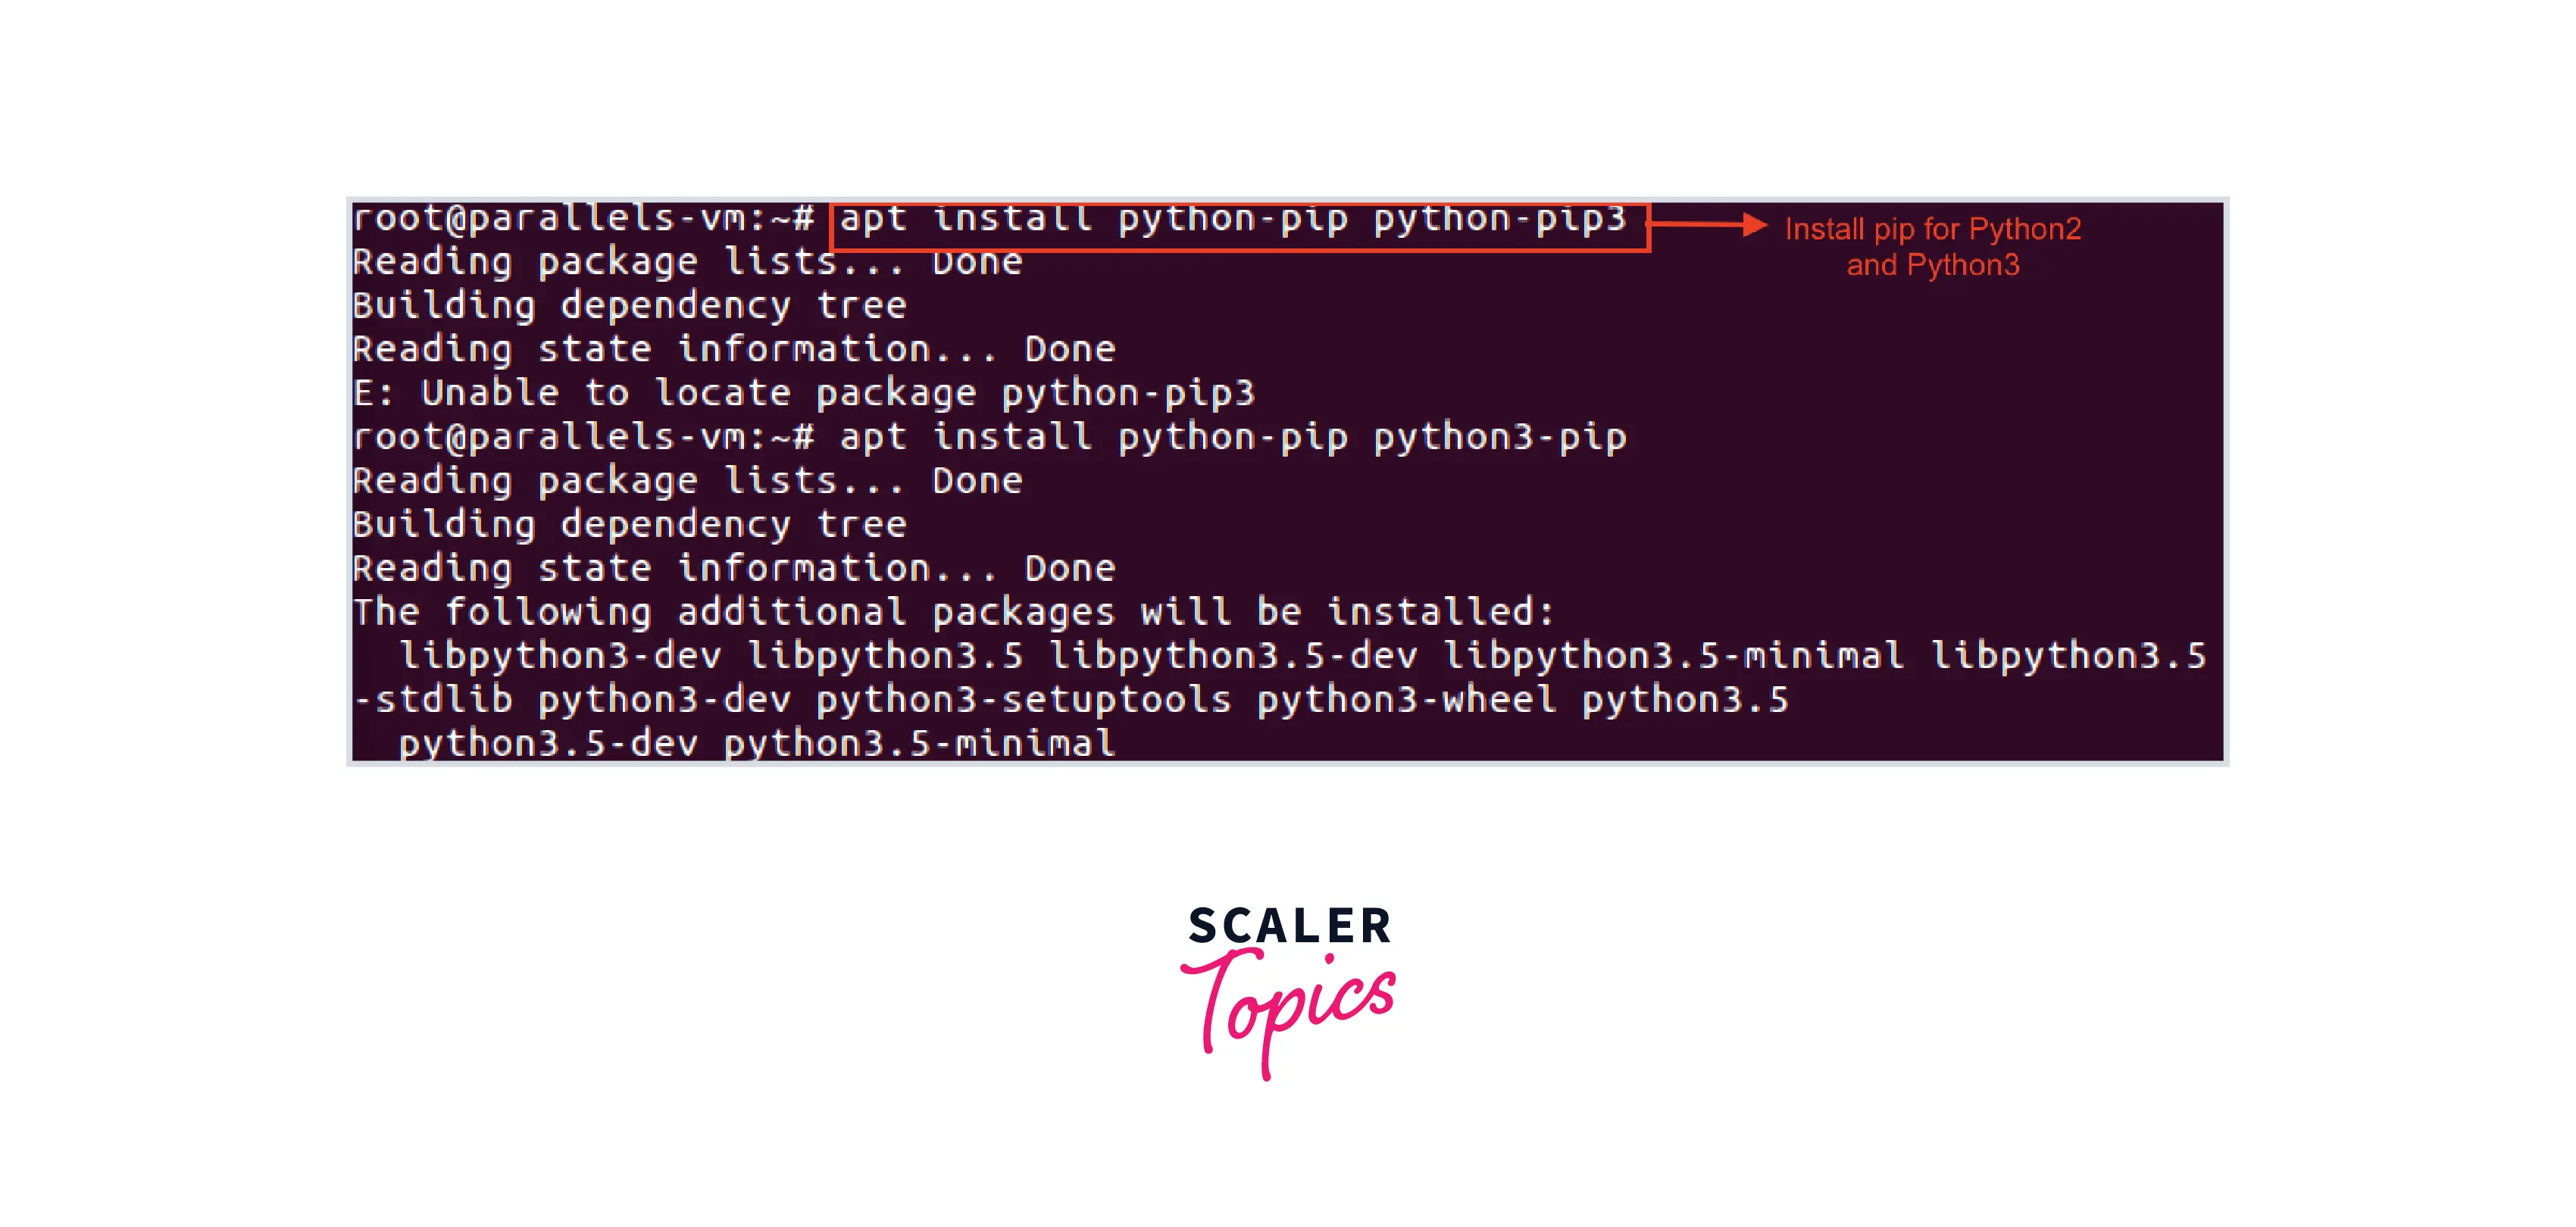
Type command apt install python-pip python-pip3
- Type command pip3 install numpy for installing python3, use pip install numpy for installing python2.
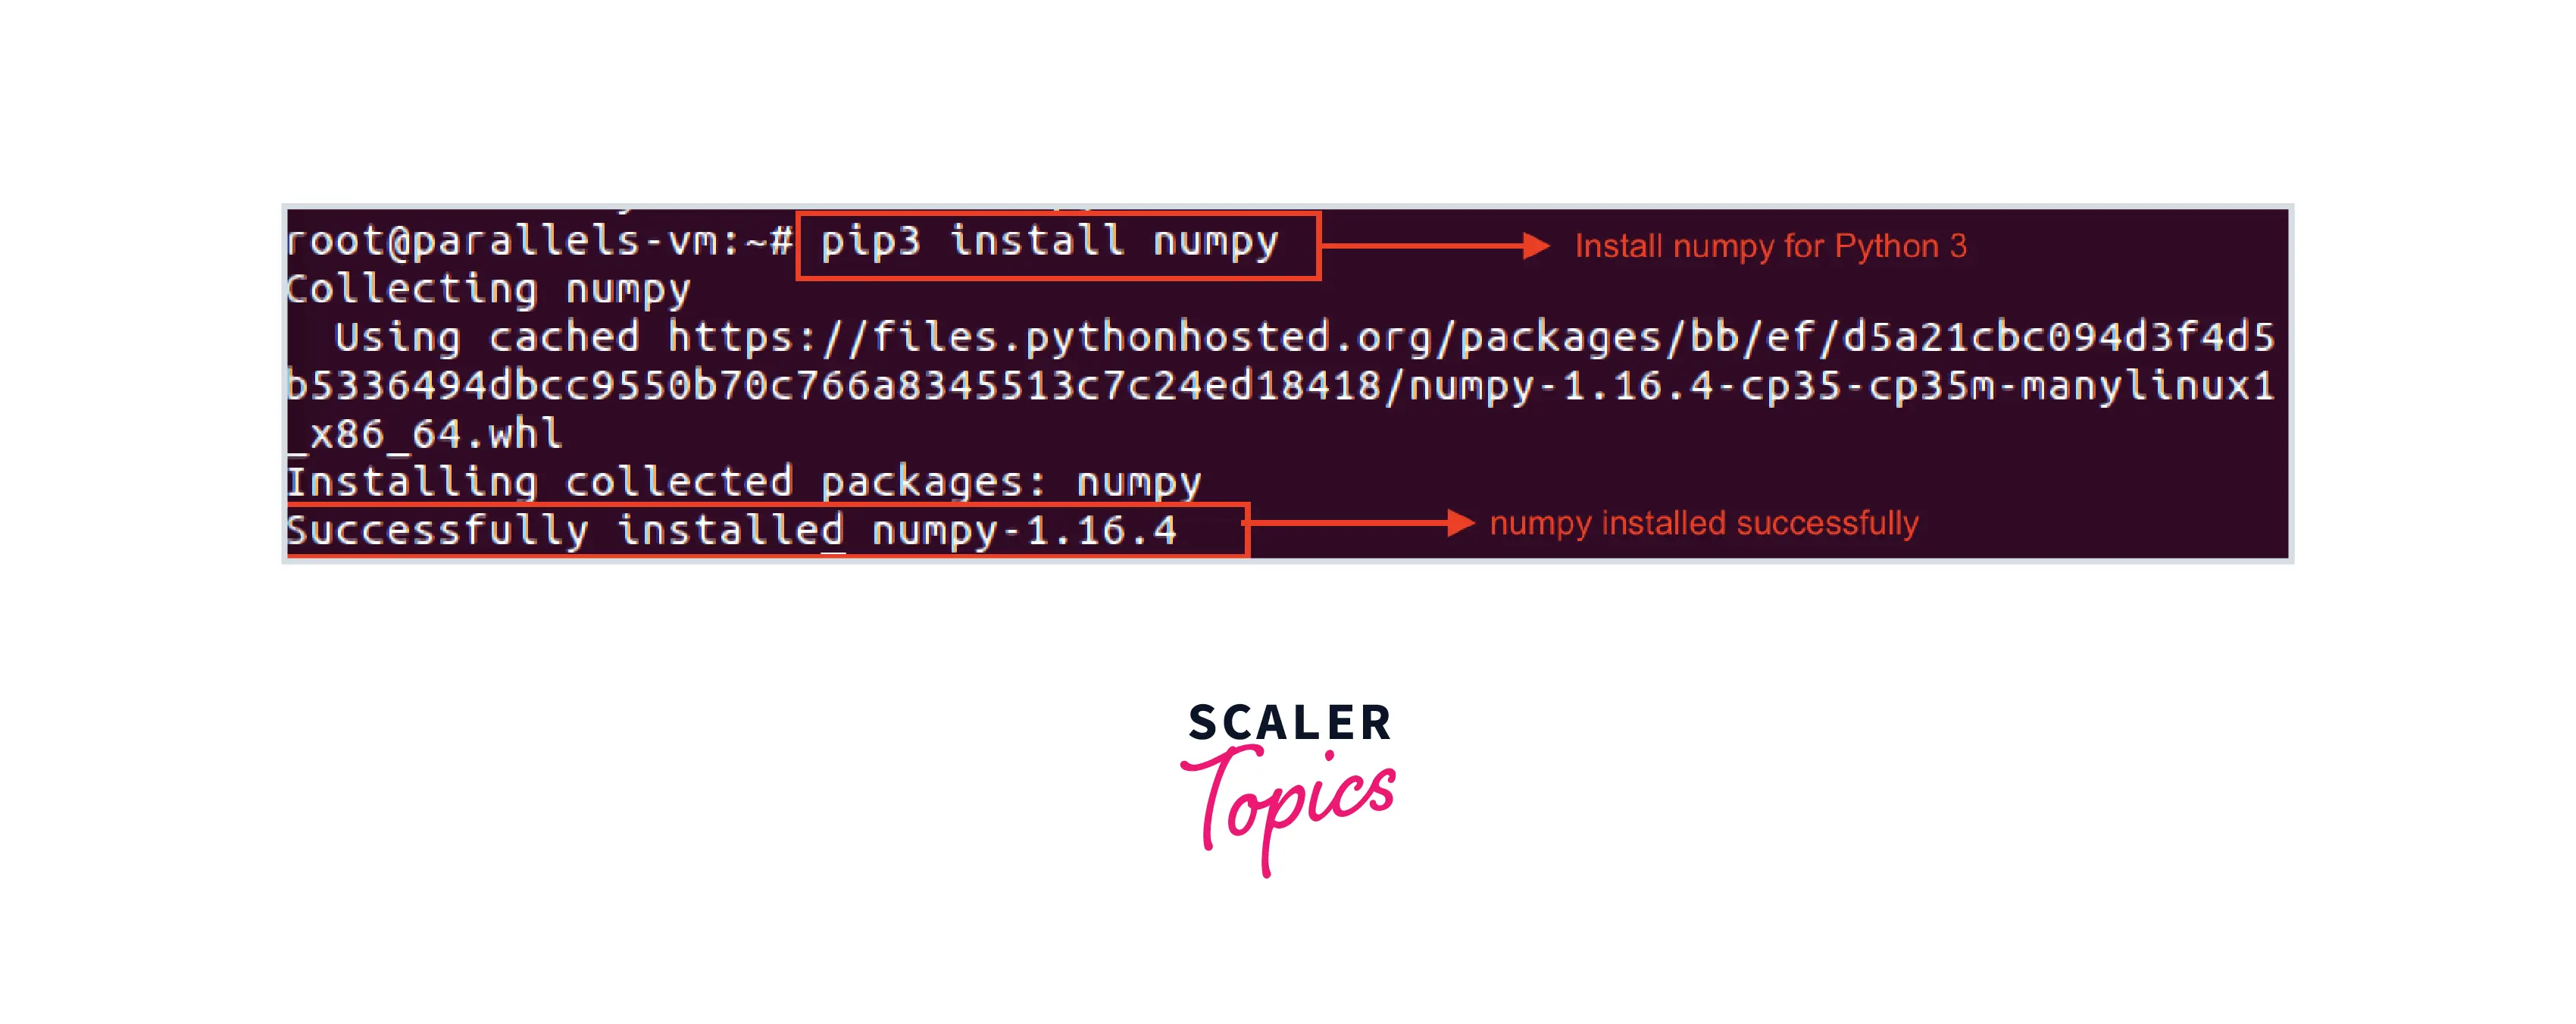
Numpy is successfully installed on Ubuntu using the above commands.
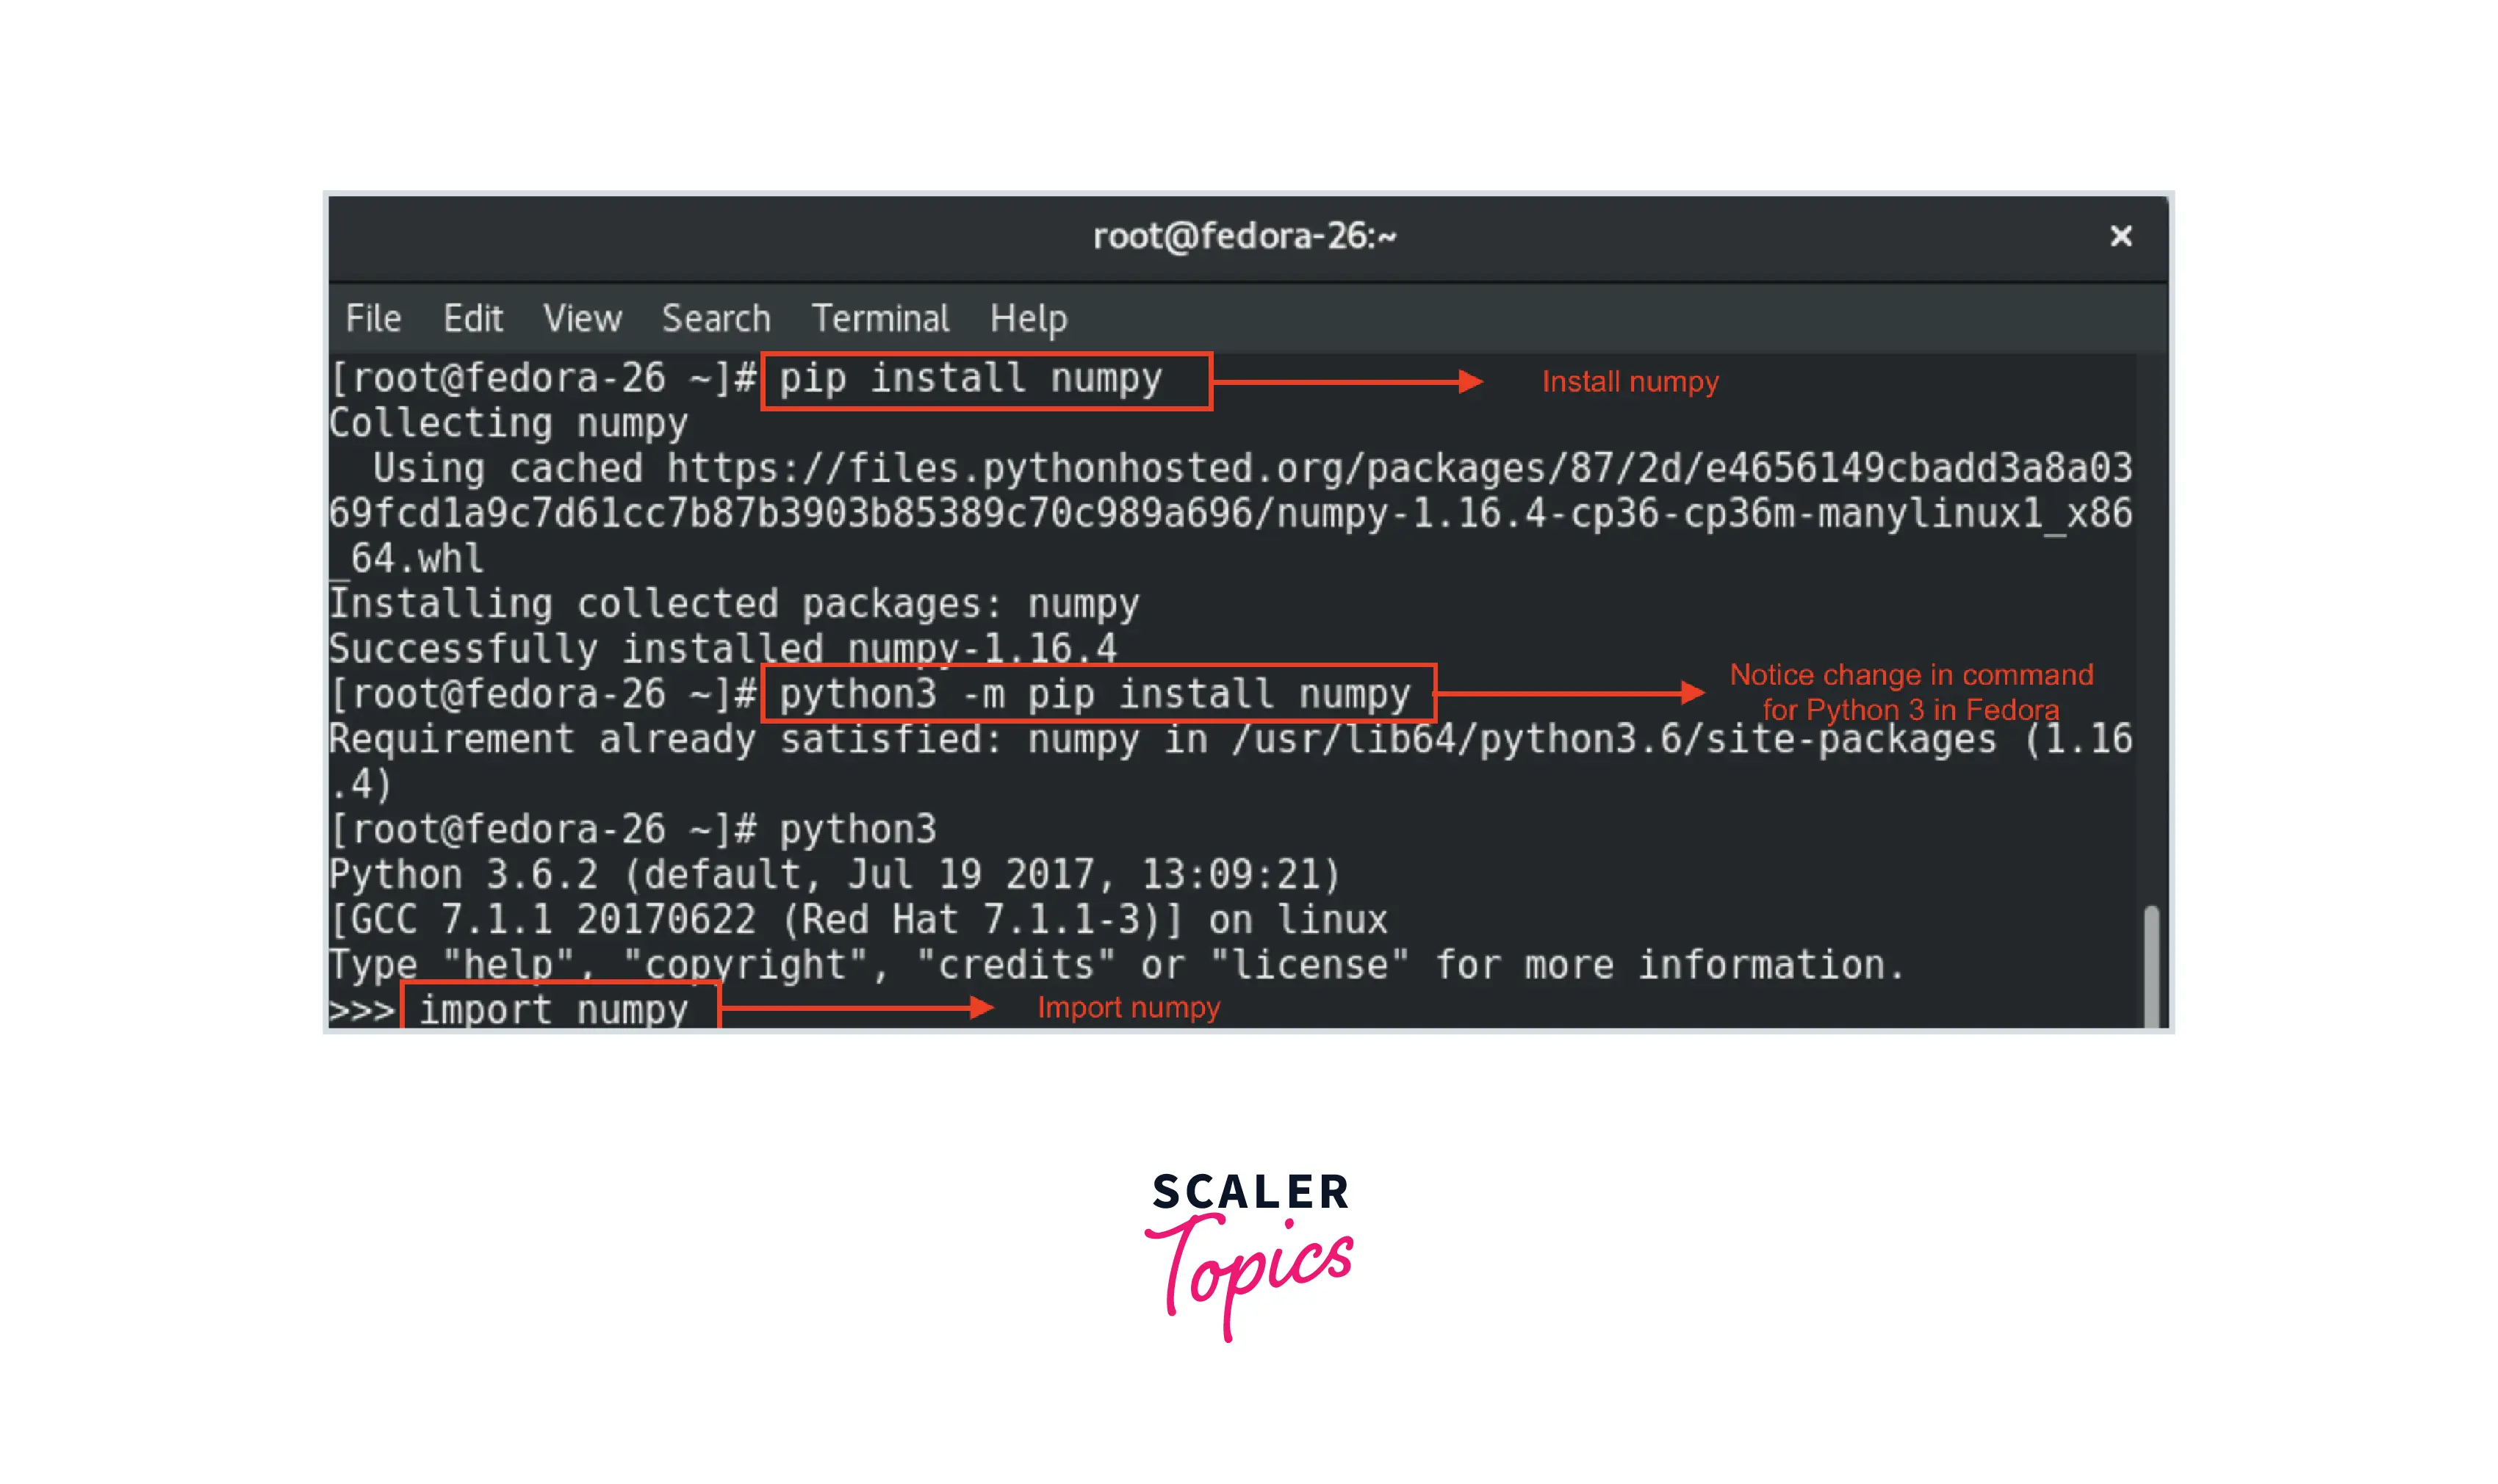
4. How to Install NumPy on Fedora Operating System
Like Ubuntu, Python is already installed in Fedora operating system.
Type command pip install numpy
5. Advanced Usage
1.CONDA
Conda is an open-source environment and package system. Windows, macOS, GNU/Linux, and many hardware platforms, including x86 and Power 8 and 9, are all supported by conda.
- It offers prebuilt packages and can install and update.
- There is no need to install the system and Python packages separately. Everything is already there in the .yml environment. .yml is a text file that contains a list of dependencies, etc., in a single file.
Using Default or conda-forage NumPy can be easily installed by performing the following steps.
- Install NumPy by using Environment
- Installation using conda-forge
- The actual install command
2. Using Pip/Pypi
- pip installs packages for python from the Python Package Index(Pypi) and other indexes.
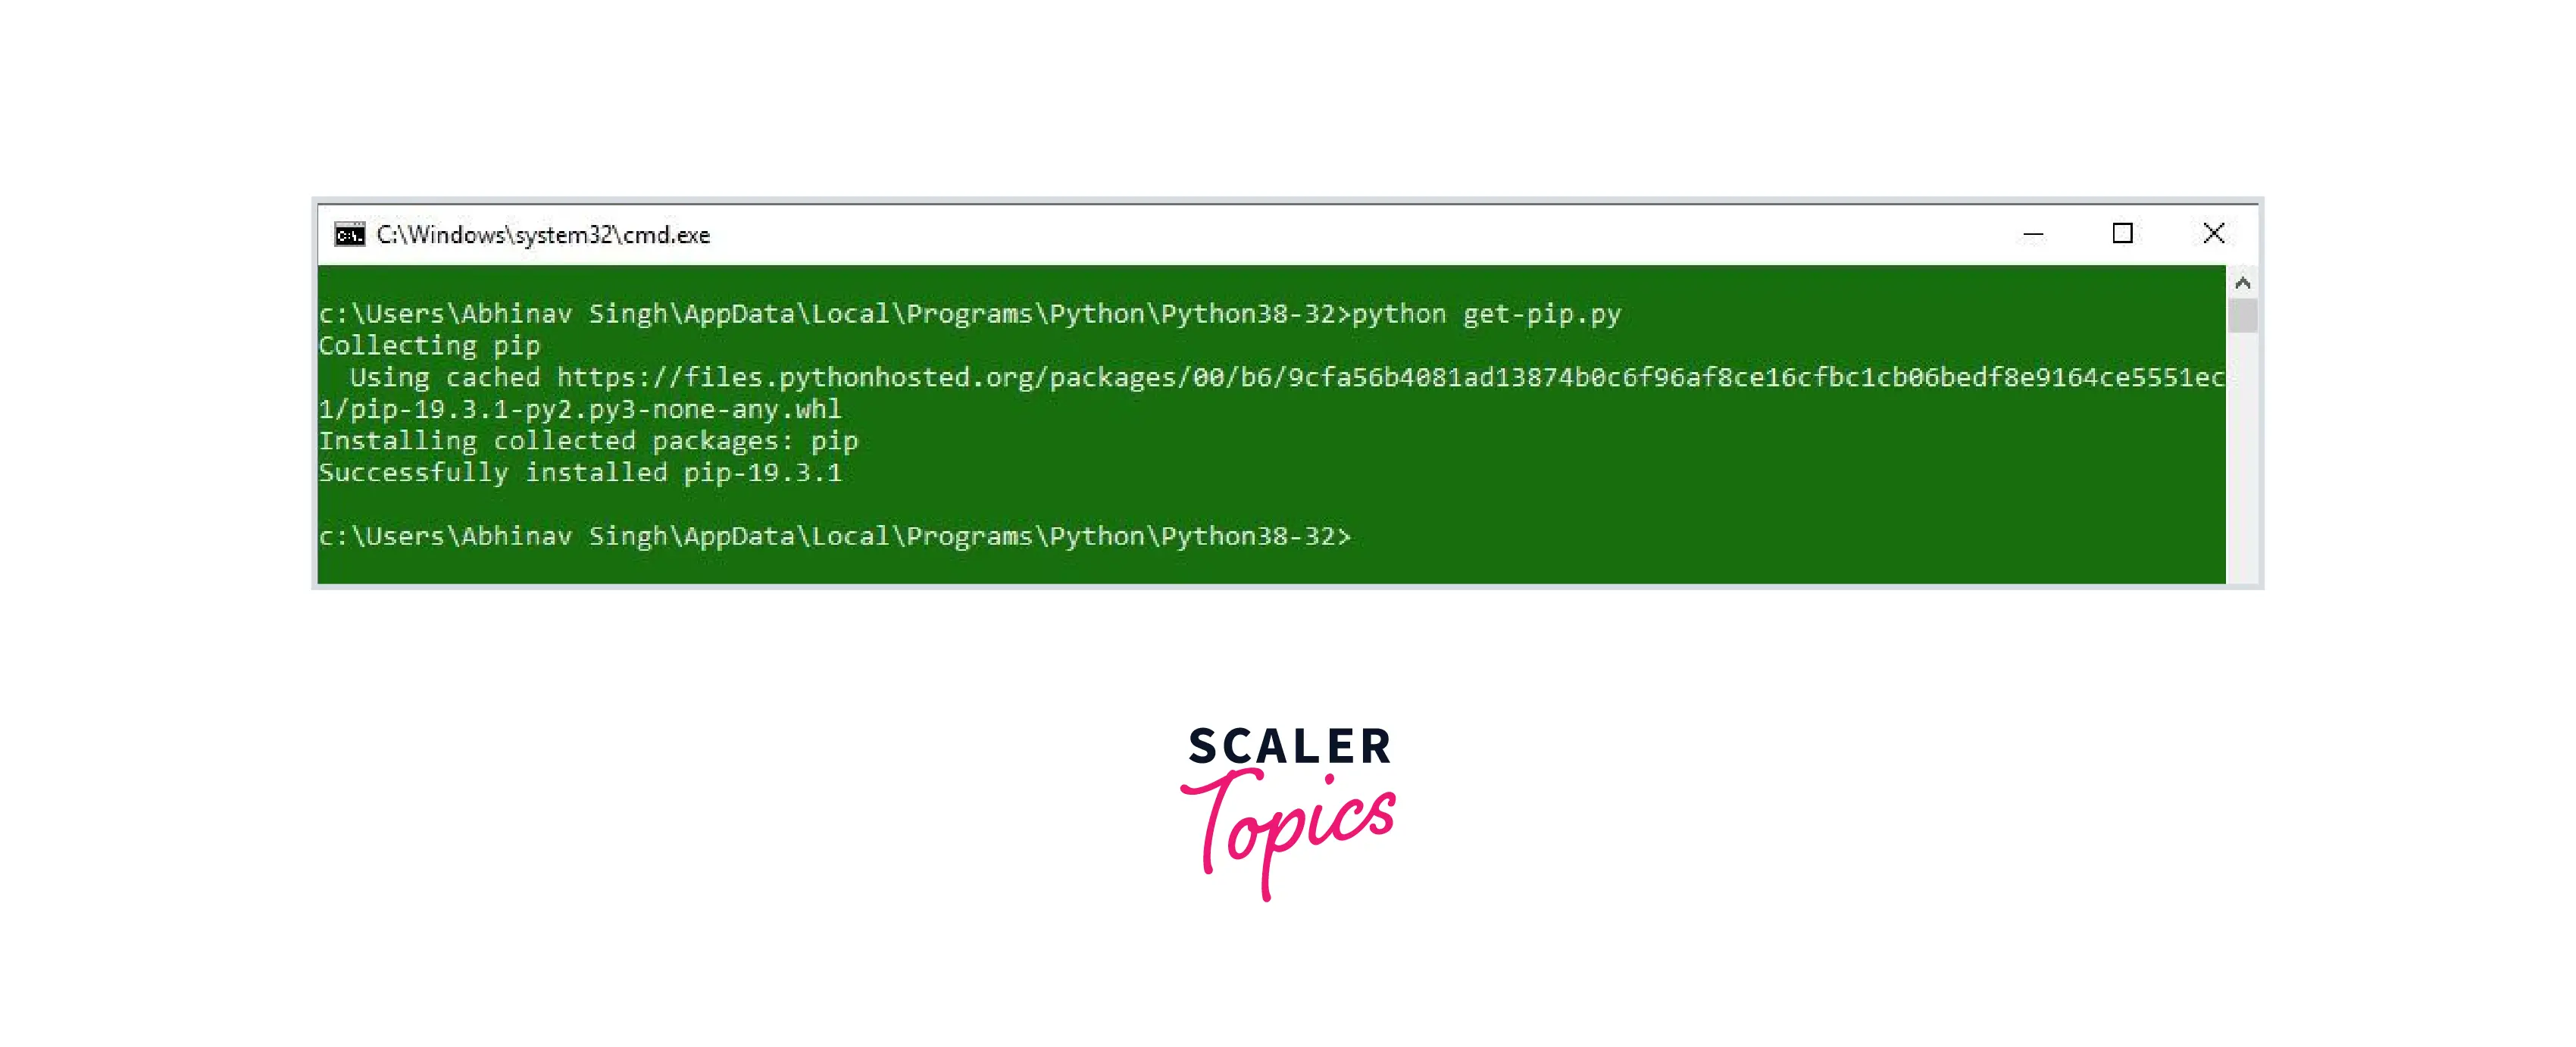
- For installing pip, download the get-pip.py file.
Run command python get-pip.py in the command prompt.
- For installing packages, Run the command pip install package-name** e.g.: **pip install NumPy
3. PIP & CONDA
Conda and pip are two different Python systems for packaging.
- Pip only has python libraries but conda has python libraries, c libraries, and also executables like c compilers, etc.
- pip uses python packages for installation while conda has its channels like Conda-forage etc. for installation.
- Shared libraries are wrapped inside wheels, while in conda, Shared libraries are additionally packaged.
NOTE- Wheels are built-package format for Python. It is a ZIP archive with .whl extension and has a specially structured filename. It is designed to have all of the files needed for a PEP 376 (Python Enhancement Proposal) compatible installation in a format that's very similar to the on-disk format.
4. Reproducible Installs
The results of the running code may change if the libraries are updated, or the code may completely break. It is necessary to be able to recreate the package and version. The best ways to do this :
- Try to use a different python environment.
- Use different package installers and versions like:
- pip or pip3
- Conda etc.
Important Numpy Packages
Packages like Pandas depend on Numpy, but NumPy does not depend on any python packages. It does, however, require an accelerated linear algebra library, such as Intel MKL or OpenBLAS.
- OpenBLAS is used to build the NumPy wheels on PyPi, the wheel includes the OpenBLAS libraries.
- NumPy is built against Intel MKL in the conda defaults channel.
- When users install NumPy, a package called MKL is installed in their environment.
- In the conda-forage channel, NumPy is based on a fake “BLAS” package.
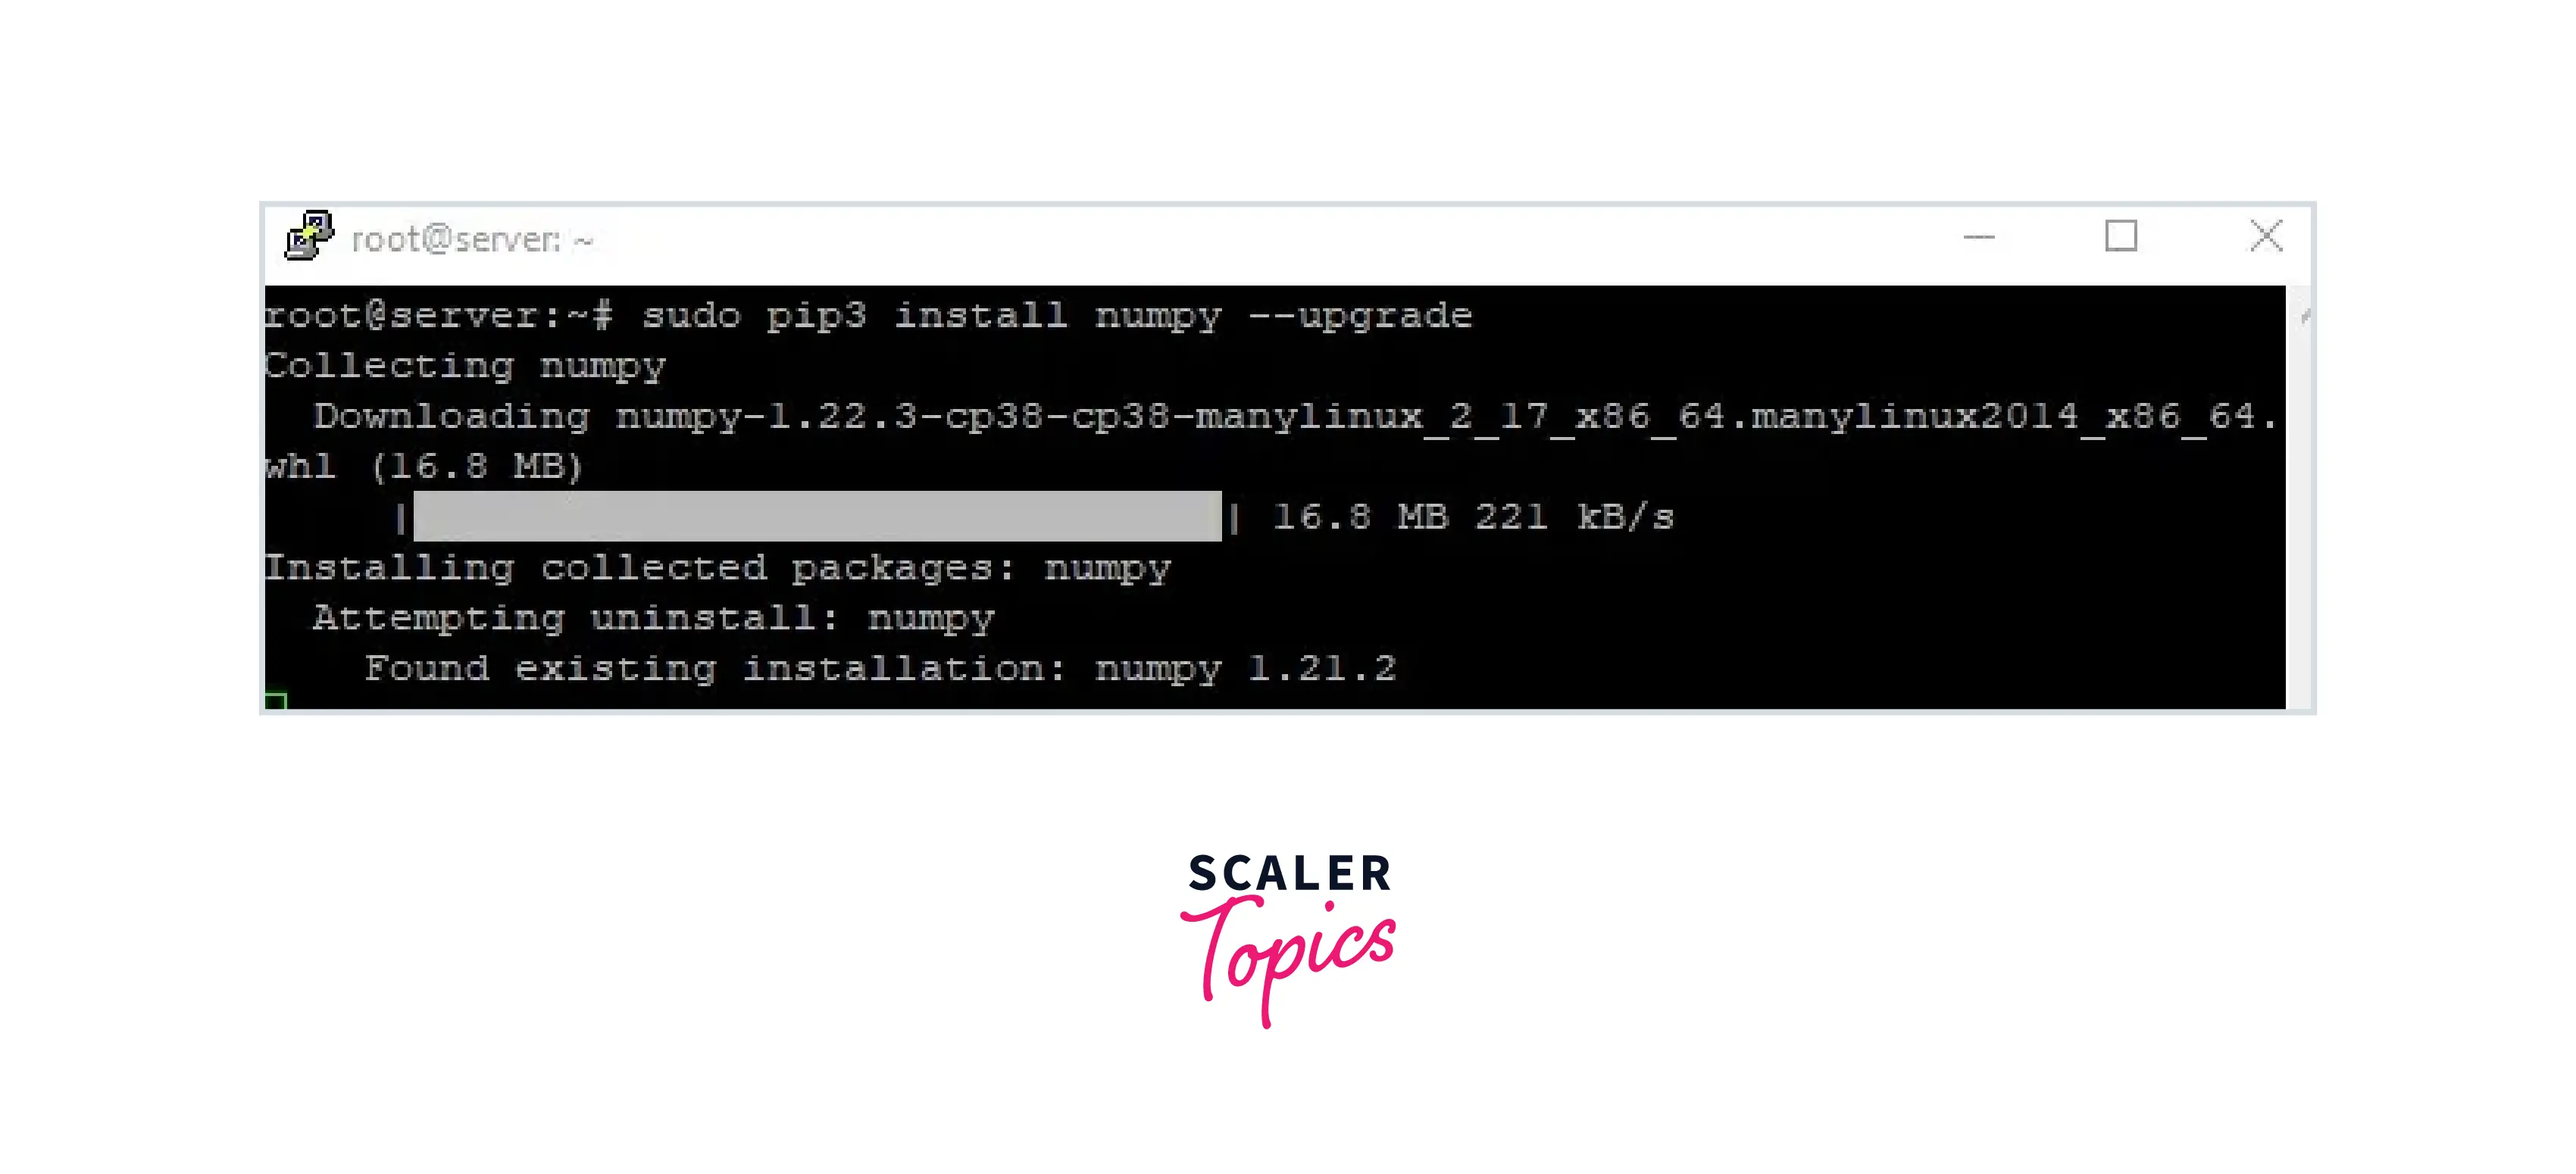
Upgrading NumPy
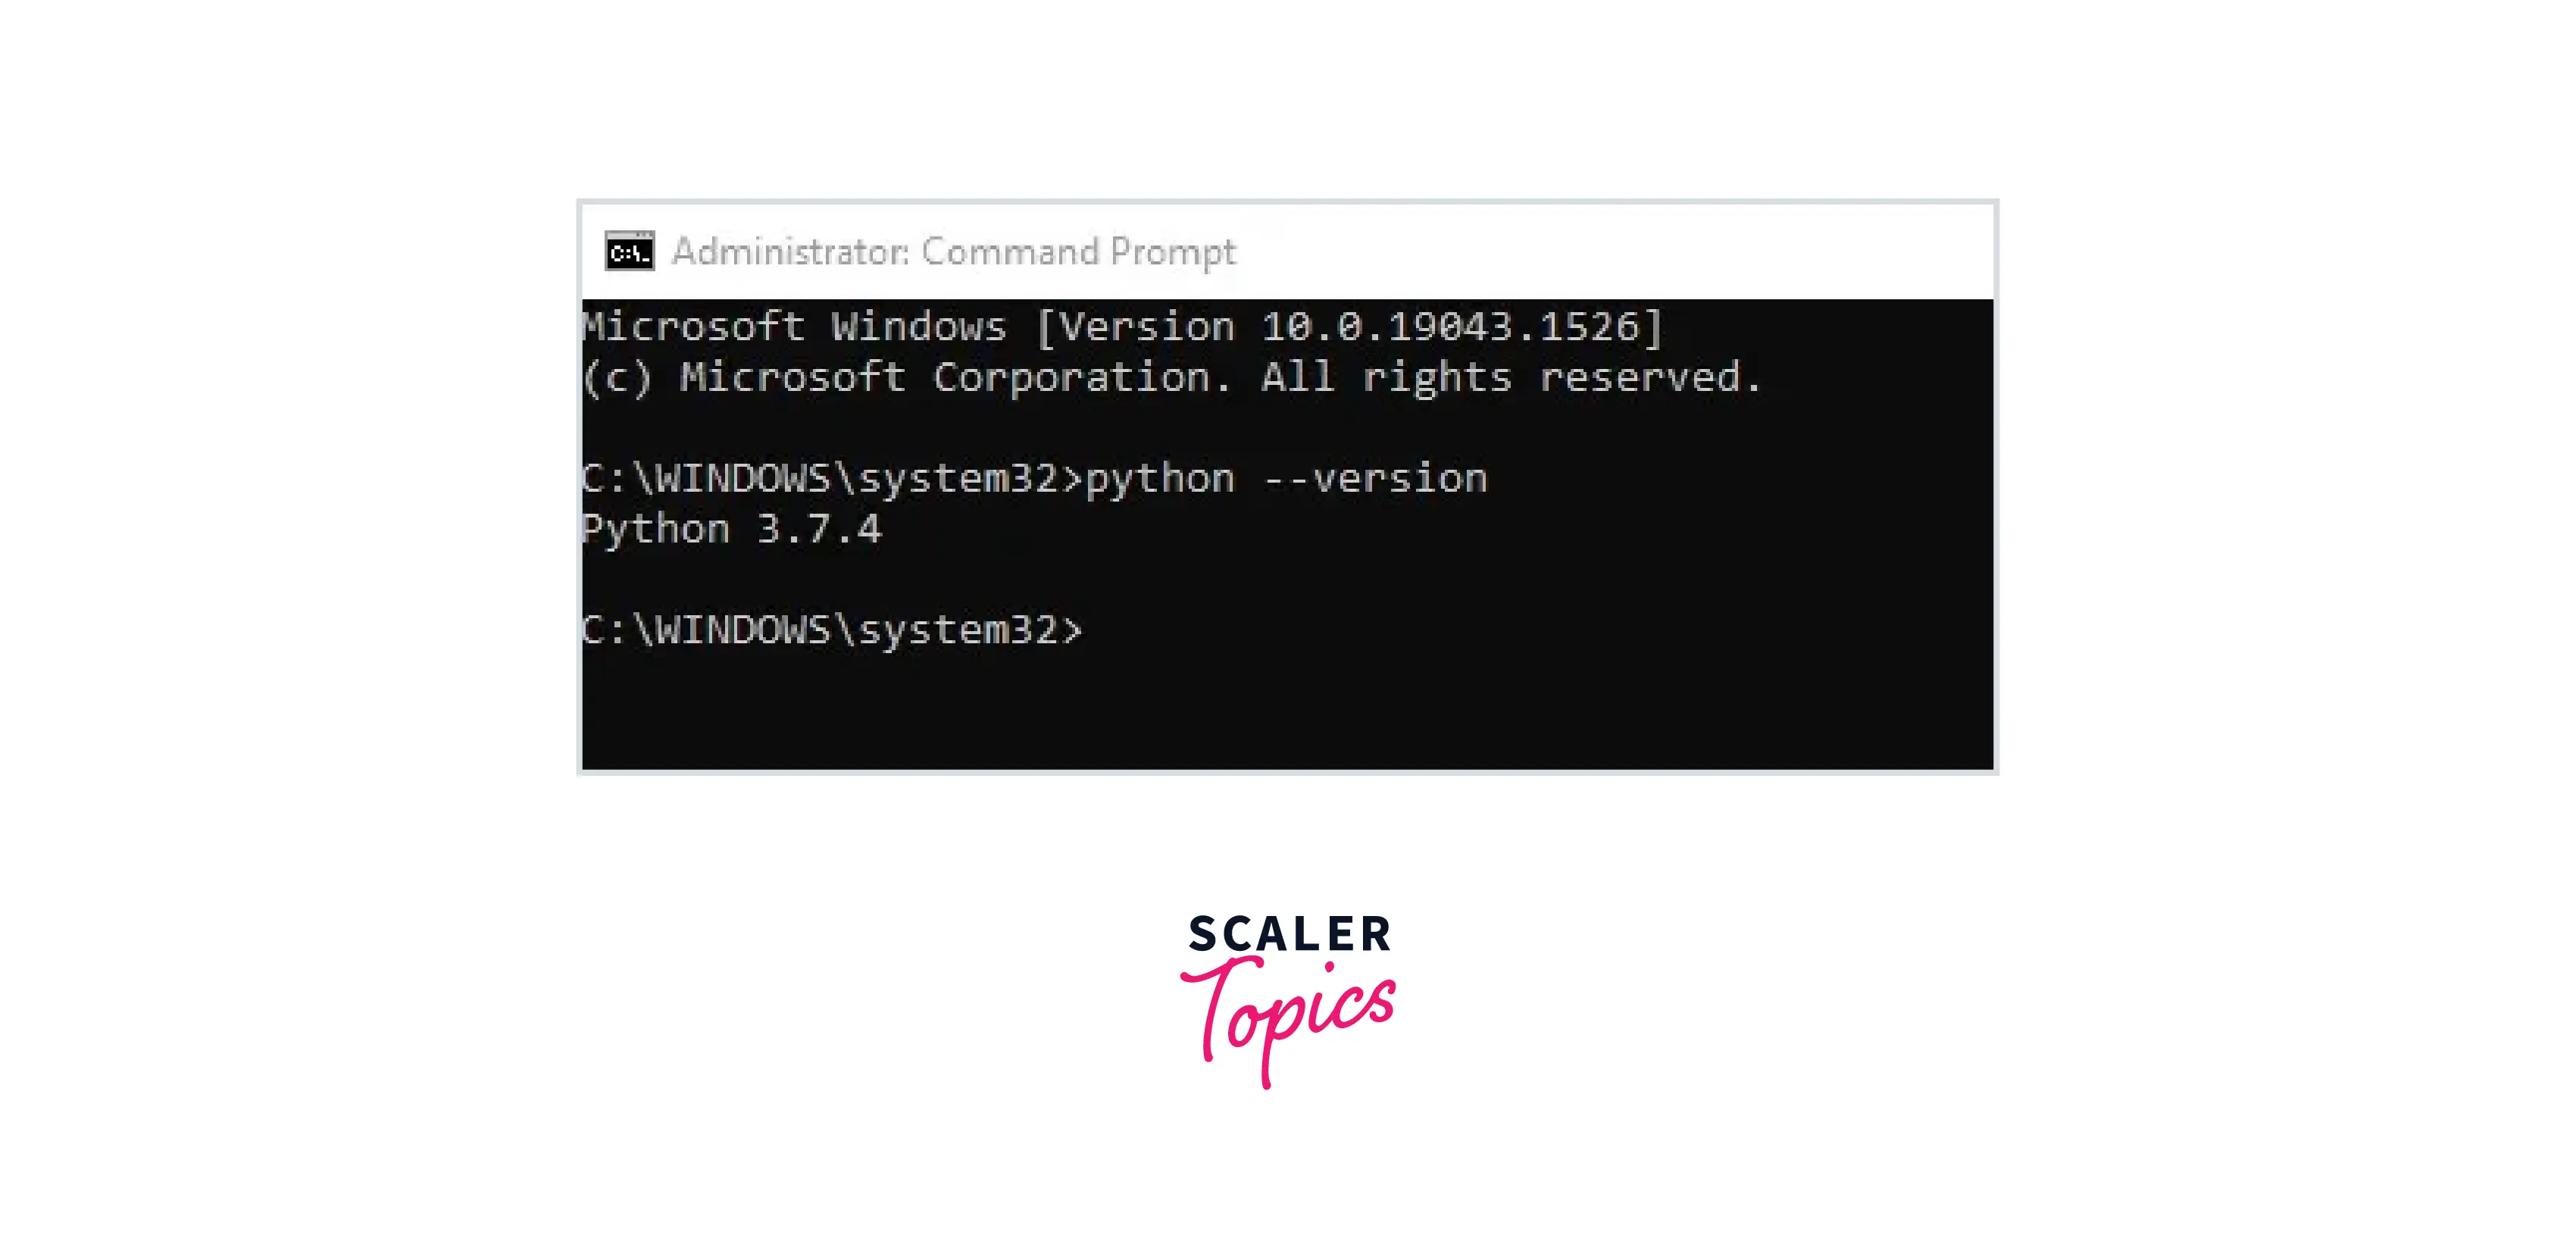
Check the Python version by typing the command:
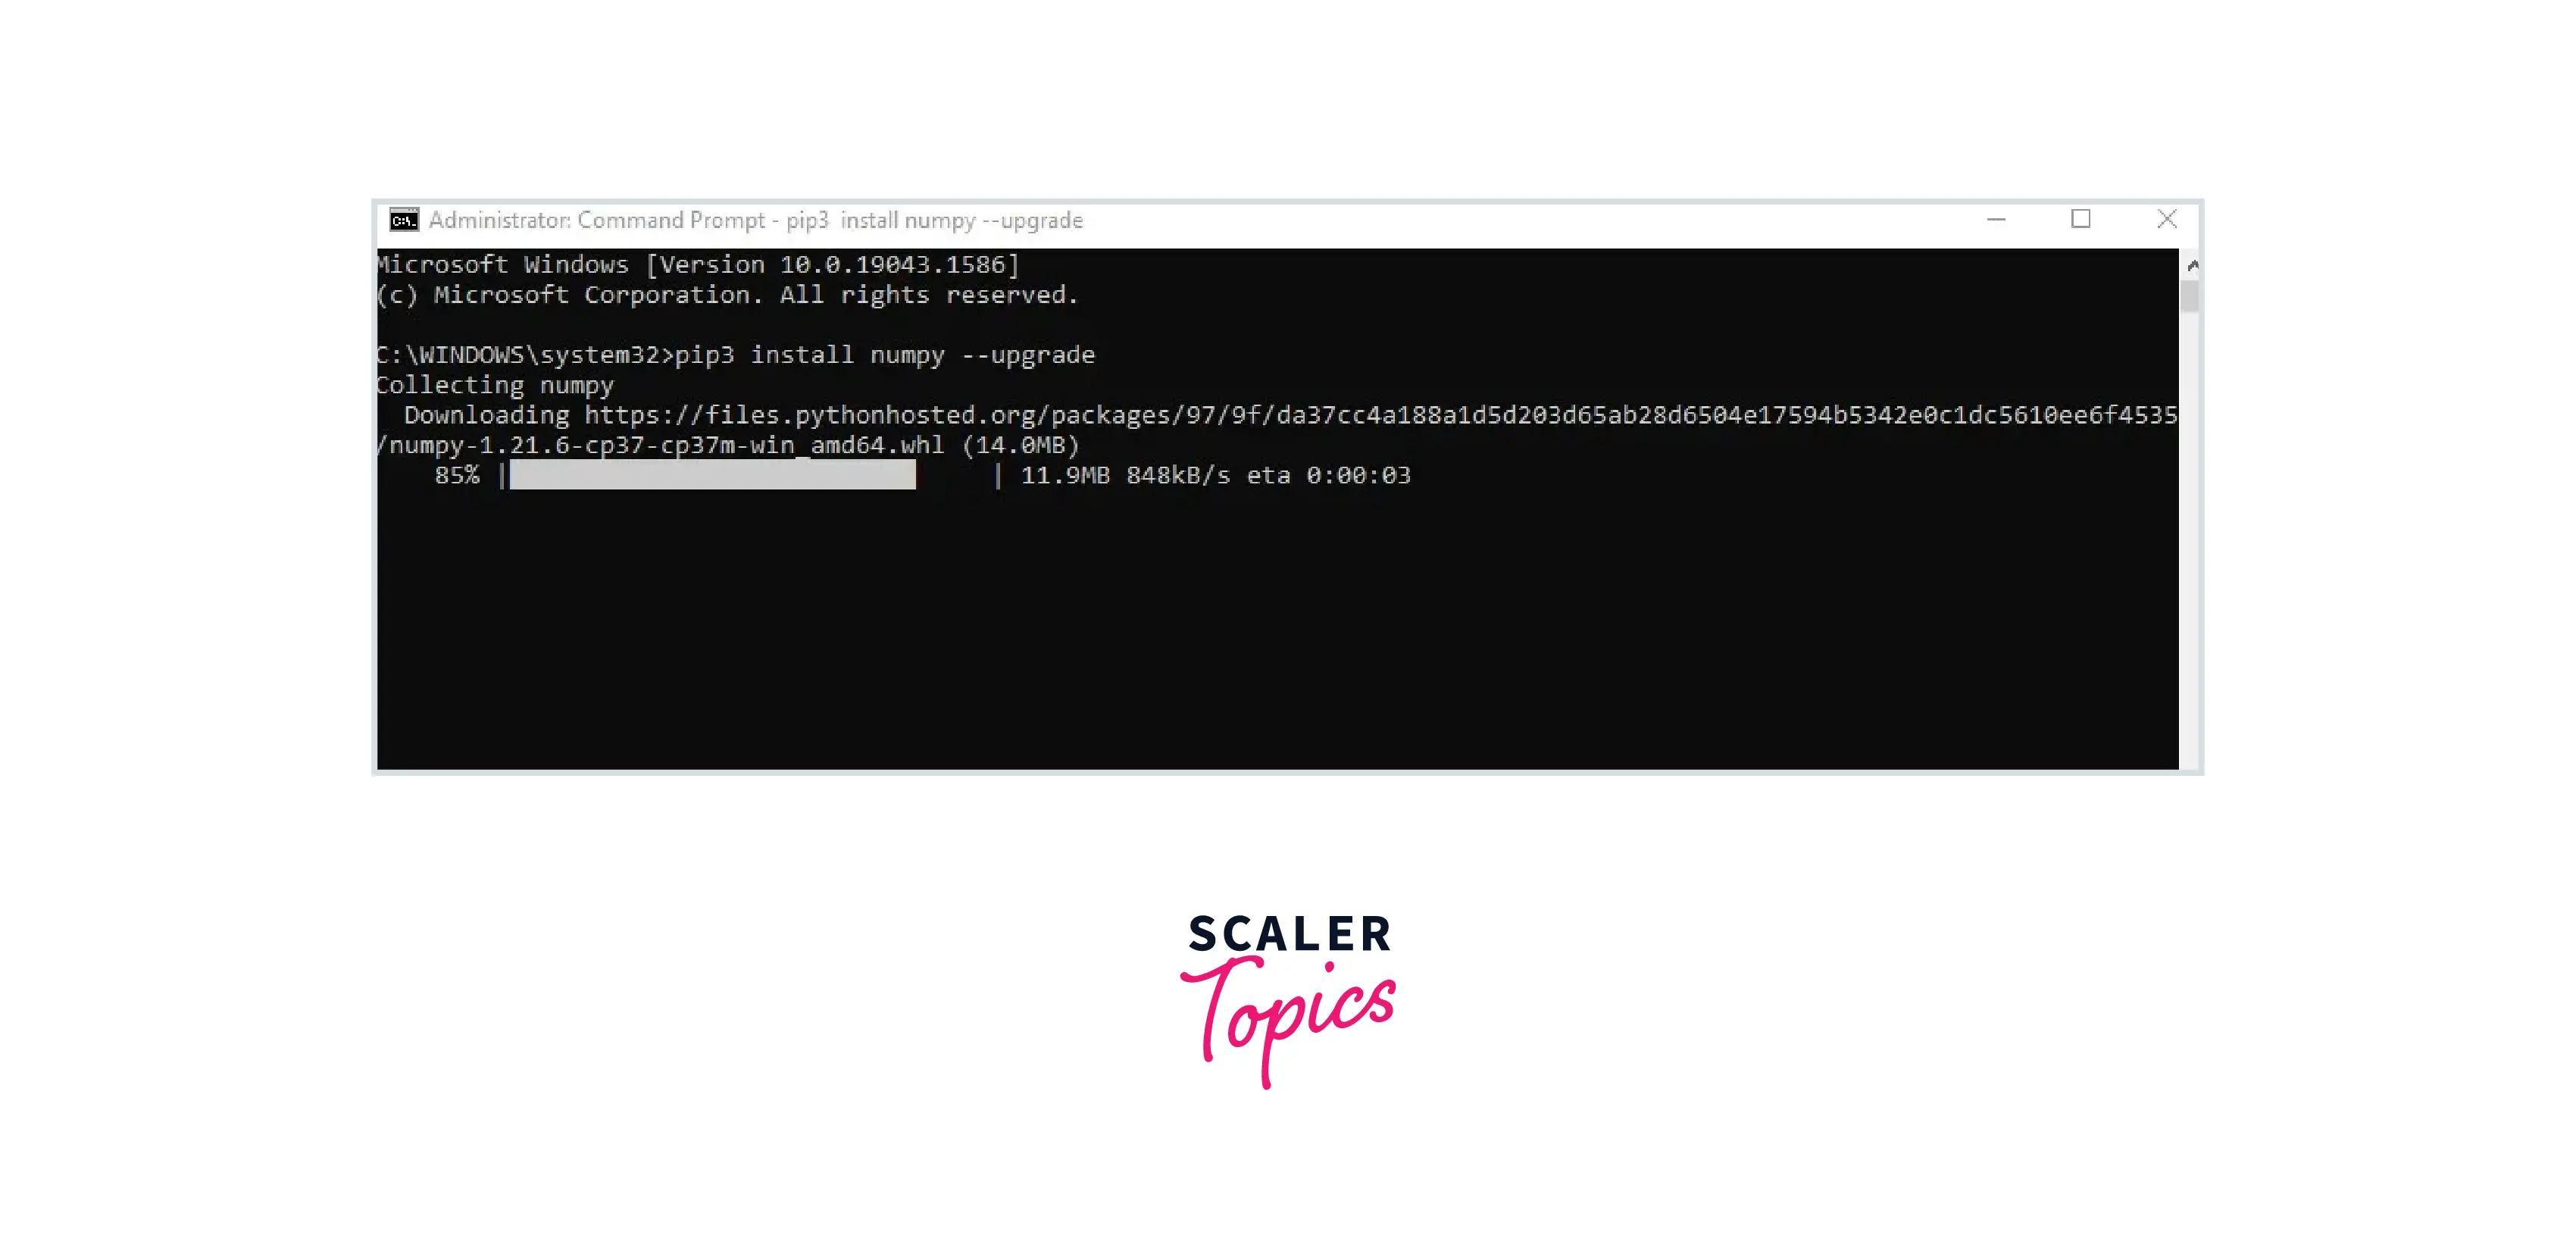
Upgrading NumPy for Windows
Upgrade by running run the following command in the command prompt:
Upgrading NumPy for Linux
Run command
Troubleshooting
Troubleshooting is a problem-solving approach that is used to find and fix problems in complex electronic and software systems. Collecting information about the issues such as Undesirable behavior or lack of expected functionality is the first step of troubleshooting.
- It is the process of identifying the objects that are producing the problem from a list of possible reasons.
- This method often requires going beyond technical information and communicating with system end-users to determine which steps they must take to determine which element of the code, infrastructure, or configuration is causing the difficulties.
Let's look at the example below:
An error occurred while importing NumPy c-extensions. To find the solution to the error, go to Troubleshooting approach.
IMPORTANT: PLEASE READ THIS FOR ADVICE ON HOW TO SOLVE THIS ISSUE!
Importing the numpy C-extensions failed. This error can happen for many reasons, often due to issues with your setup or how NumPy was installed.
We have compiled some common reasons and troubleshooting tips at:
https://numpy.org/devdocs/user/troubleshooting-importerror.html
Please note and check the following:
- The Python version is: Python3.10 from "/Users/ufukeskici/jupyter-notebook/test-project/MyDemoEnv/bin/python"
- The NumPy version is: "1.22.2"
and make sure that they are the versions you expect. Please carefully study the documentation linked above for further help.
Original error was: dlopen(/Users/ufukeskici/jupyter-notebook/test-project/MyDemoEnv/lib/python3.10/site-packages/numpy/core/_multiarray_umath.cpython-310-darwin.so, 2): no suitable image found. Did find: /Users/ufukeskici/jupyter-notebook/test-project/MyDemoEnv/lib/python3.10/site-packages/numpy/core/_multiarray_umath.cpython-310-darwin.so: mach-o, but wrong architecture /Users/ufukeskici/jupyter-notebook/test-project/MyDemoEnv/lib/python3.10/site-packages/numpy/core/_multiarray_umath.cpython-310-darwin.so: mach-o, but wrong architecture
Additional details about the error to assist you in troubleshooting can be found below:
- Python version
- The Version of NumPy
PATH or PYTHONPATH environment variables may be needed to be checked. This can be done by running below code:
The following sections follow the list of the most commonly reported issues based on the setup.
Depending on the system/setup, a few concerns are reported often. If none of the suggestions above assist, keep the following in mind:
- how did you set up Python?
- how did you set up NumPy?
- your computer's operating system
- whether you have multiple Python versions installed or not
- Your compiler versions and, ideally, a build log if you built from the source.
Let's discuss some most common issues that occur:
What Happens if NumPy is Not Installed Correctly
If Numpy is not installed correctly on your system or in the virtual environment that you are using, then it will raise some common types of errors. Let's discuss one by one why these errors occur and how to solve them.
ModuleNotFoundError or No module named NumPy found
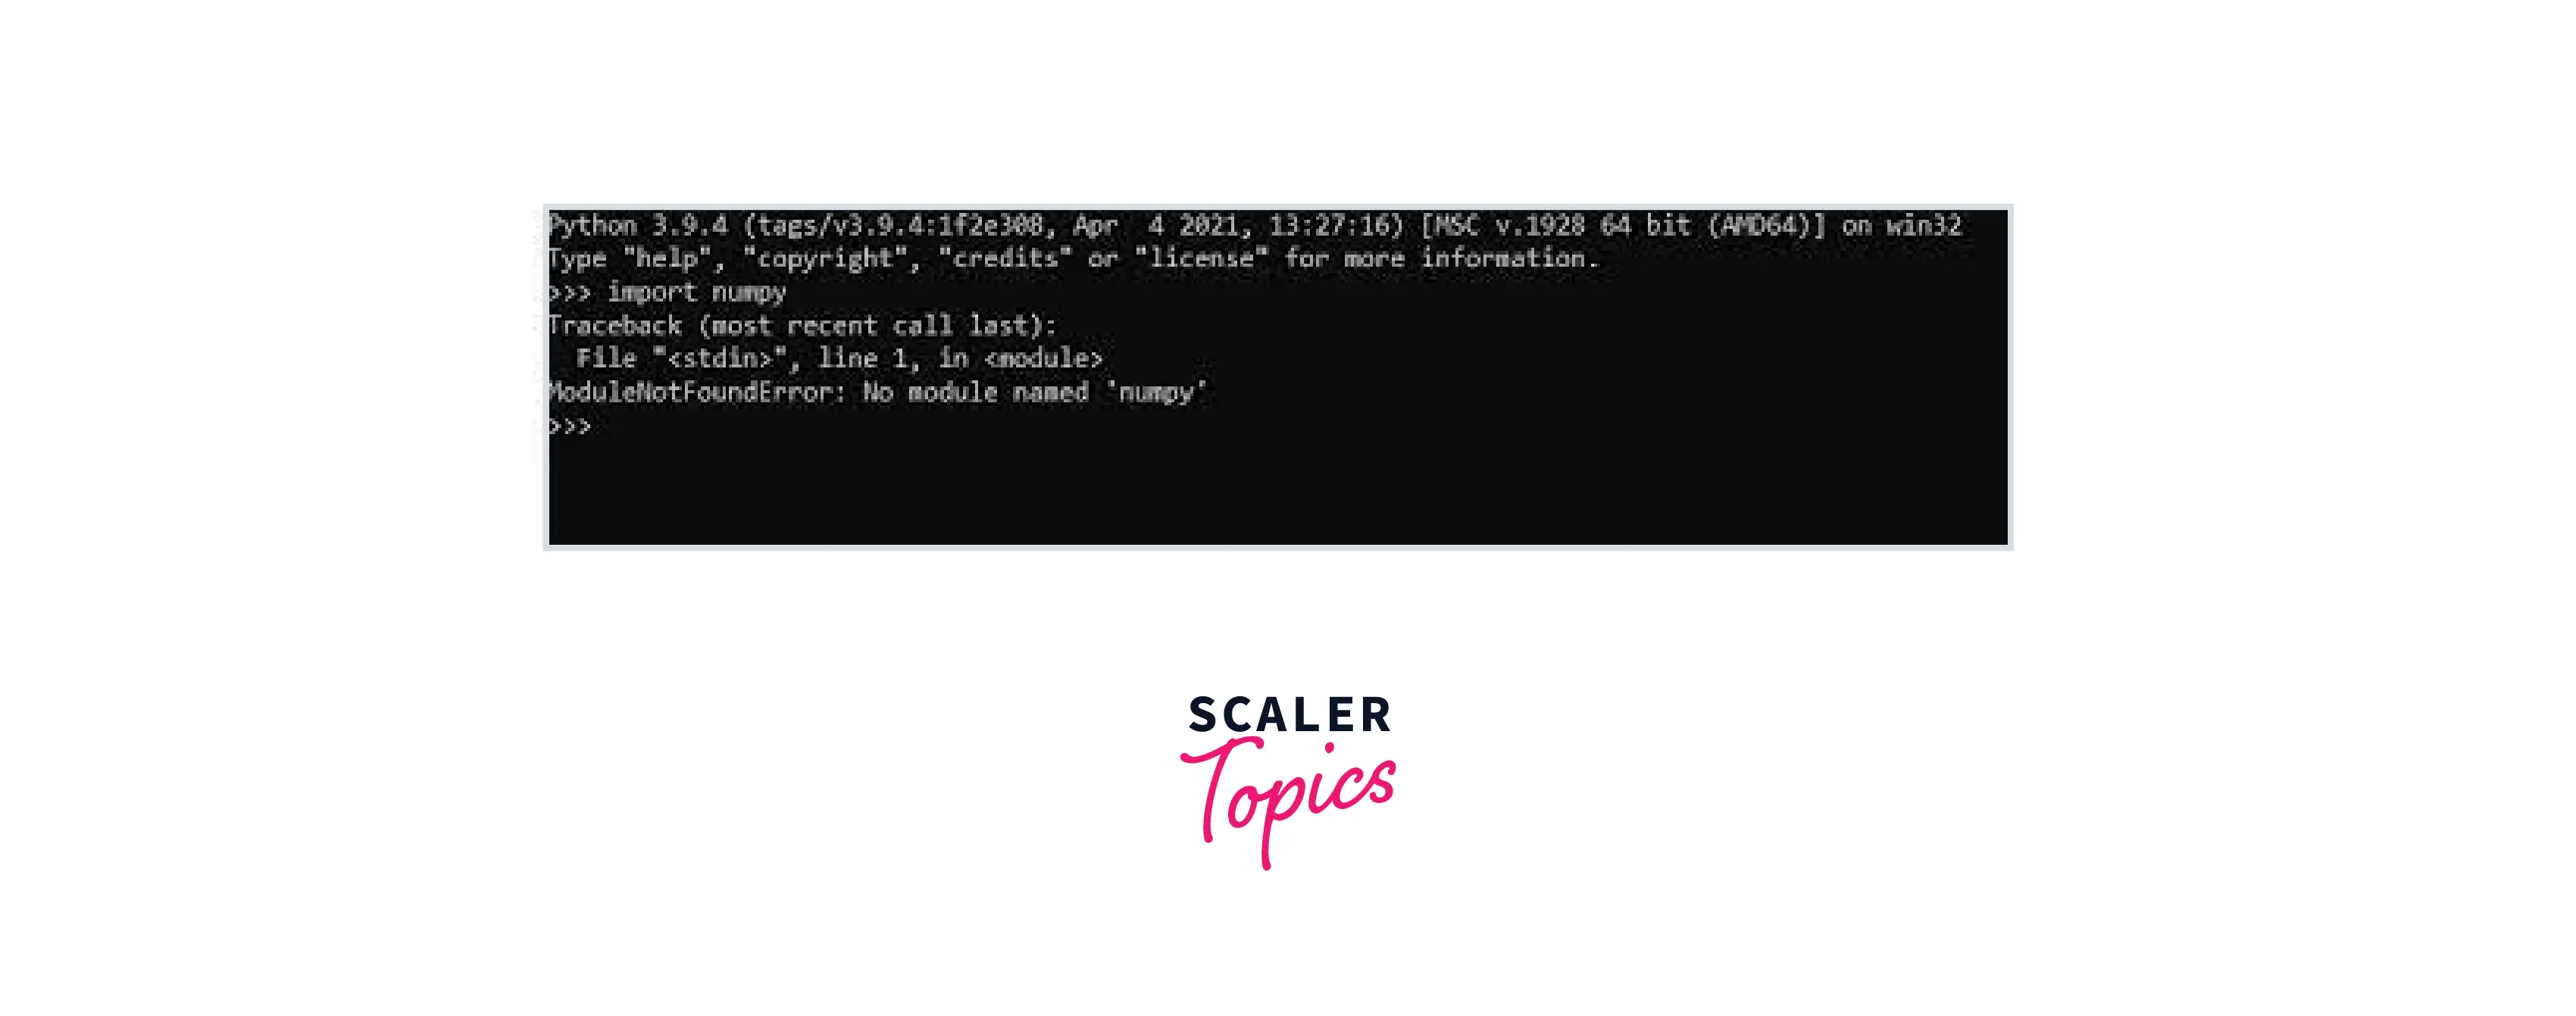
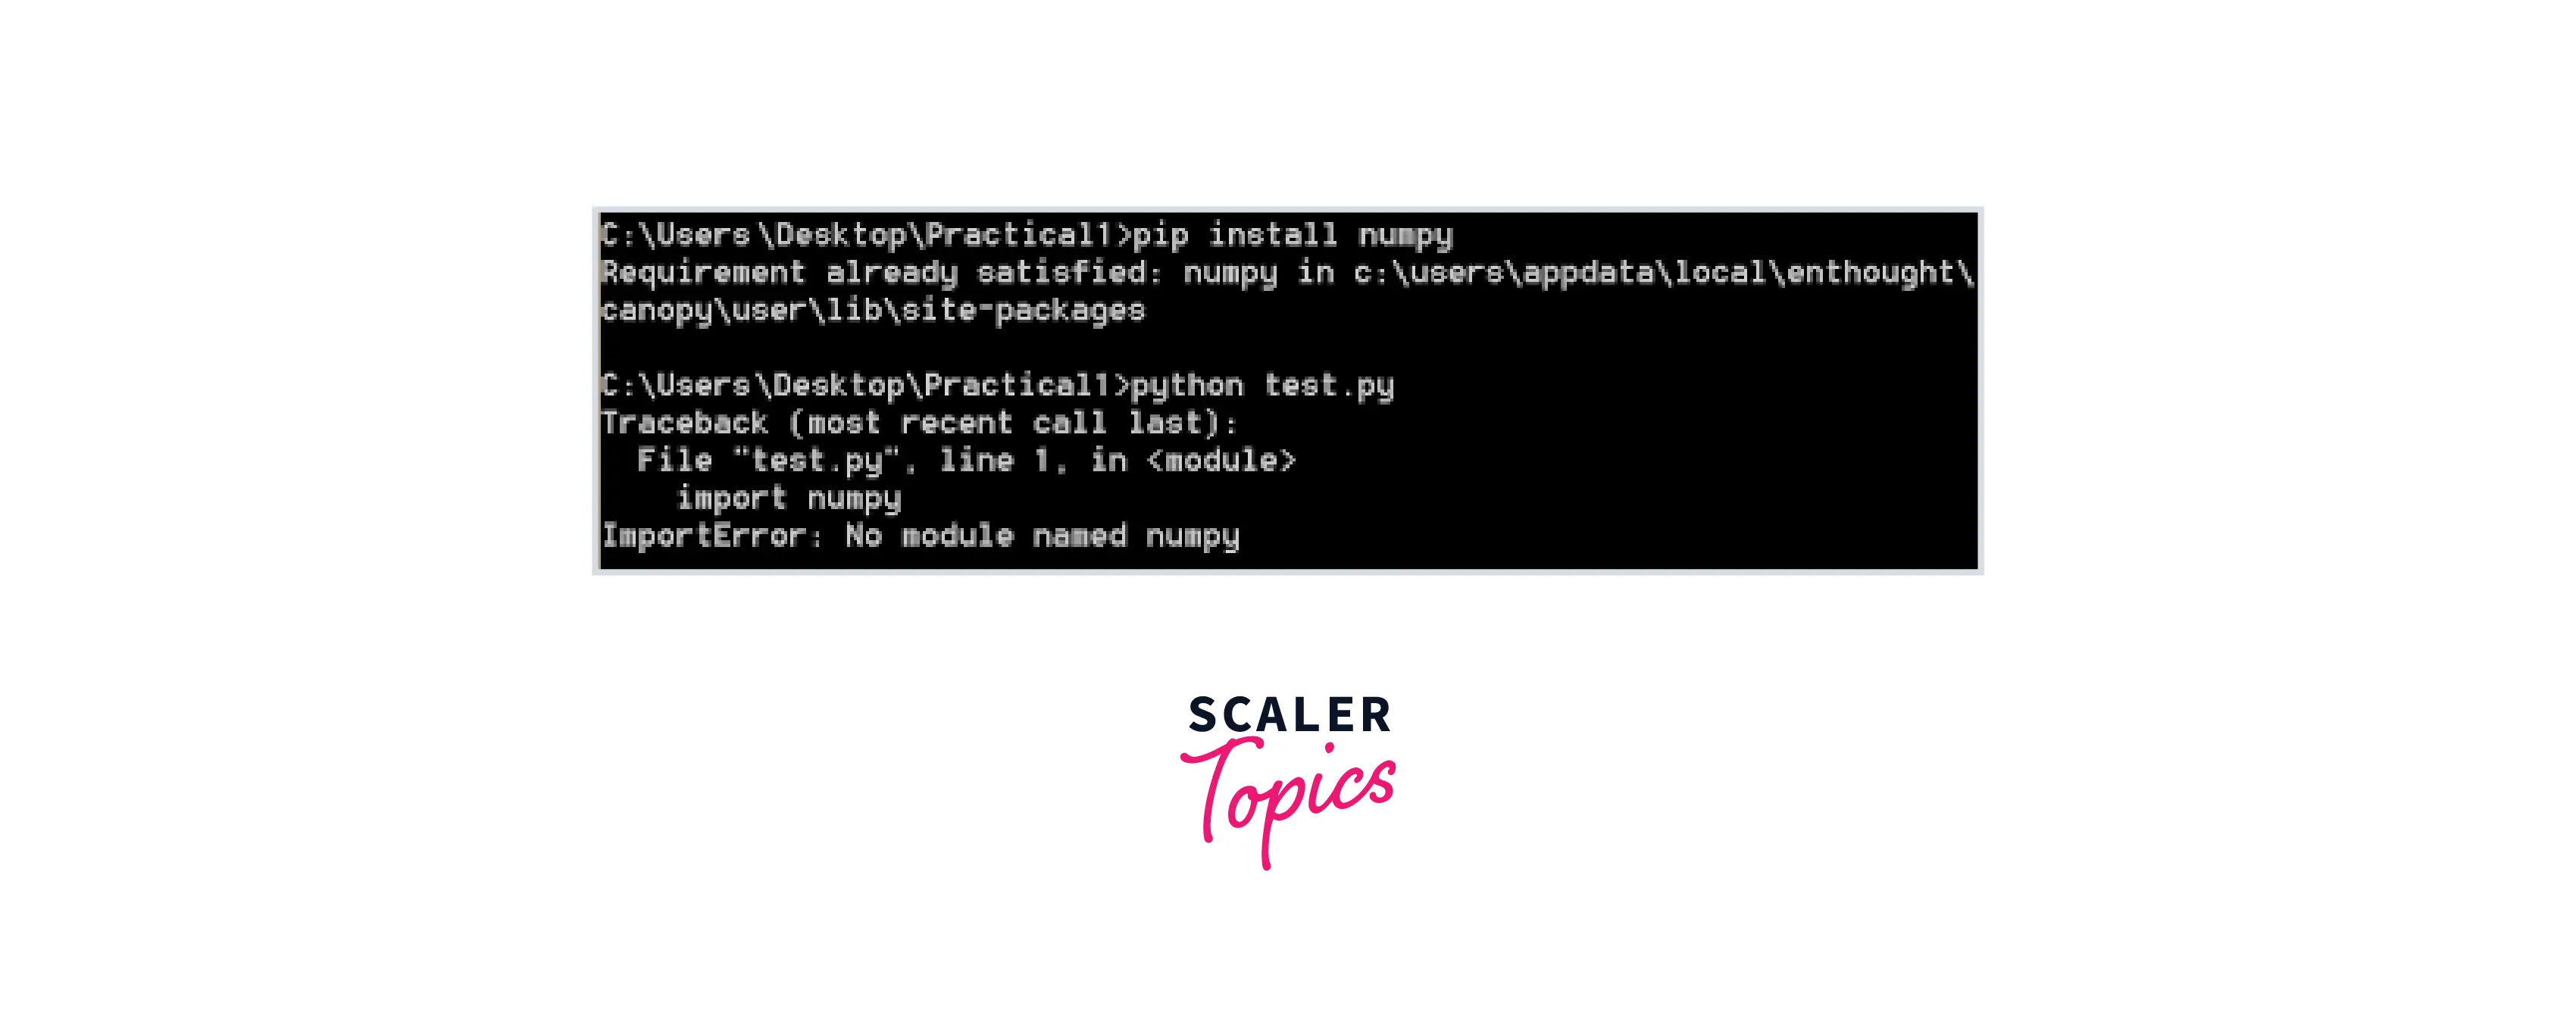
Numpy is not a built-in library in Python. Whenever we want to work with NumPy, we have to externally install it using pip according to different operating systems or virtual environments. Sometimes, when we try to execute or import numpy in Python, the first environment checks whether it is present in the site-packages folder or any directory. If not, it raises these types of errors like ImportError or "ModuleNotFoundError" which occur as " no module named numpy " as shown below.
There are many reasons for this error, as discussed below:
- When Python is unable to recognize the NumPy library in the current environment,
- When there is an issue with the Python version, like installing more than one version of Python, it's better to install the latest version.
- If python is not installed in the virtual environment that is used currently.
- If we declare the variable name as NumPy.
Let's see the solutions to these types of errors.
For operating systems like Windows, Linux, or Mac, try to install and upgrade Numpy as shown above.
For Different Virtual Environments
Anaconda
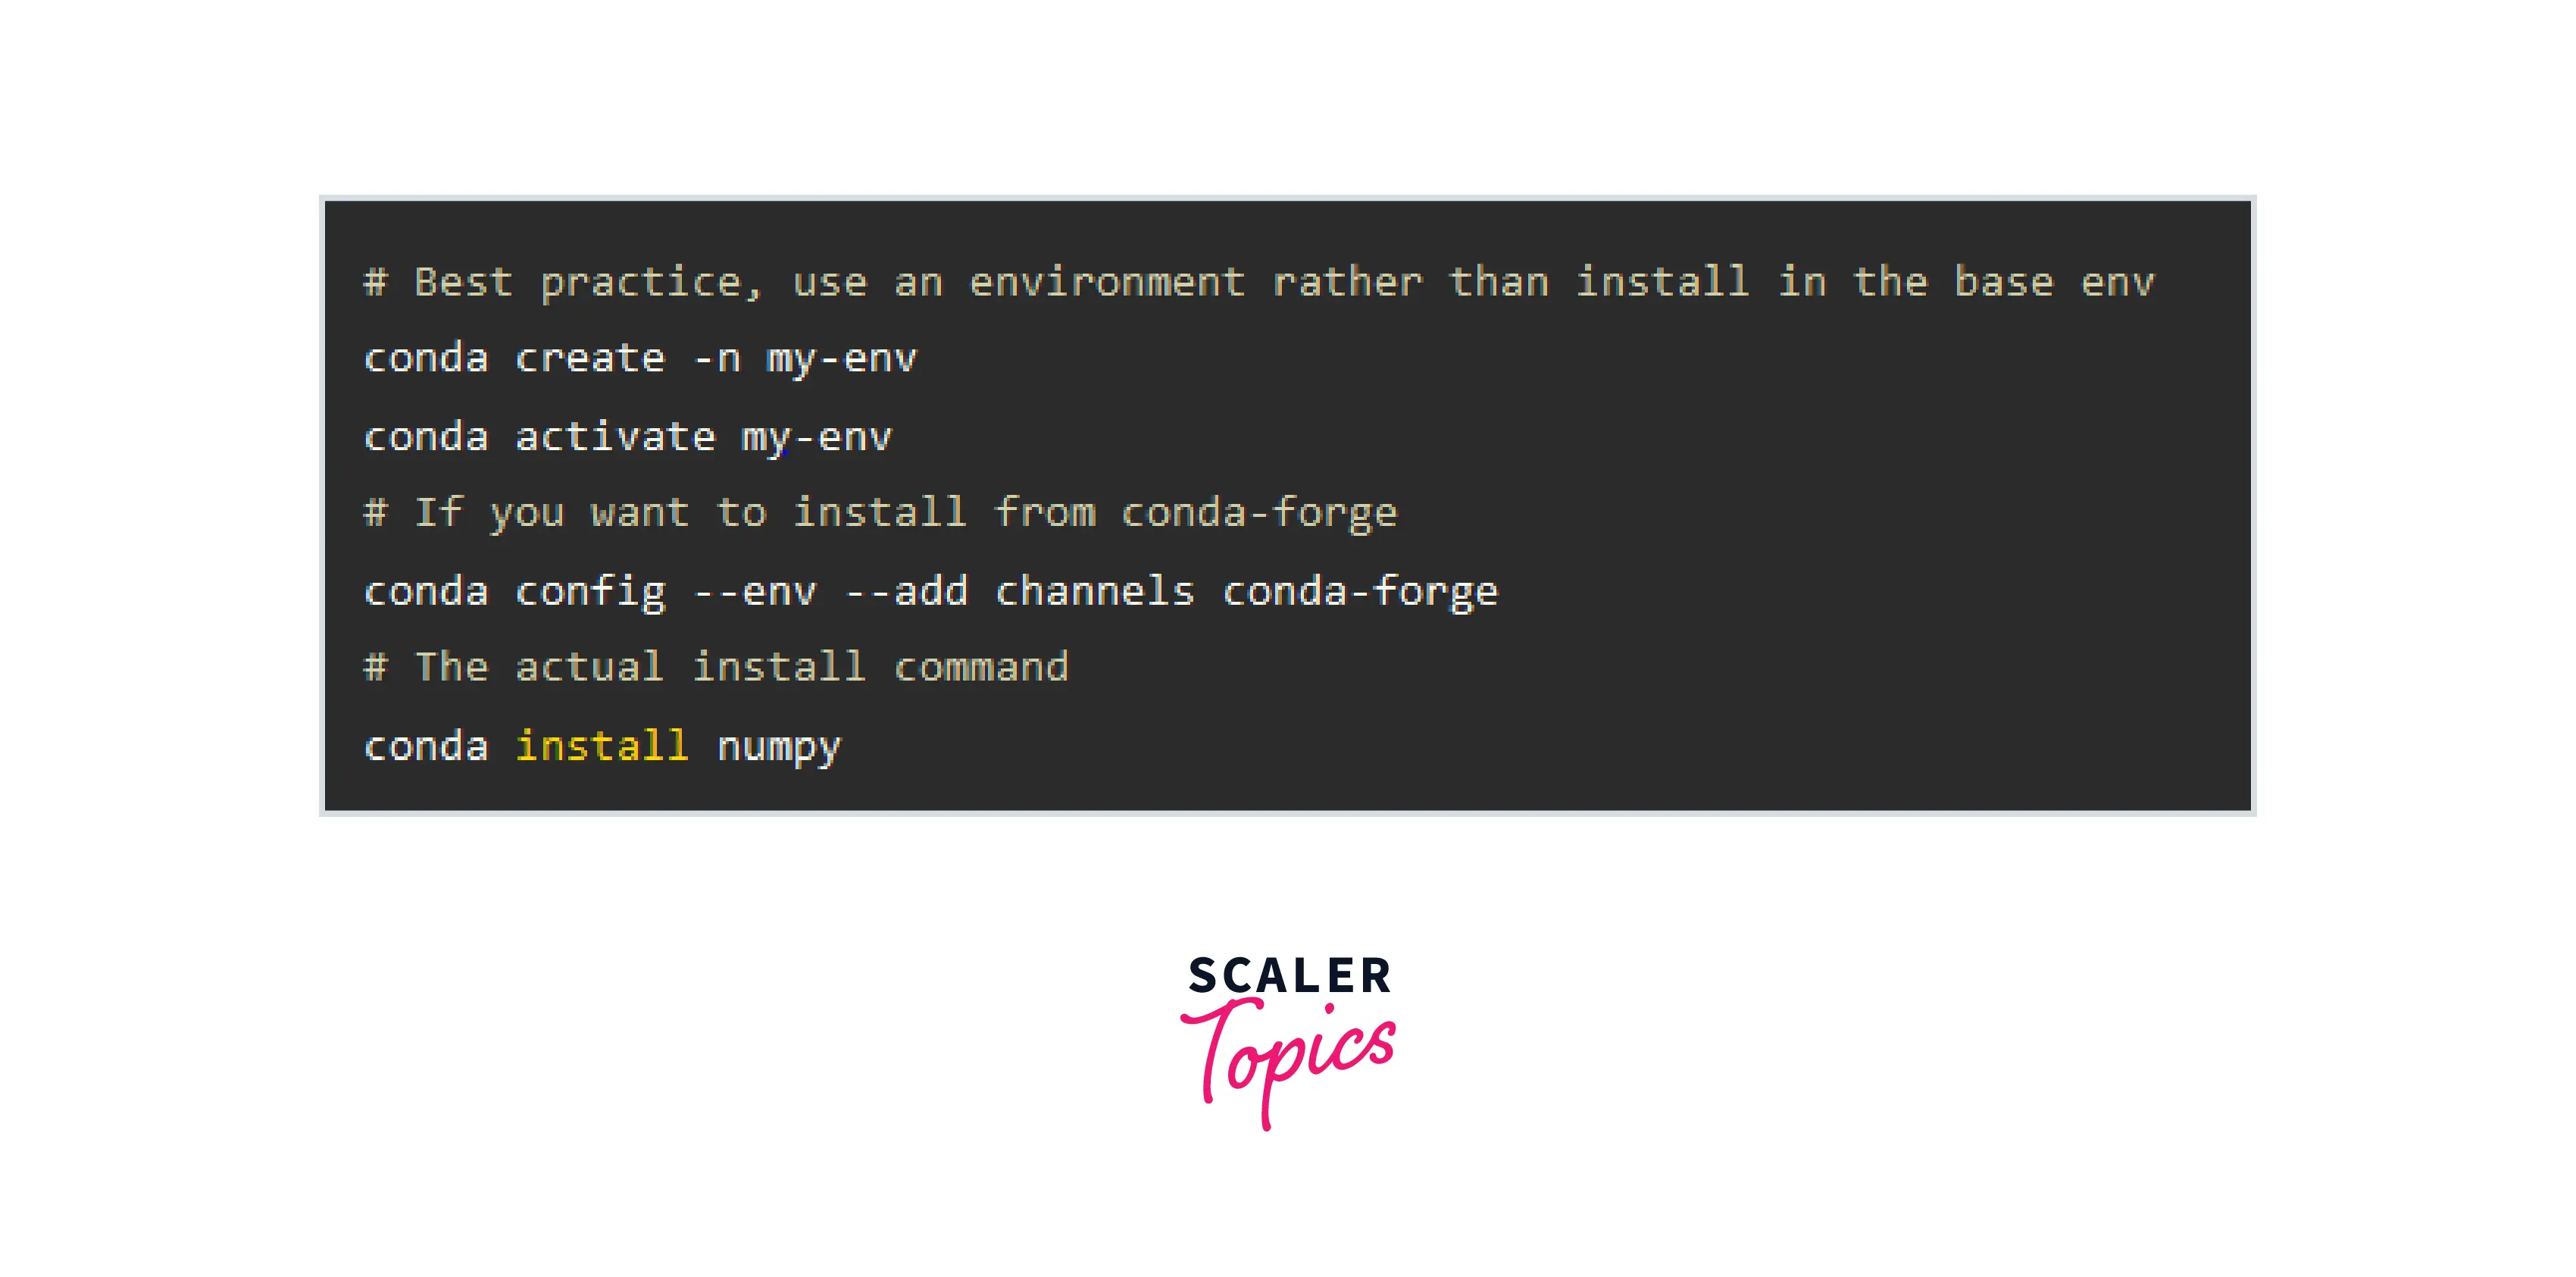
The following steps need to be followed:
Step1: Launch the Anaconda Command Prompt.
Step 2: Use this command to activate your Conda Virtual Environment:
e.g., conda, activate my -env
Step 3: Run the following command to install Numpy:
- Your environment will download and compile the Numpy package.
Step 4: Close the Anaconda Command Prompt.
Step 5: Import Numpy by reopening Jupyter or another Python IDE of your choice.
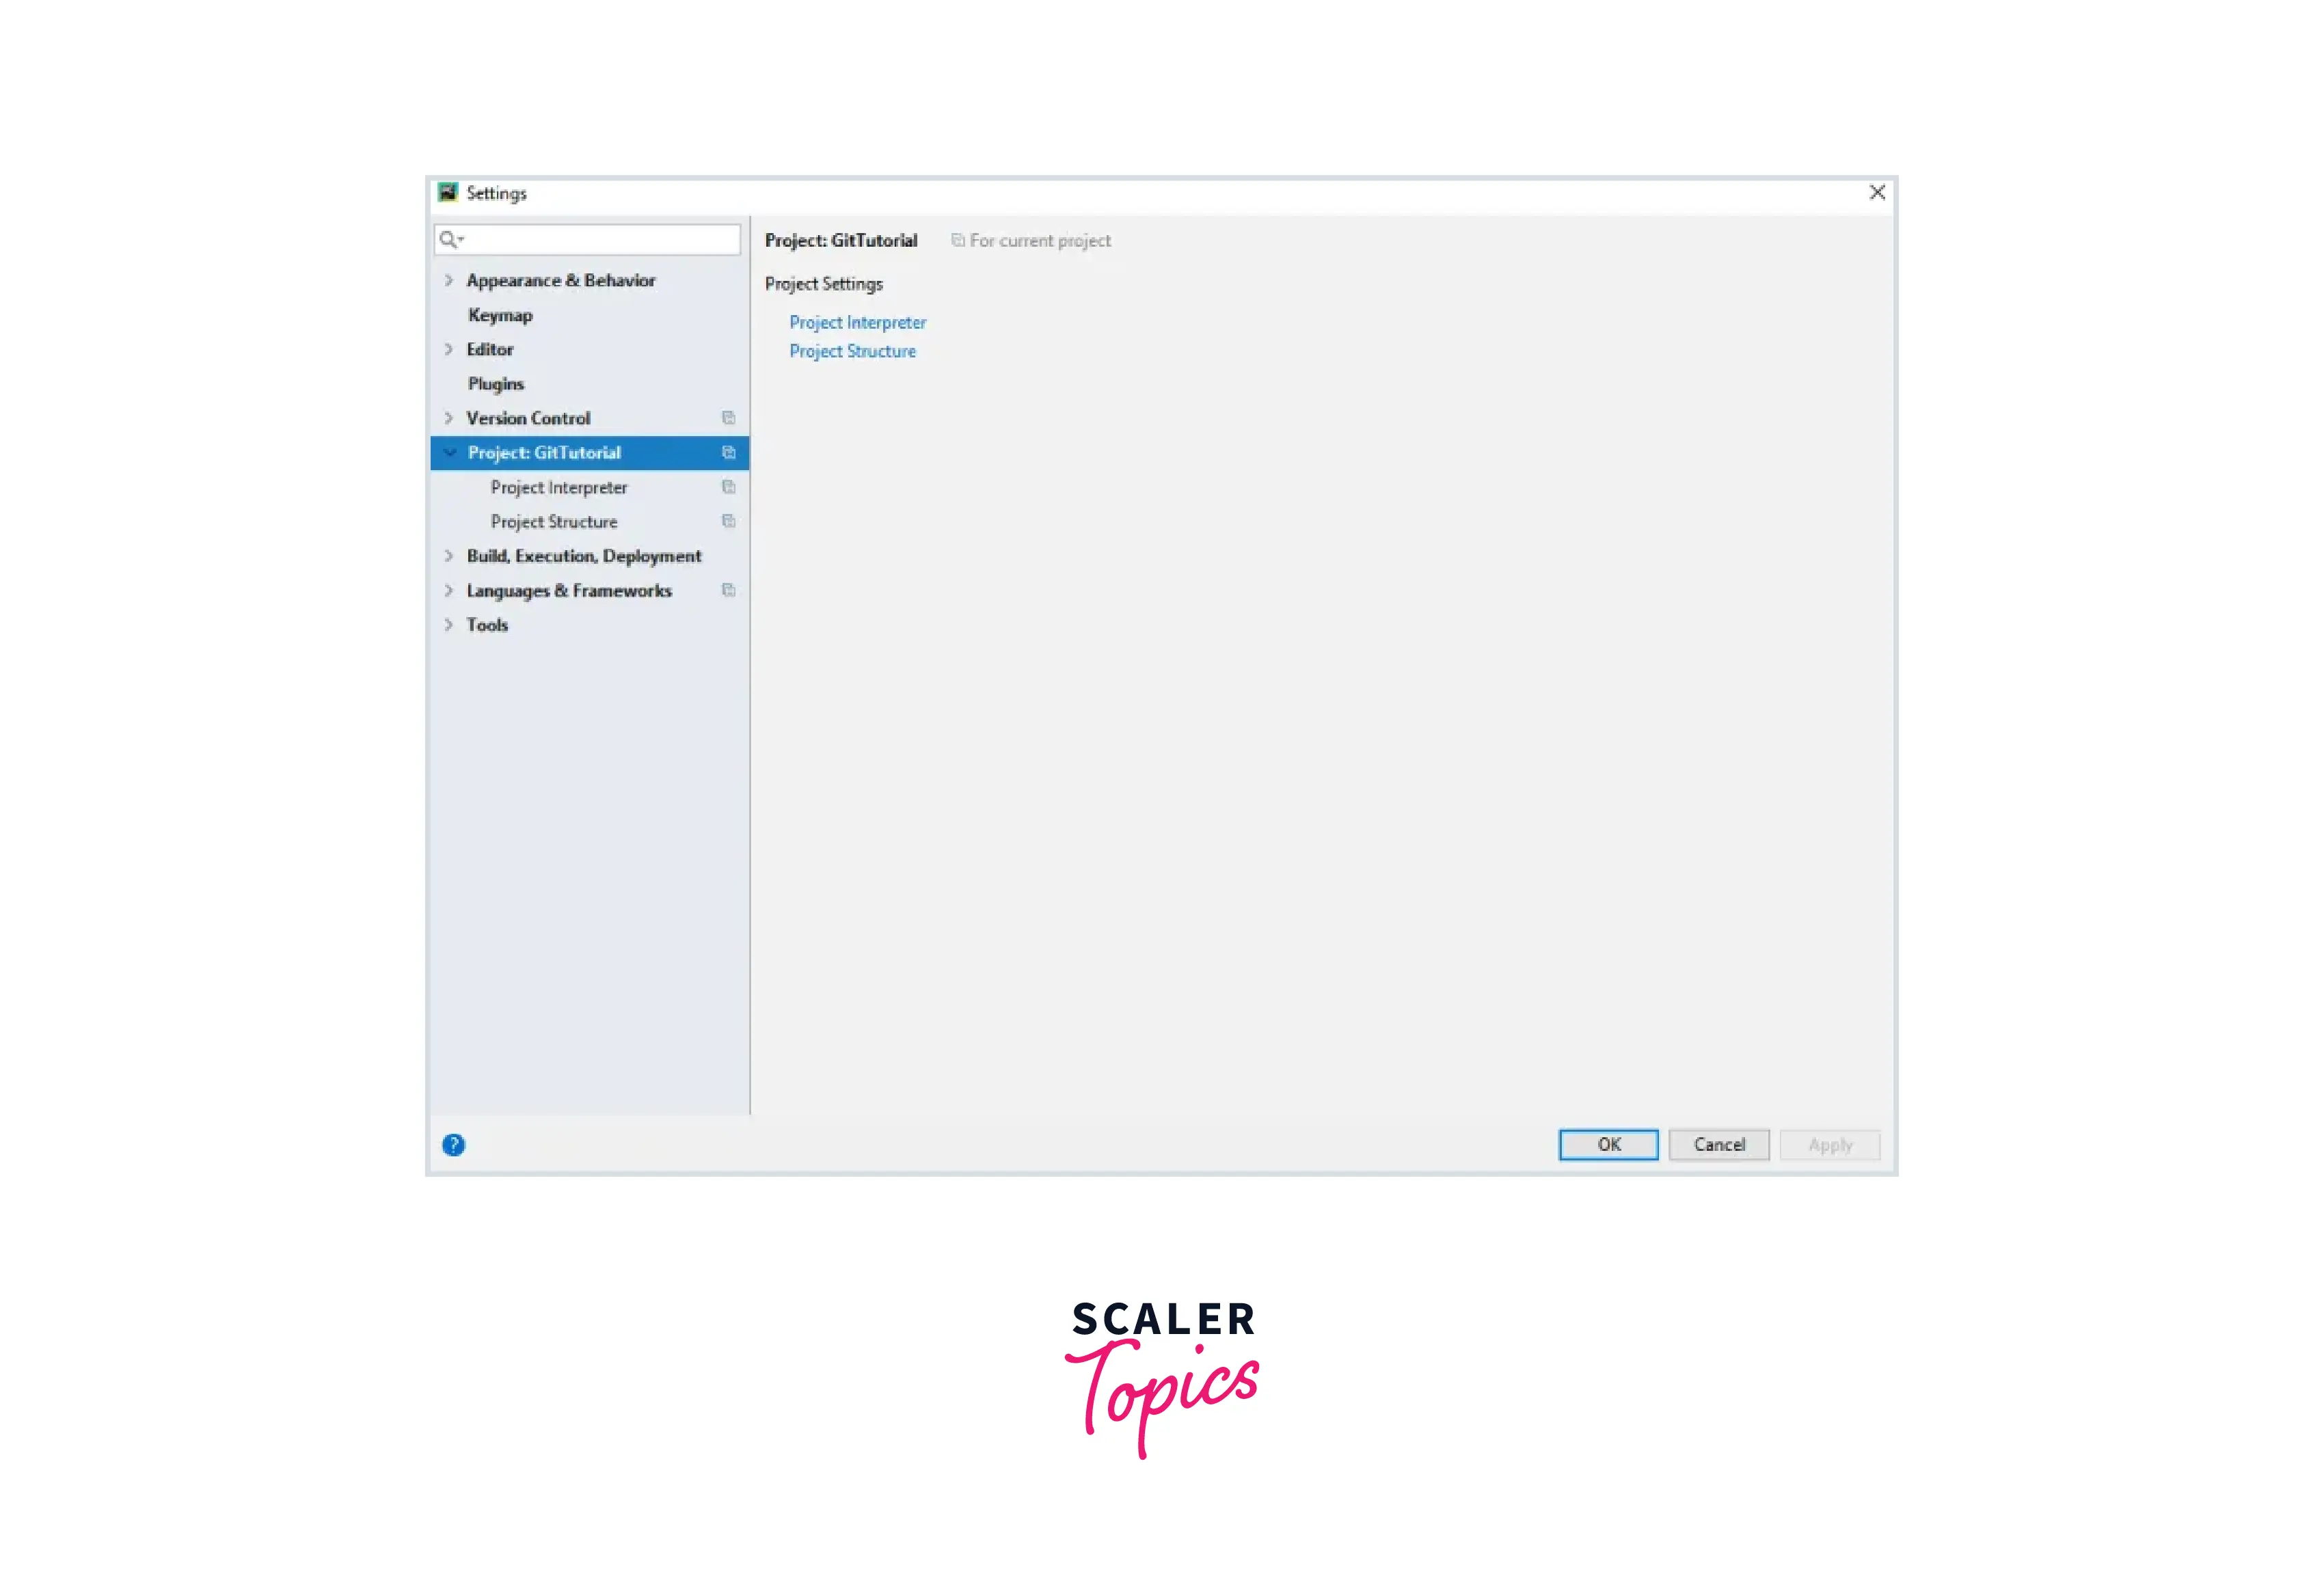
Pycharm Step 1: In the Pycharm environment, go to File and click on Settings.
Step 2: You will see > project: your_project_name. Click on it. You will see two options One is Project Interpreter, and the other is Project Structure.
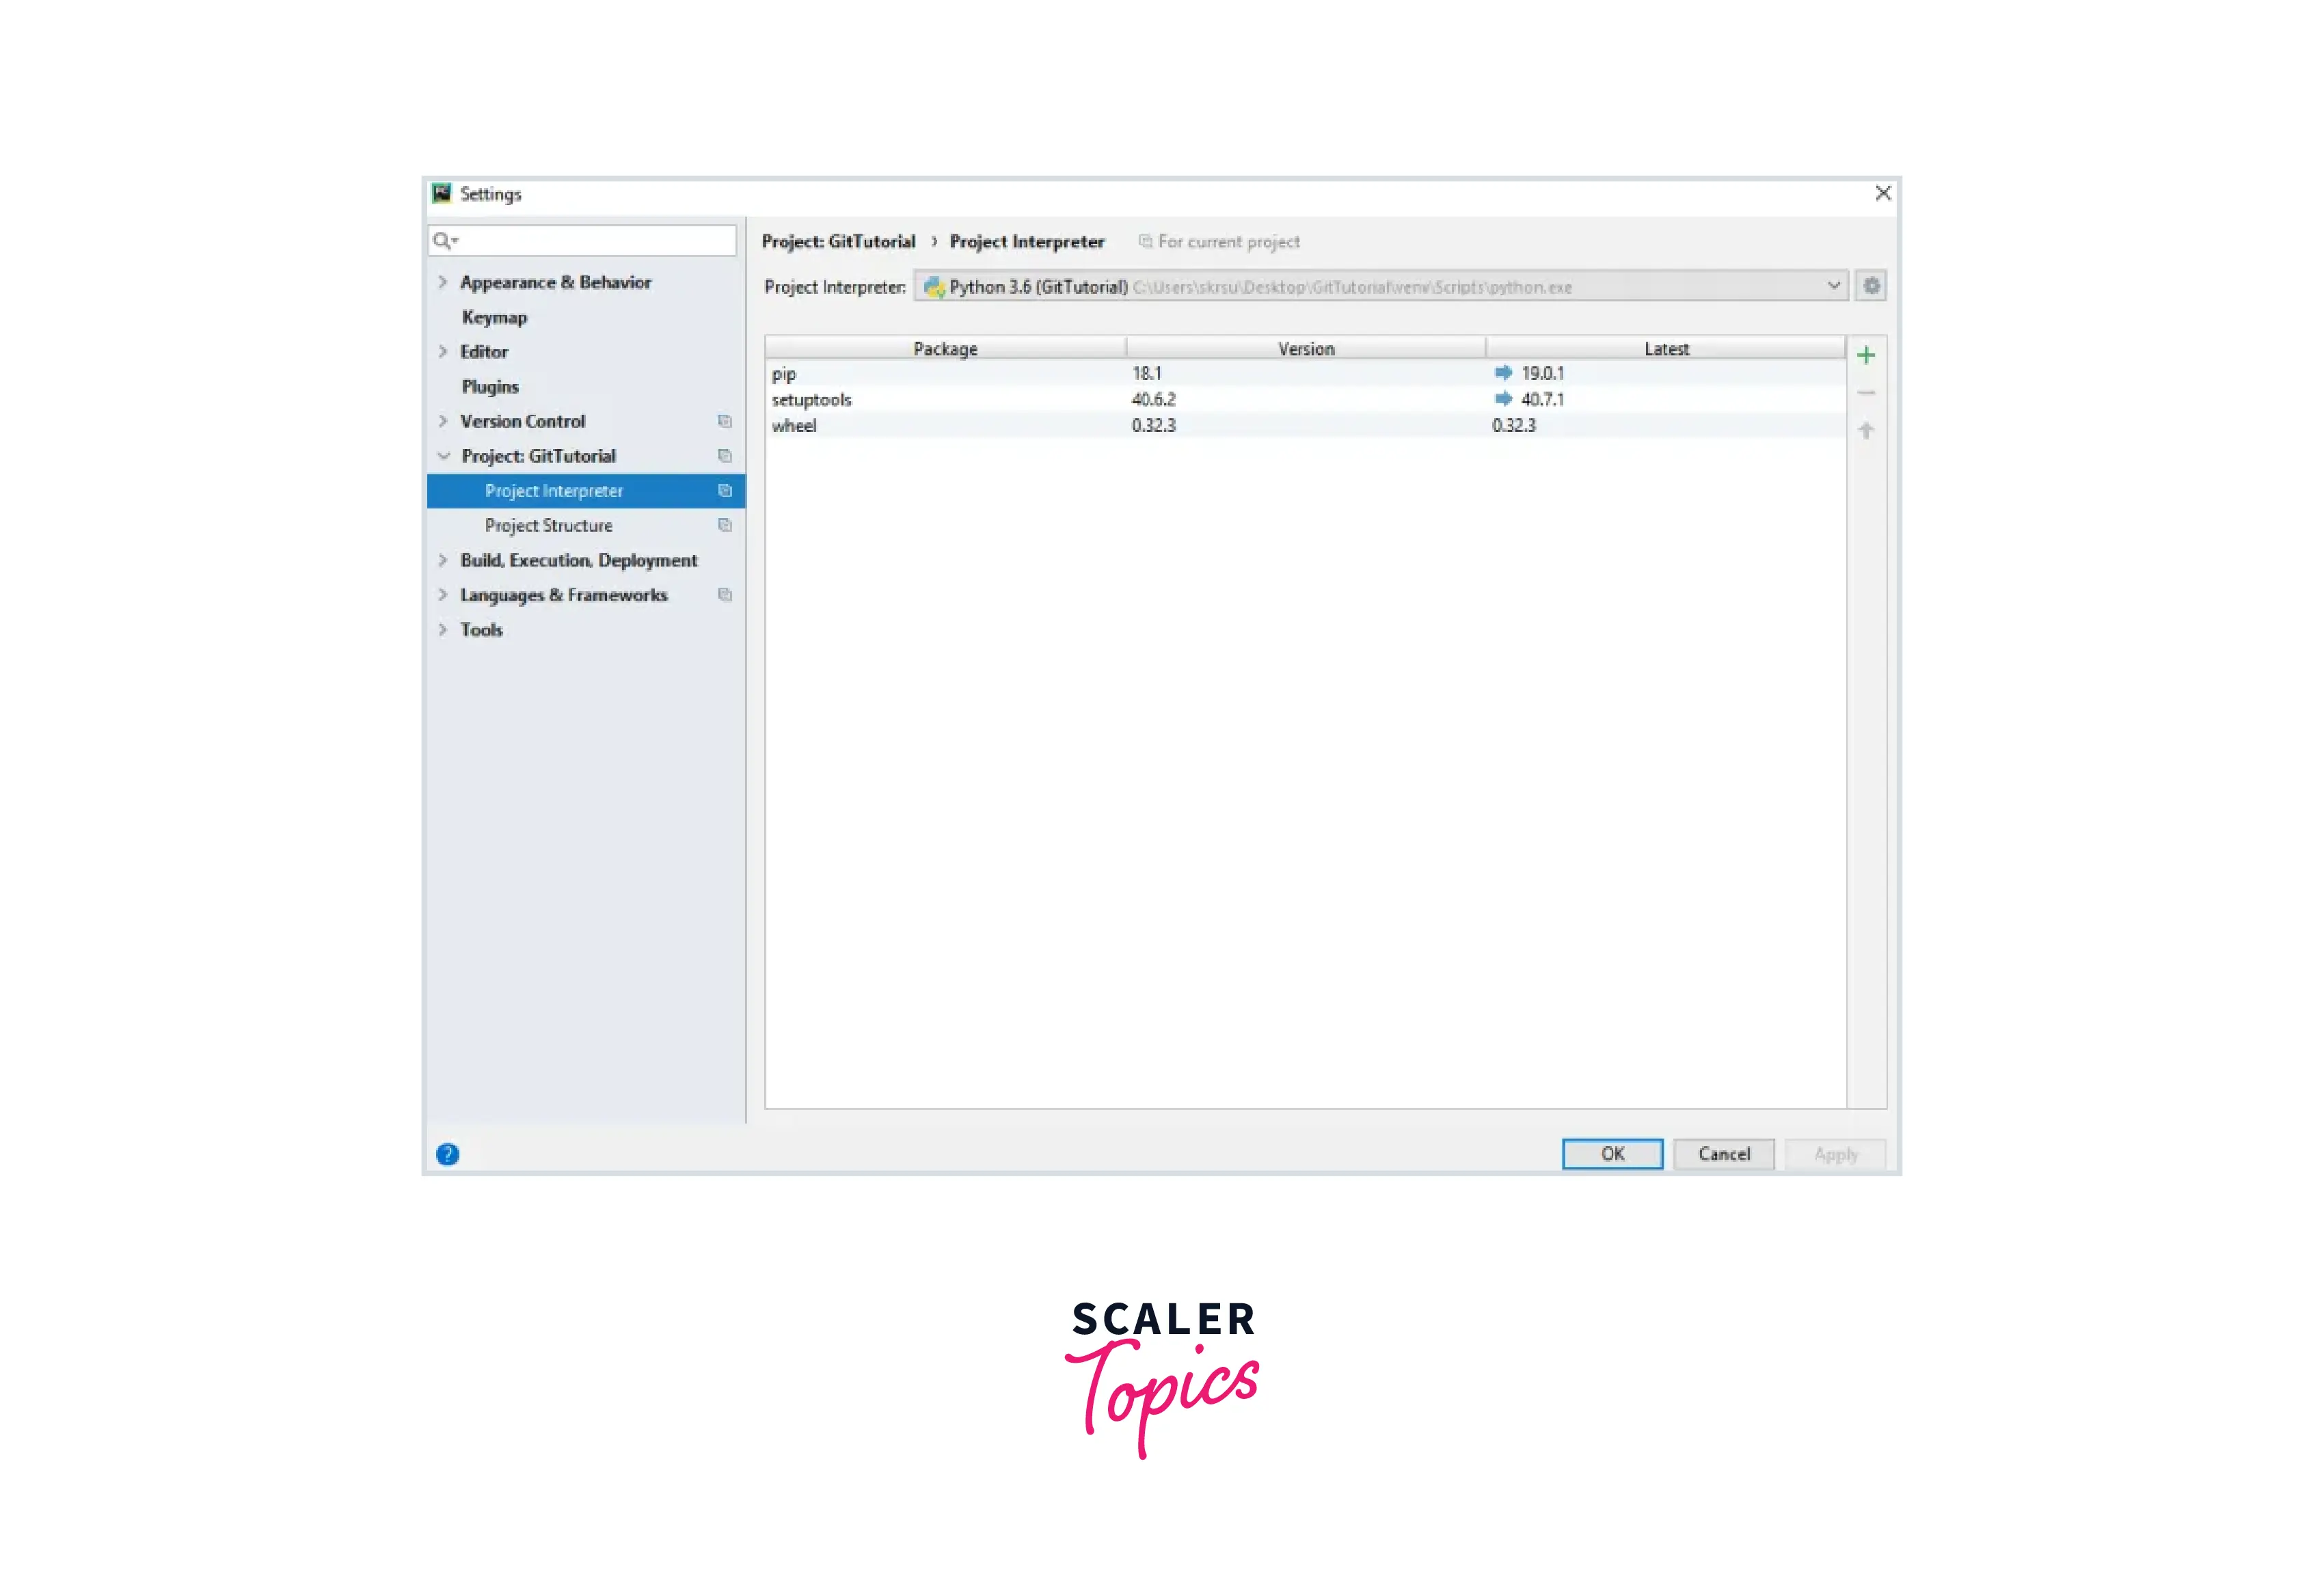
Step 3: Click on the Project Interpreter. You will see all the packages installed.
 ]
]
Step 4: You will see the + button. Click on it and search for numpy in the search field. You will see the NumPy package on the left side with its description and version on the right side. Be sure to check the author and URL of the package before selecting and installing the package.
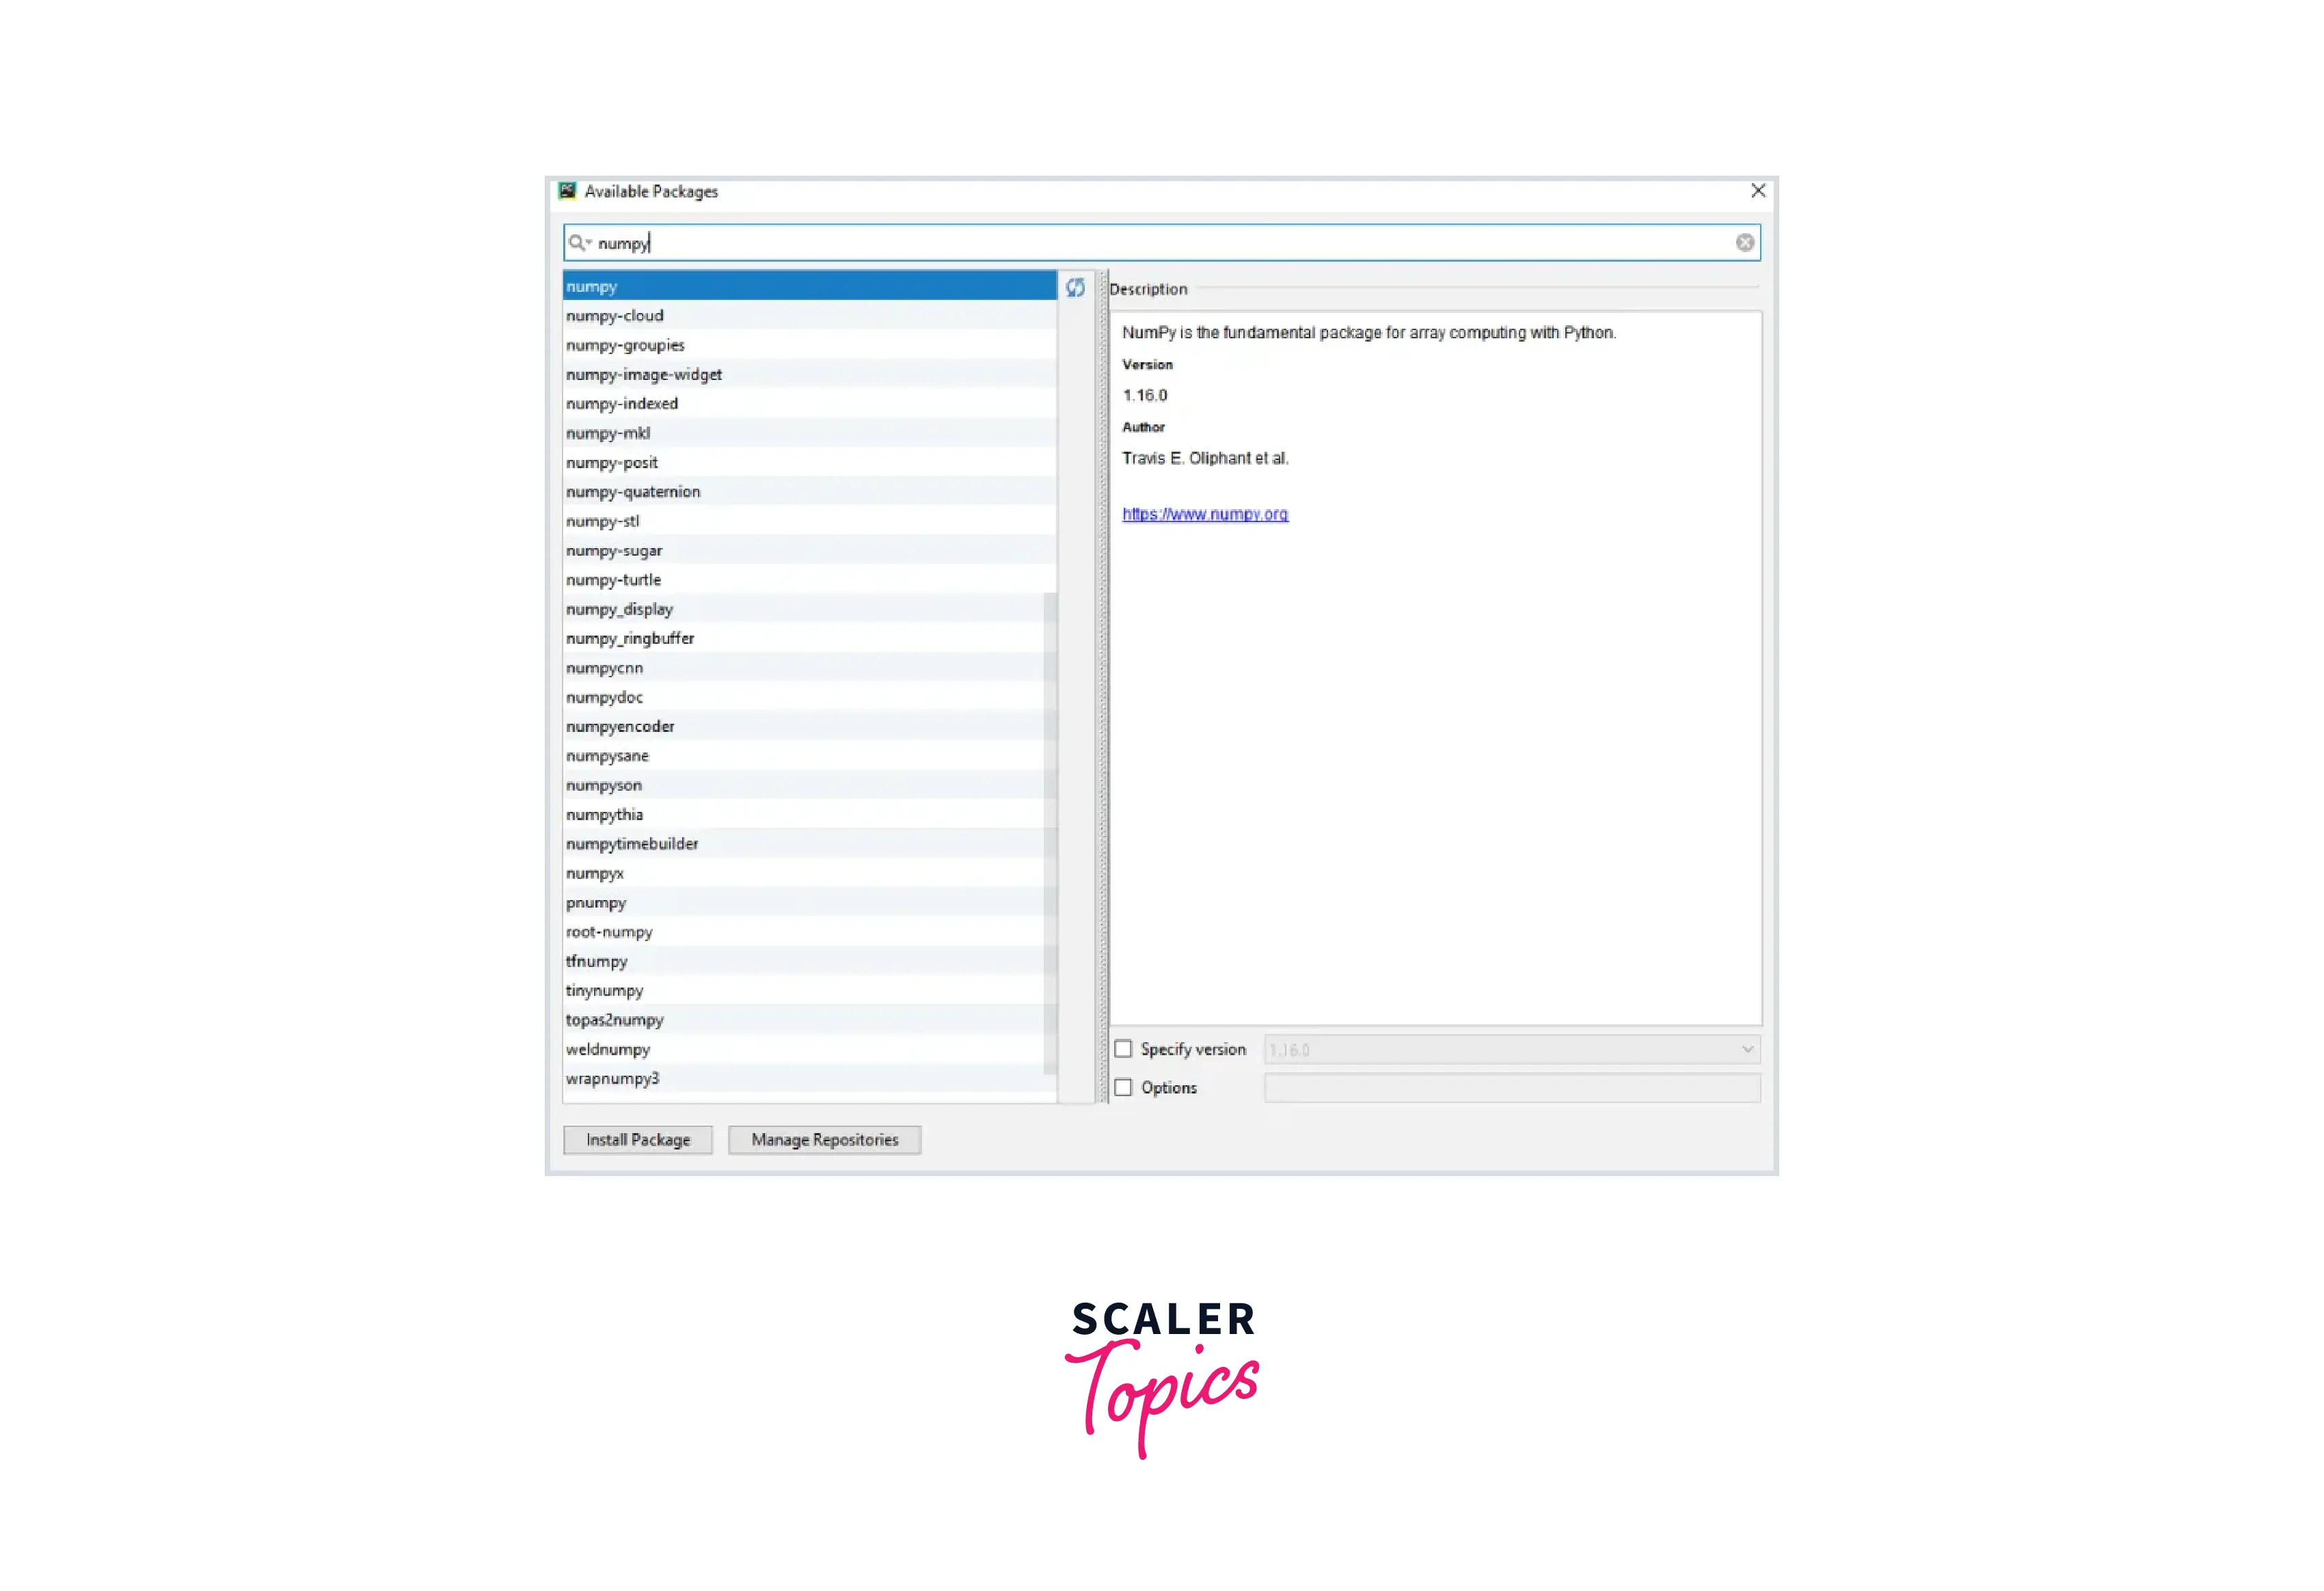
Step 5: In the bottom left corner, click on install packages after selecting numpy. The packages will be installed by it. During installation, If you find an error, then upgrade pip using the following command in the terminal.
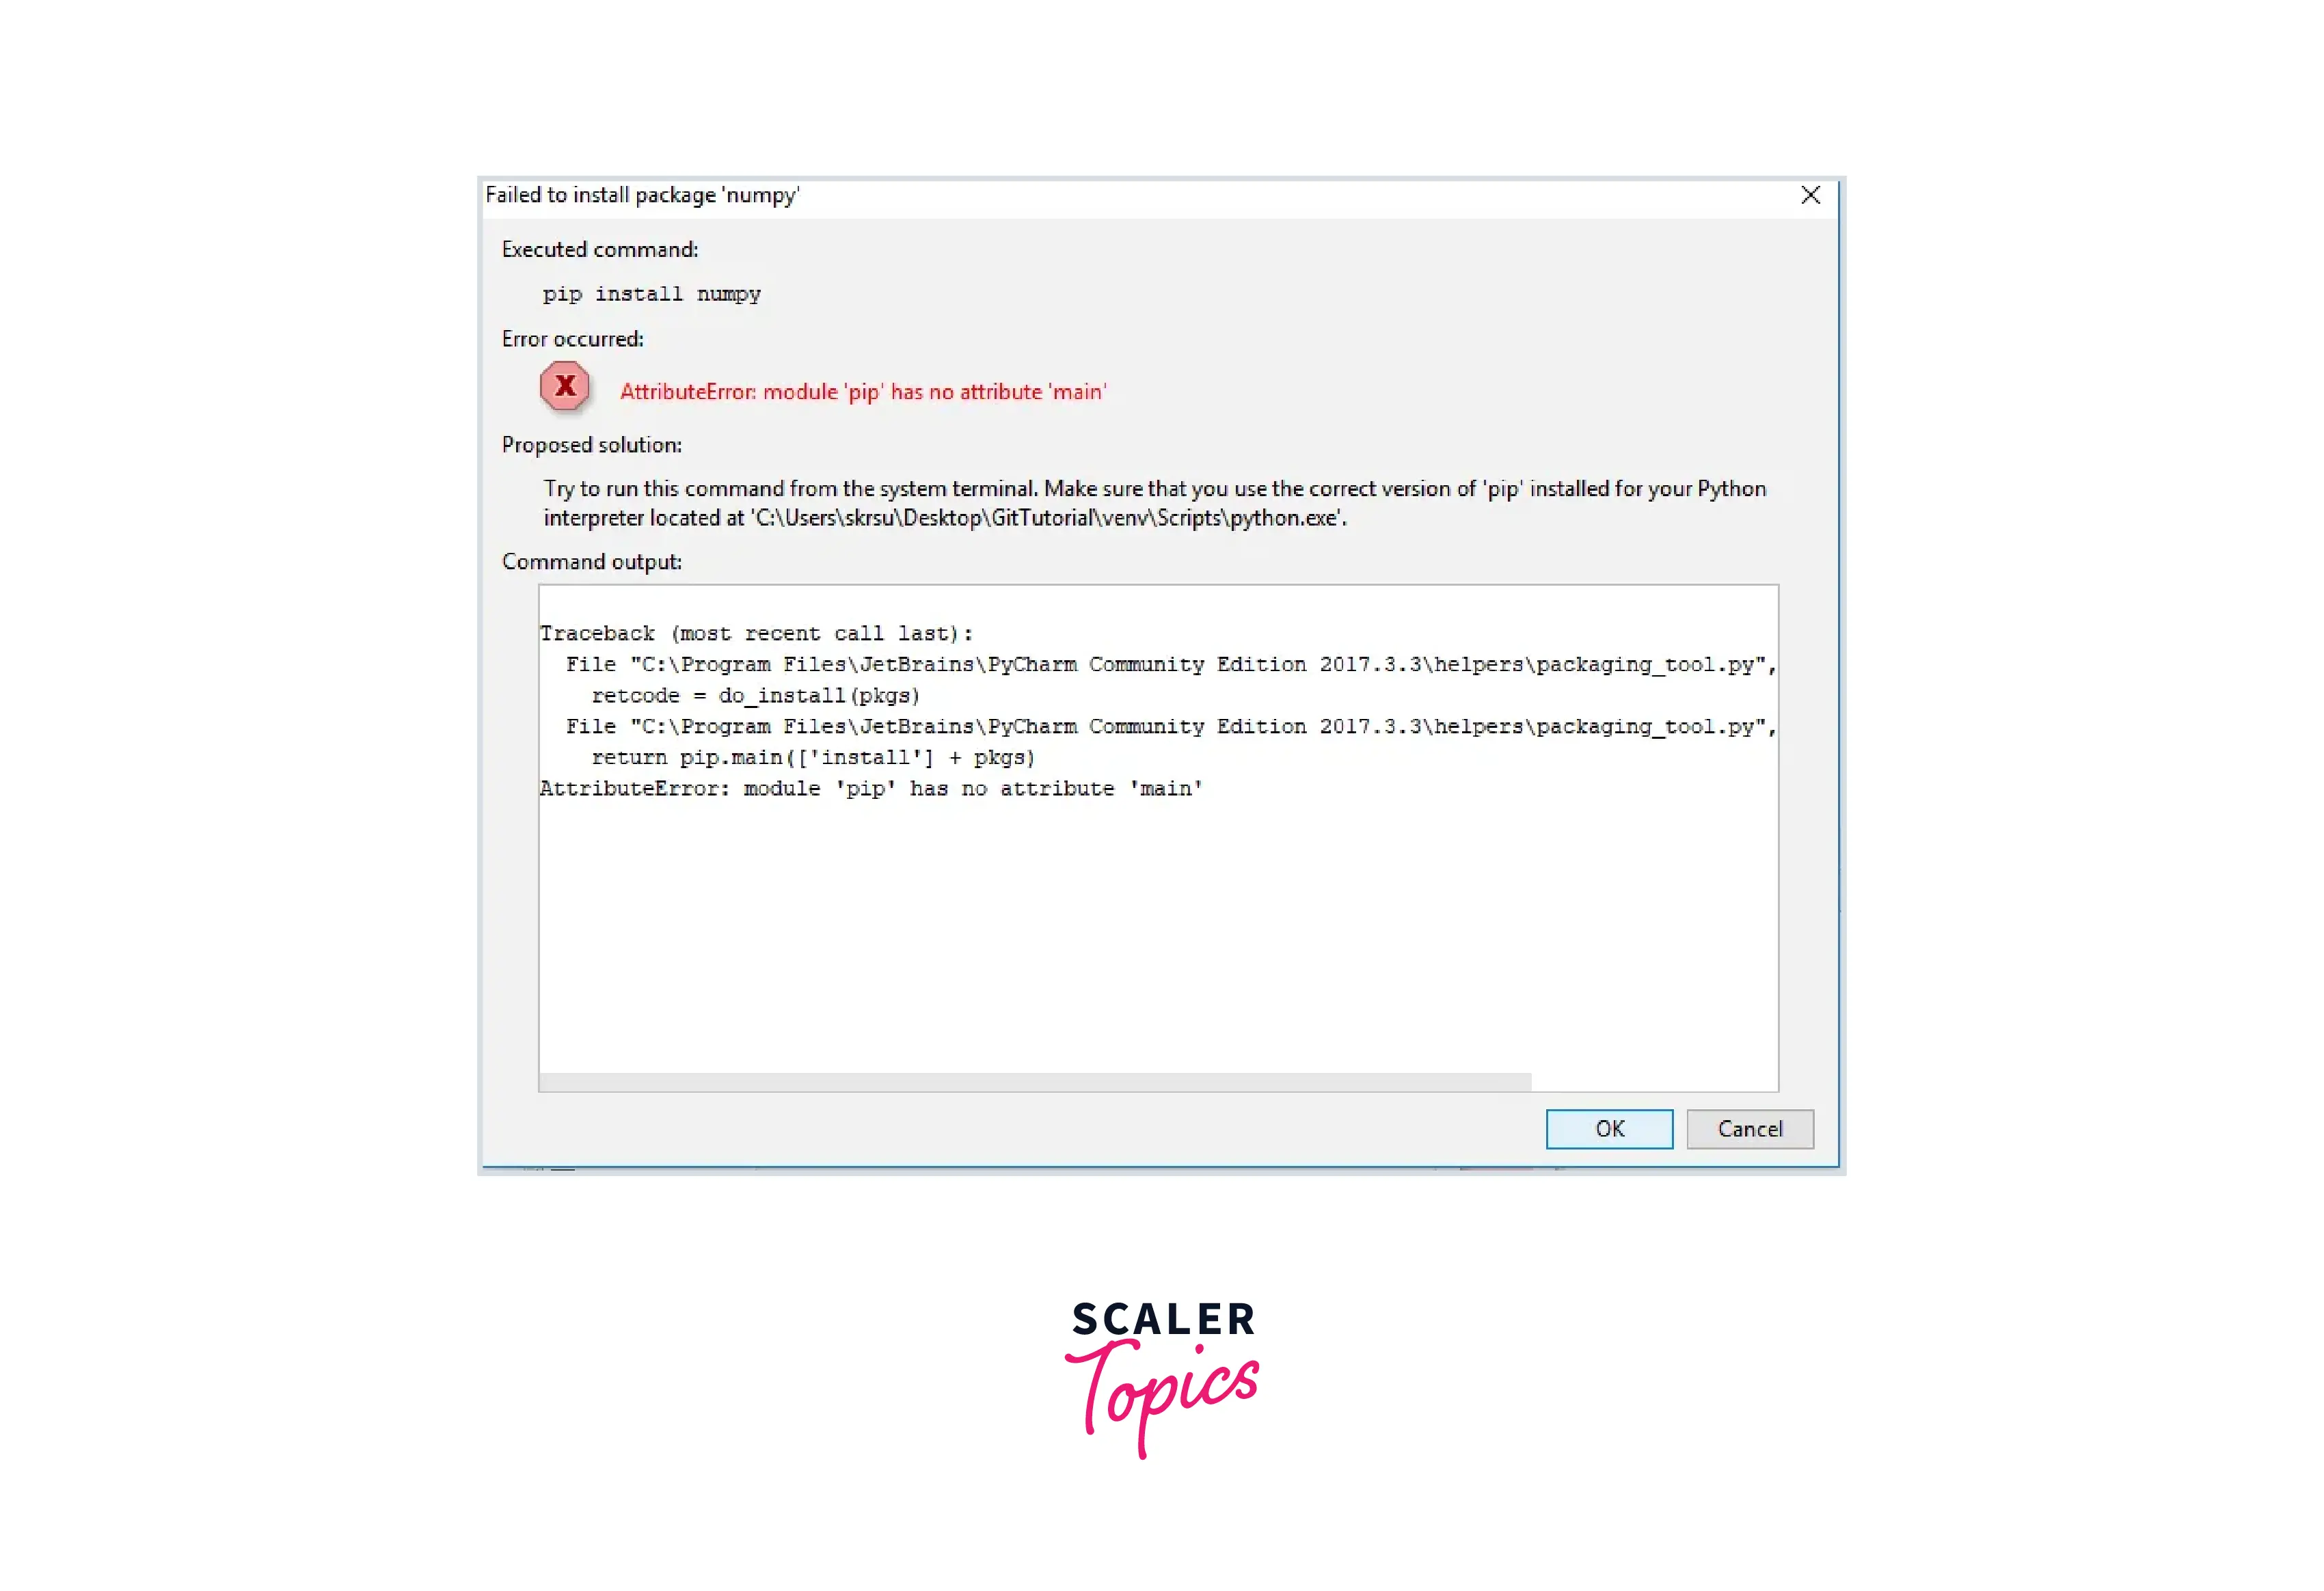
Then use the following command to install the numpy.
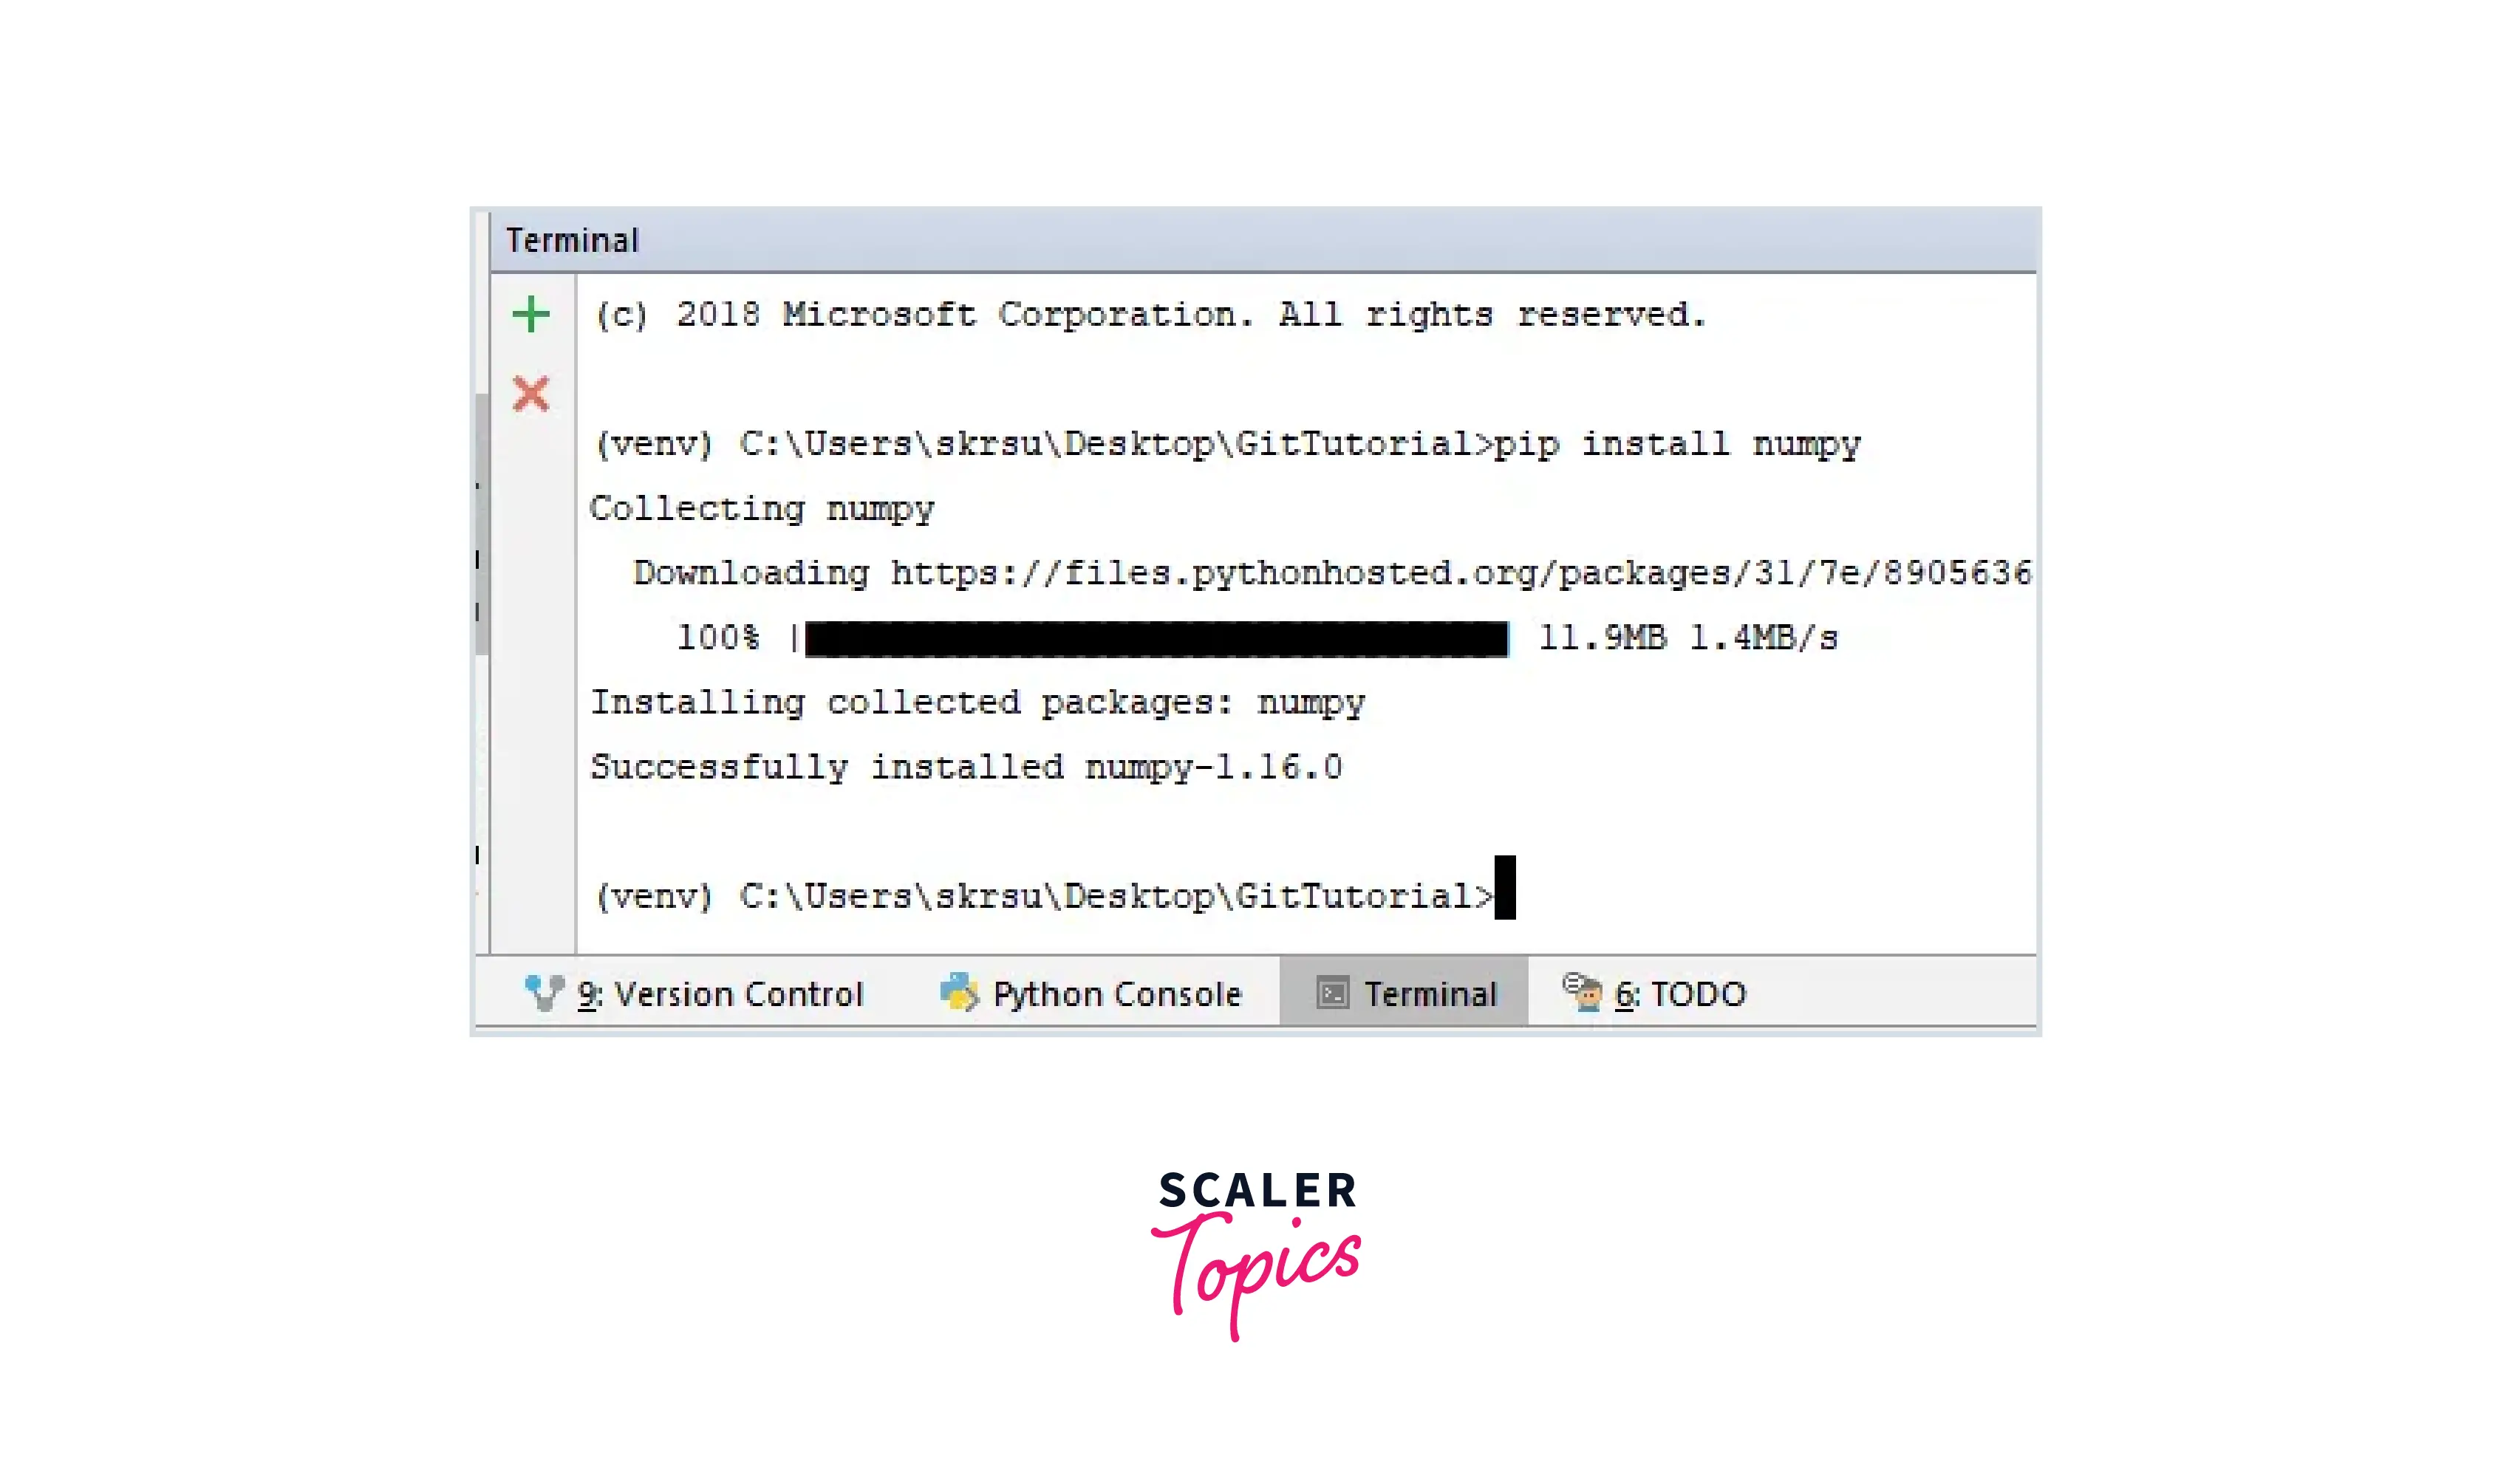
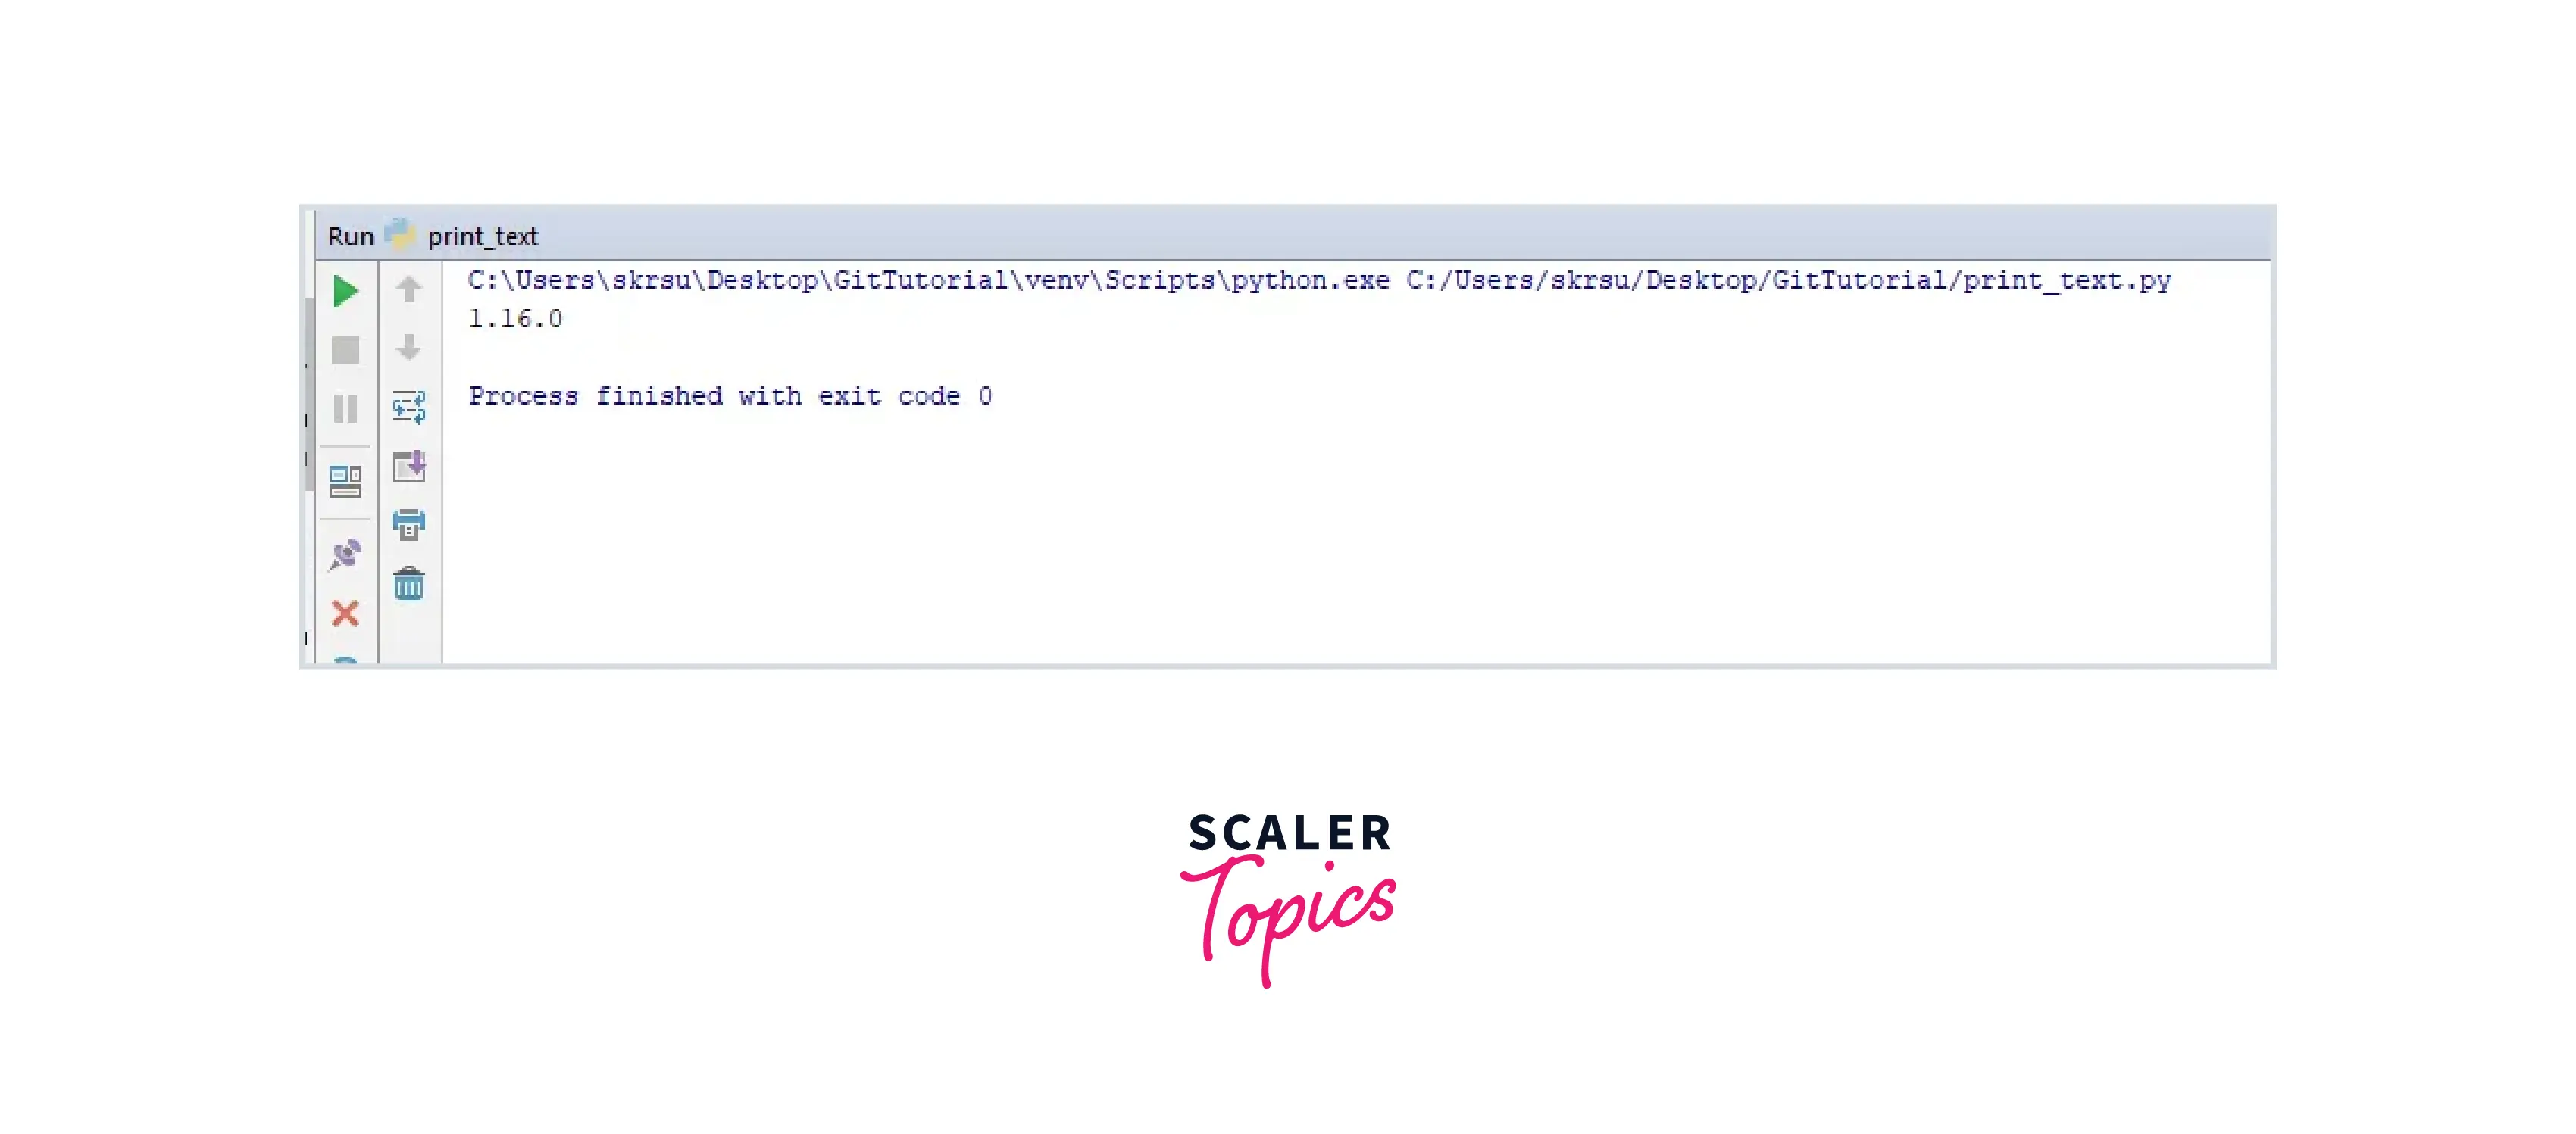
By running the following command, check that it is correctly installed or not:
VS Code For example, In VSCode, you can press CTRL + Shift + P or (⌘ + Shift + P on Mac) to open the command palette.
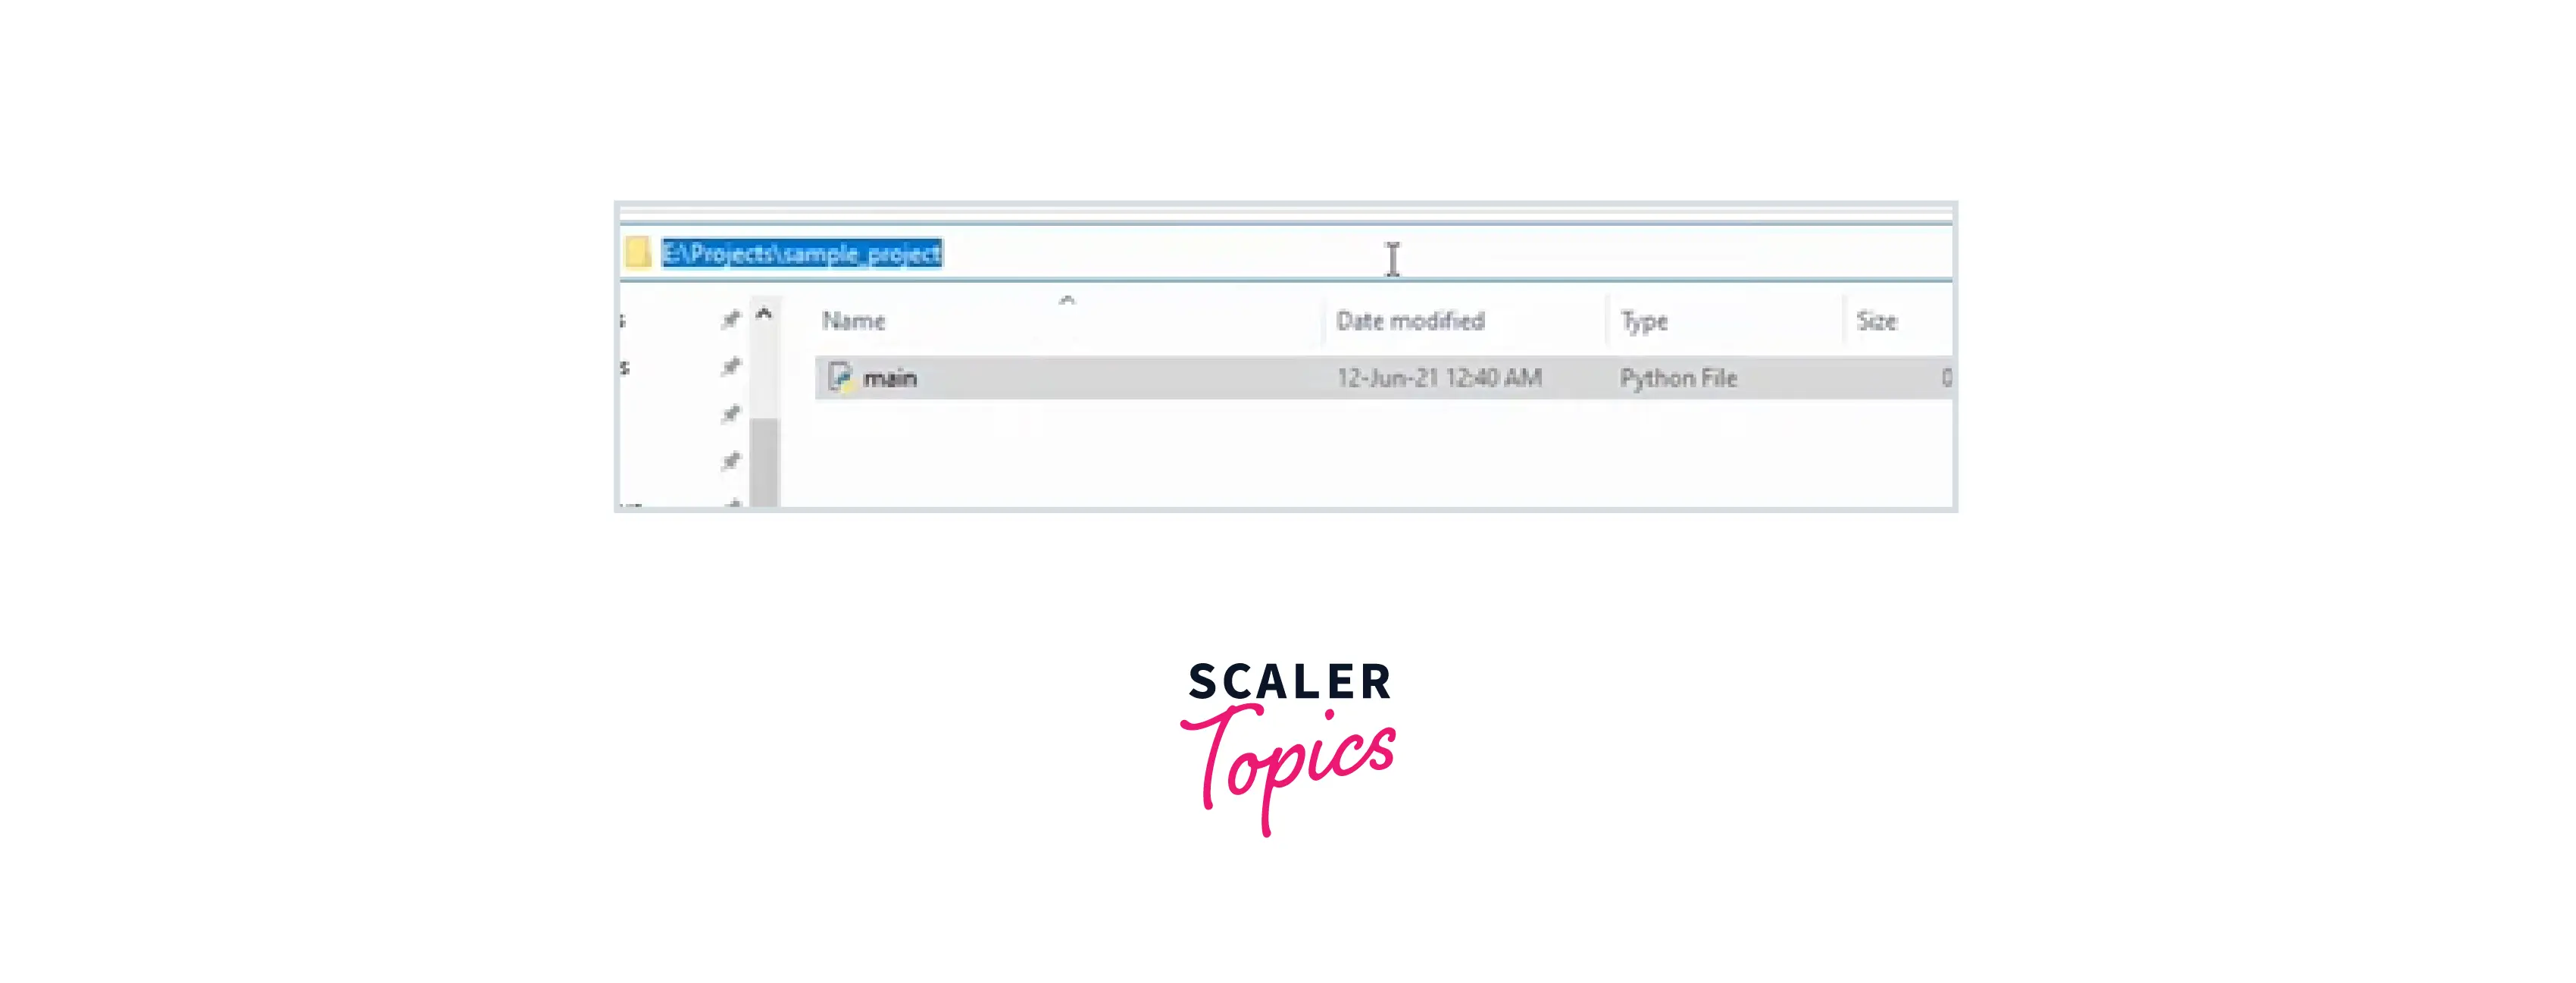
Step 1: Select the file path of the project that you have created eg:
Step 2: Create a virtual environment by entering the command:
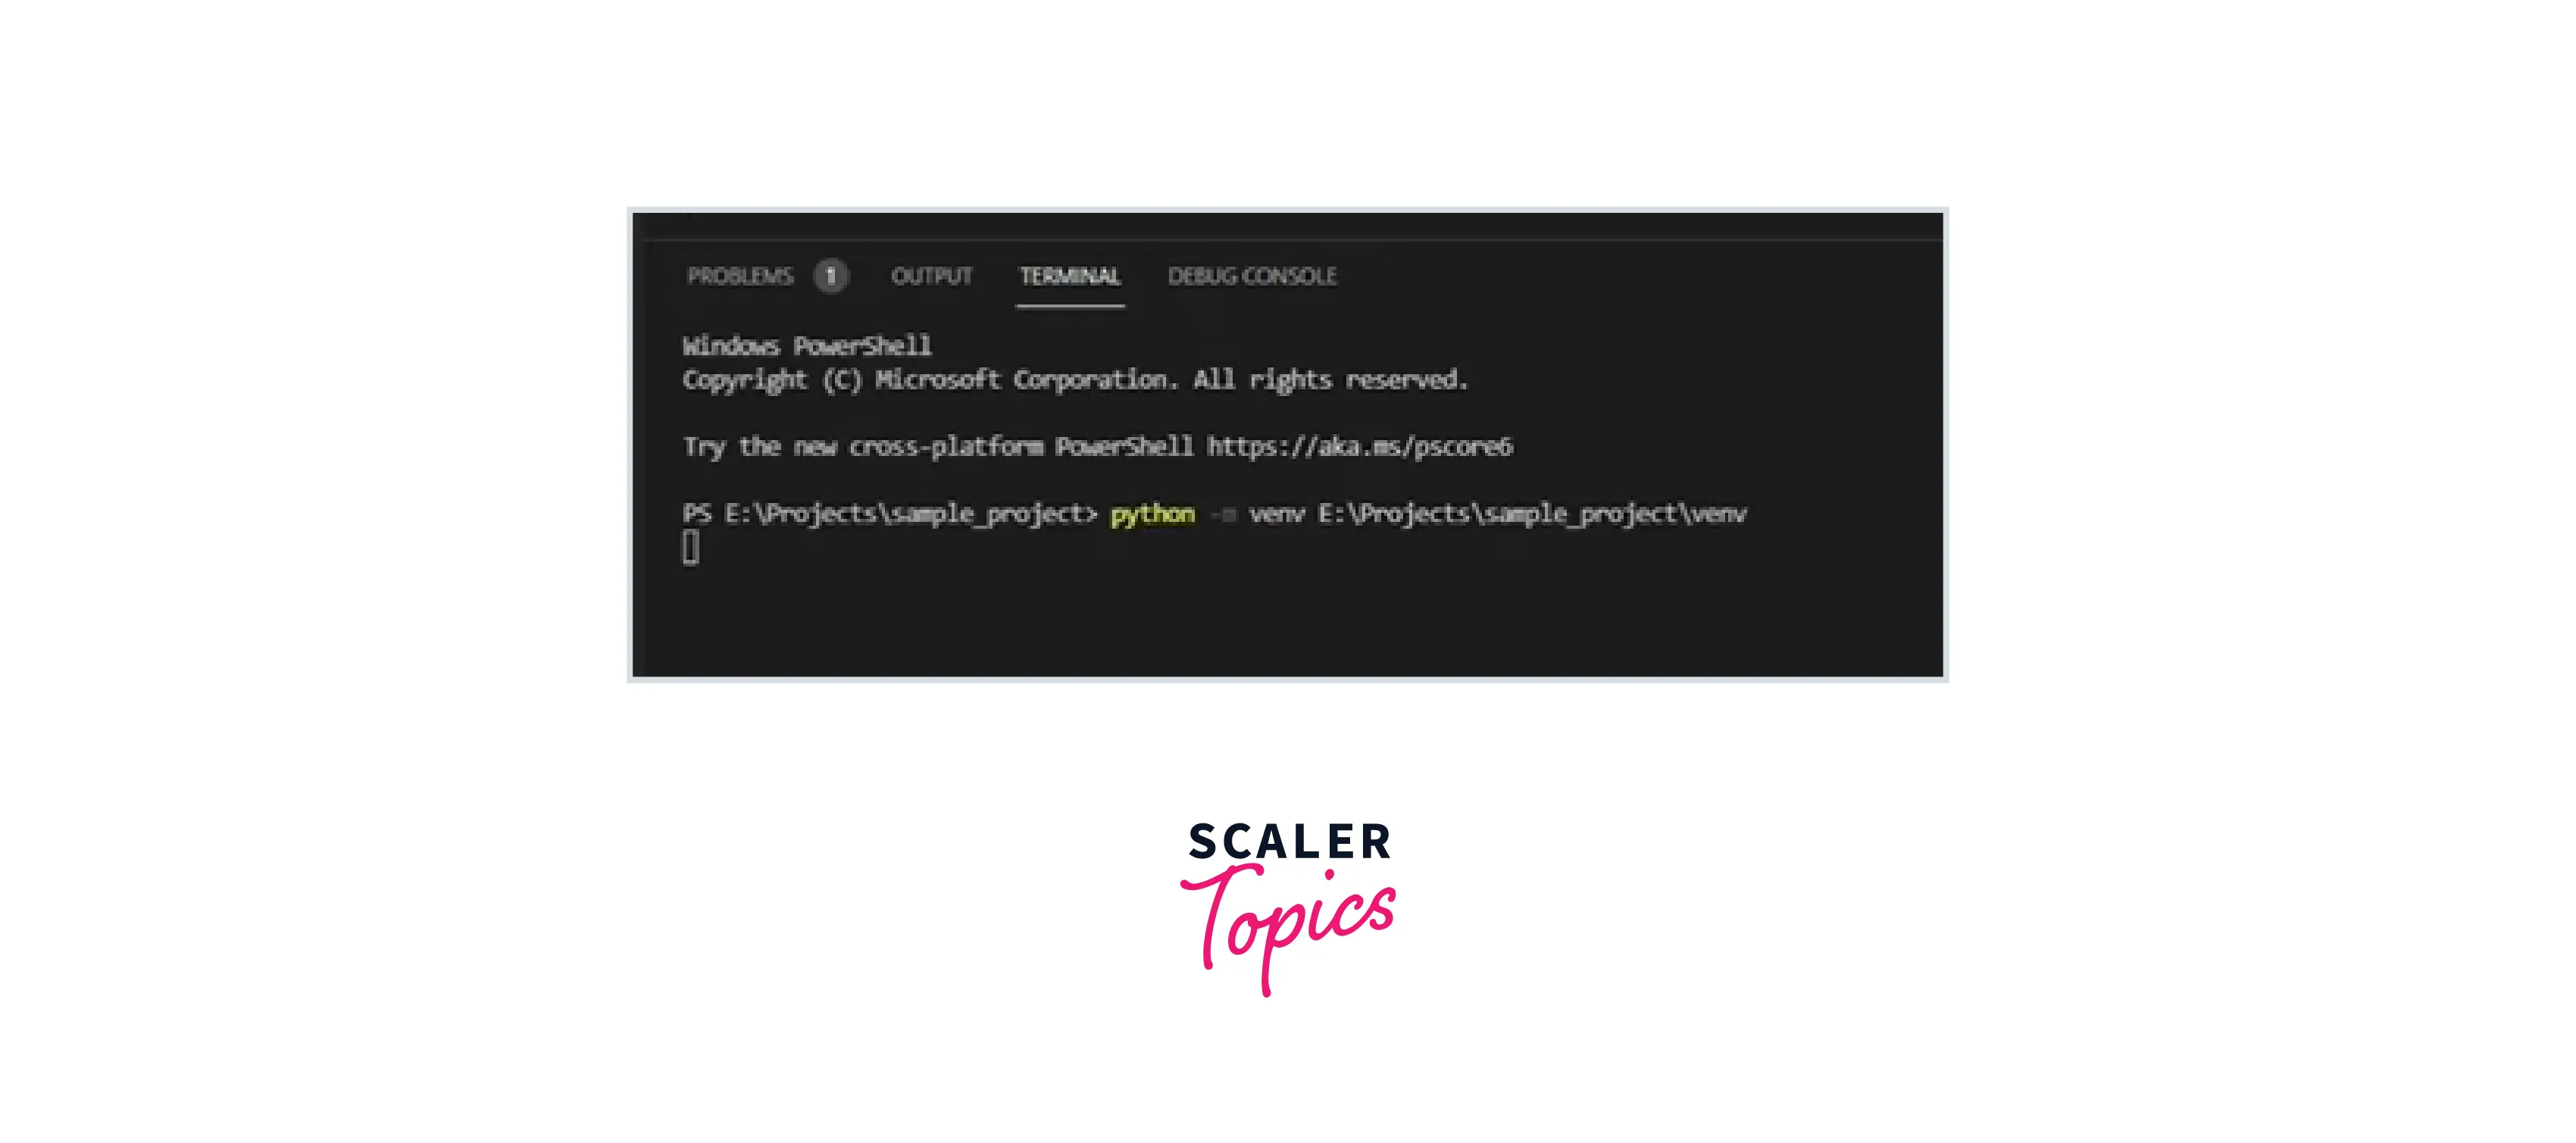
see, project file with all libraries is created as shown in the below image:
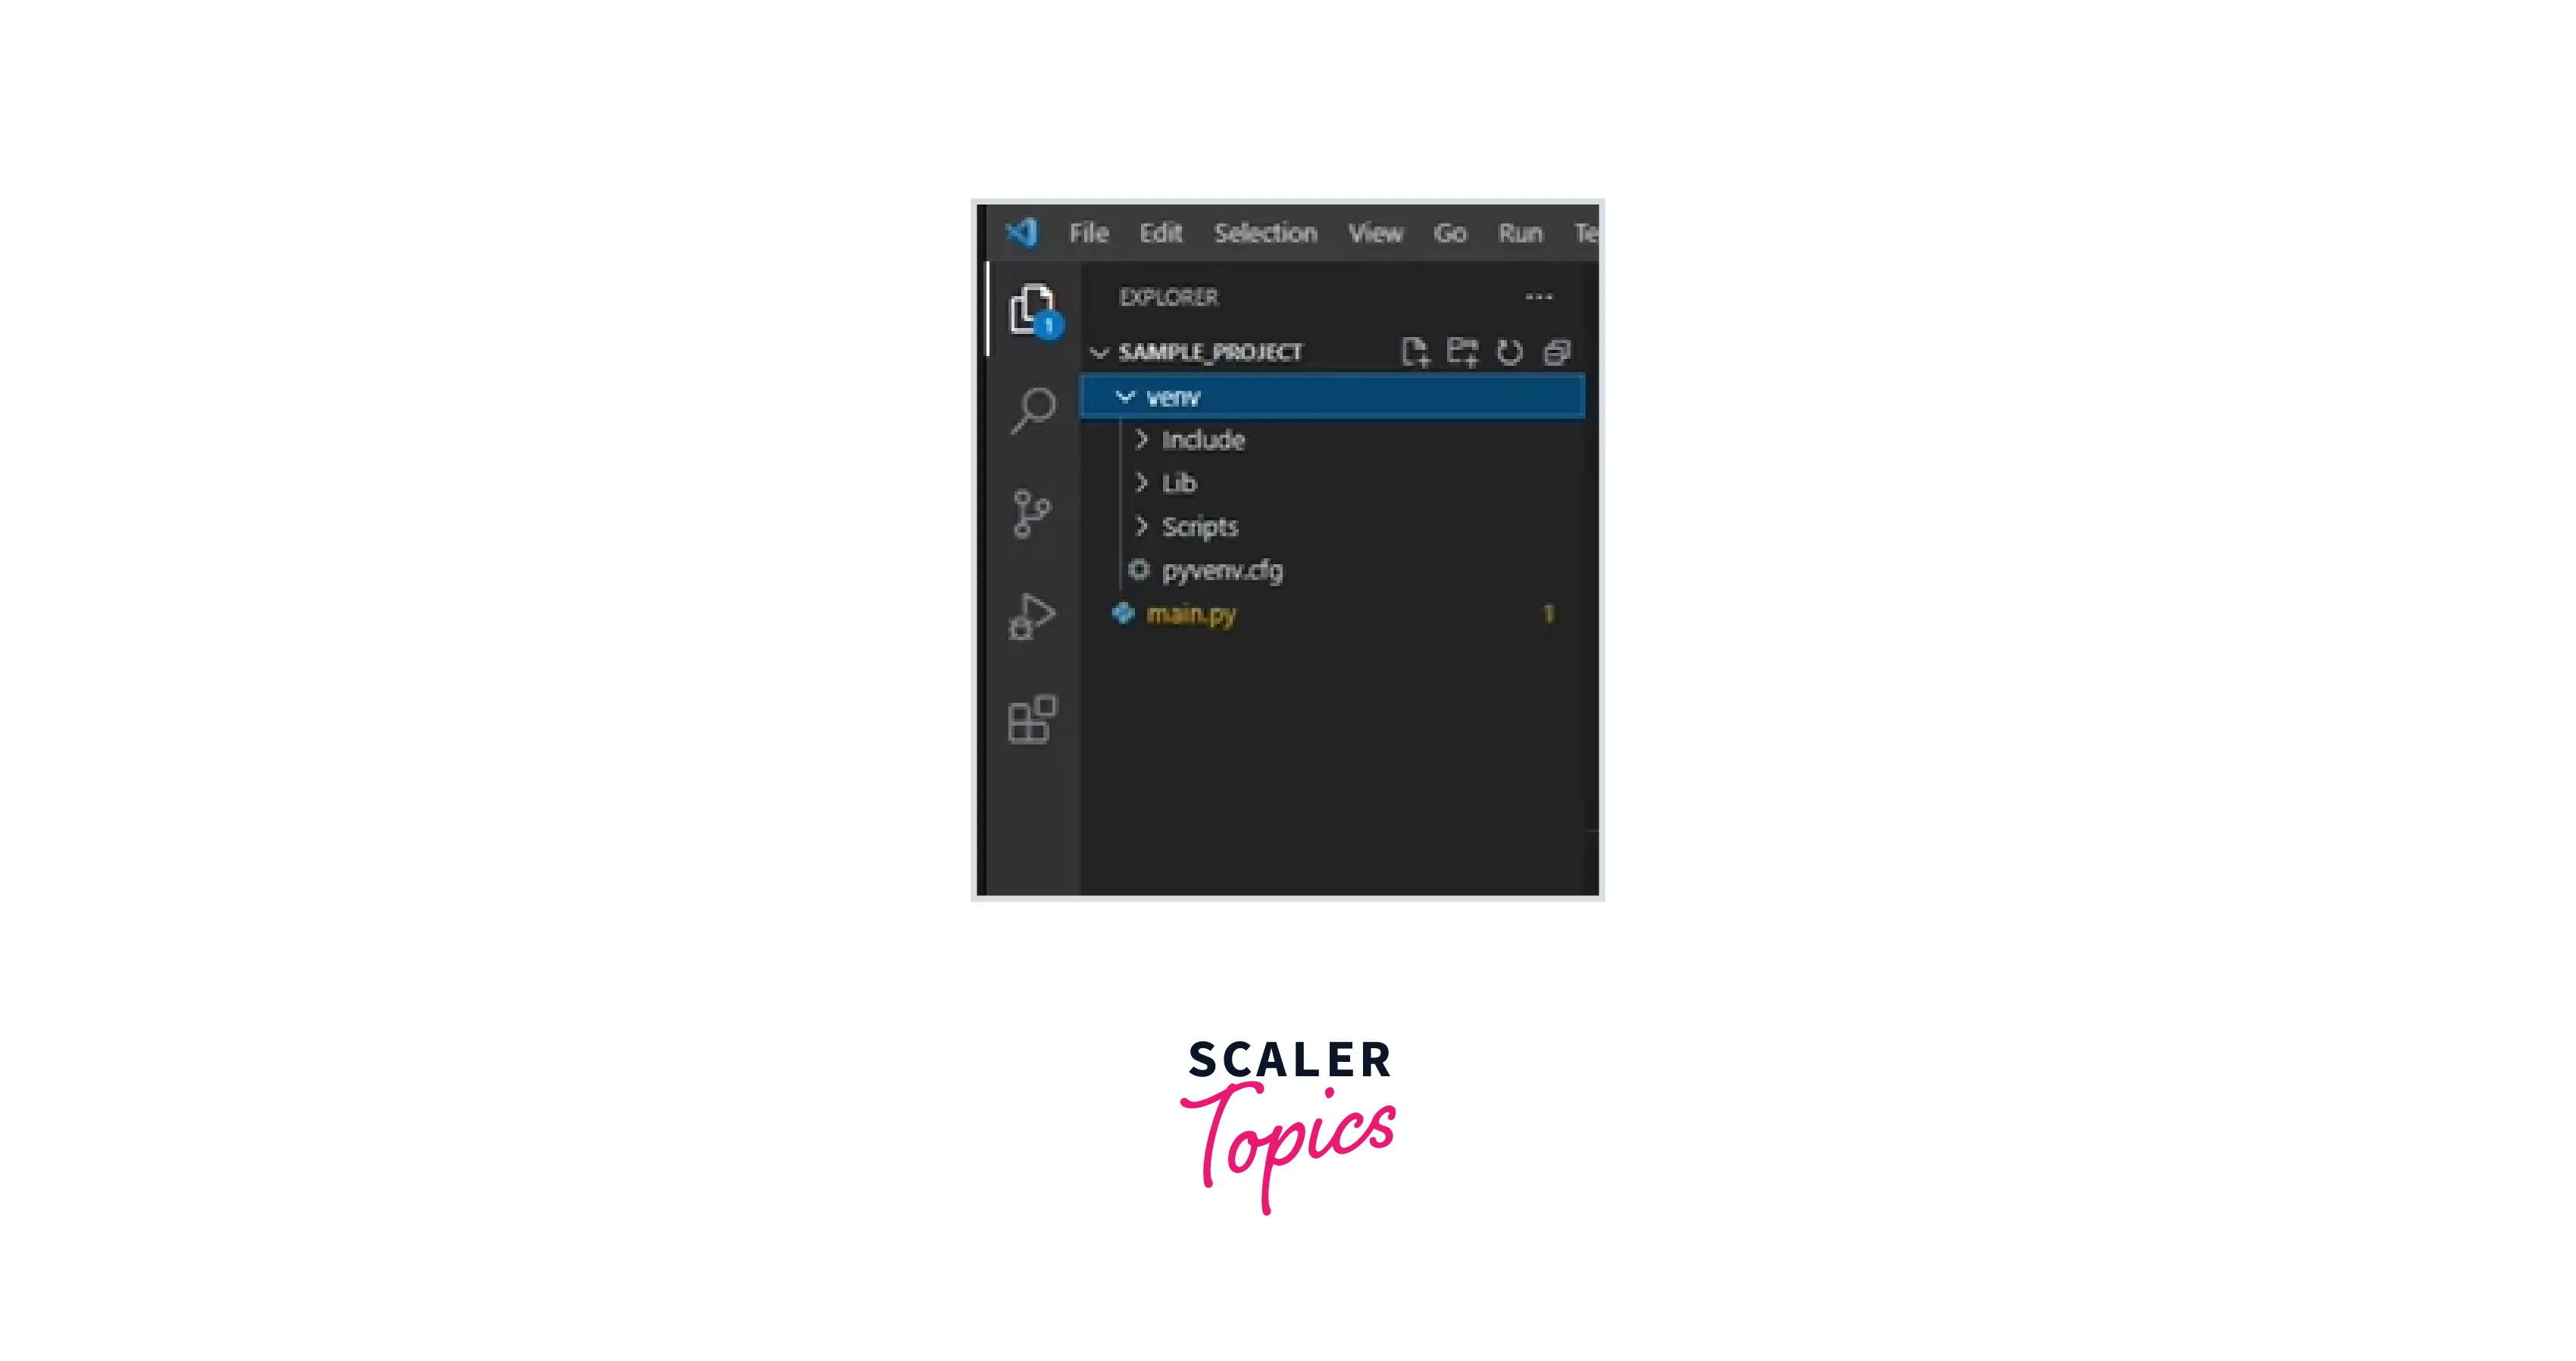
Now, we have to change interpreter by typing: ctrl+shift+p
Step 3: Select Interpreter from the dropdown as shown:
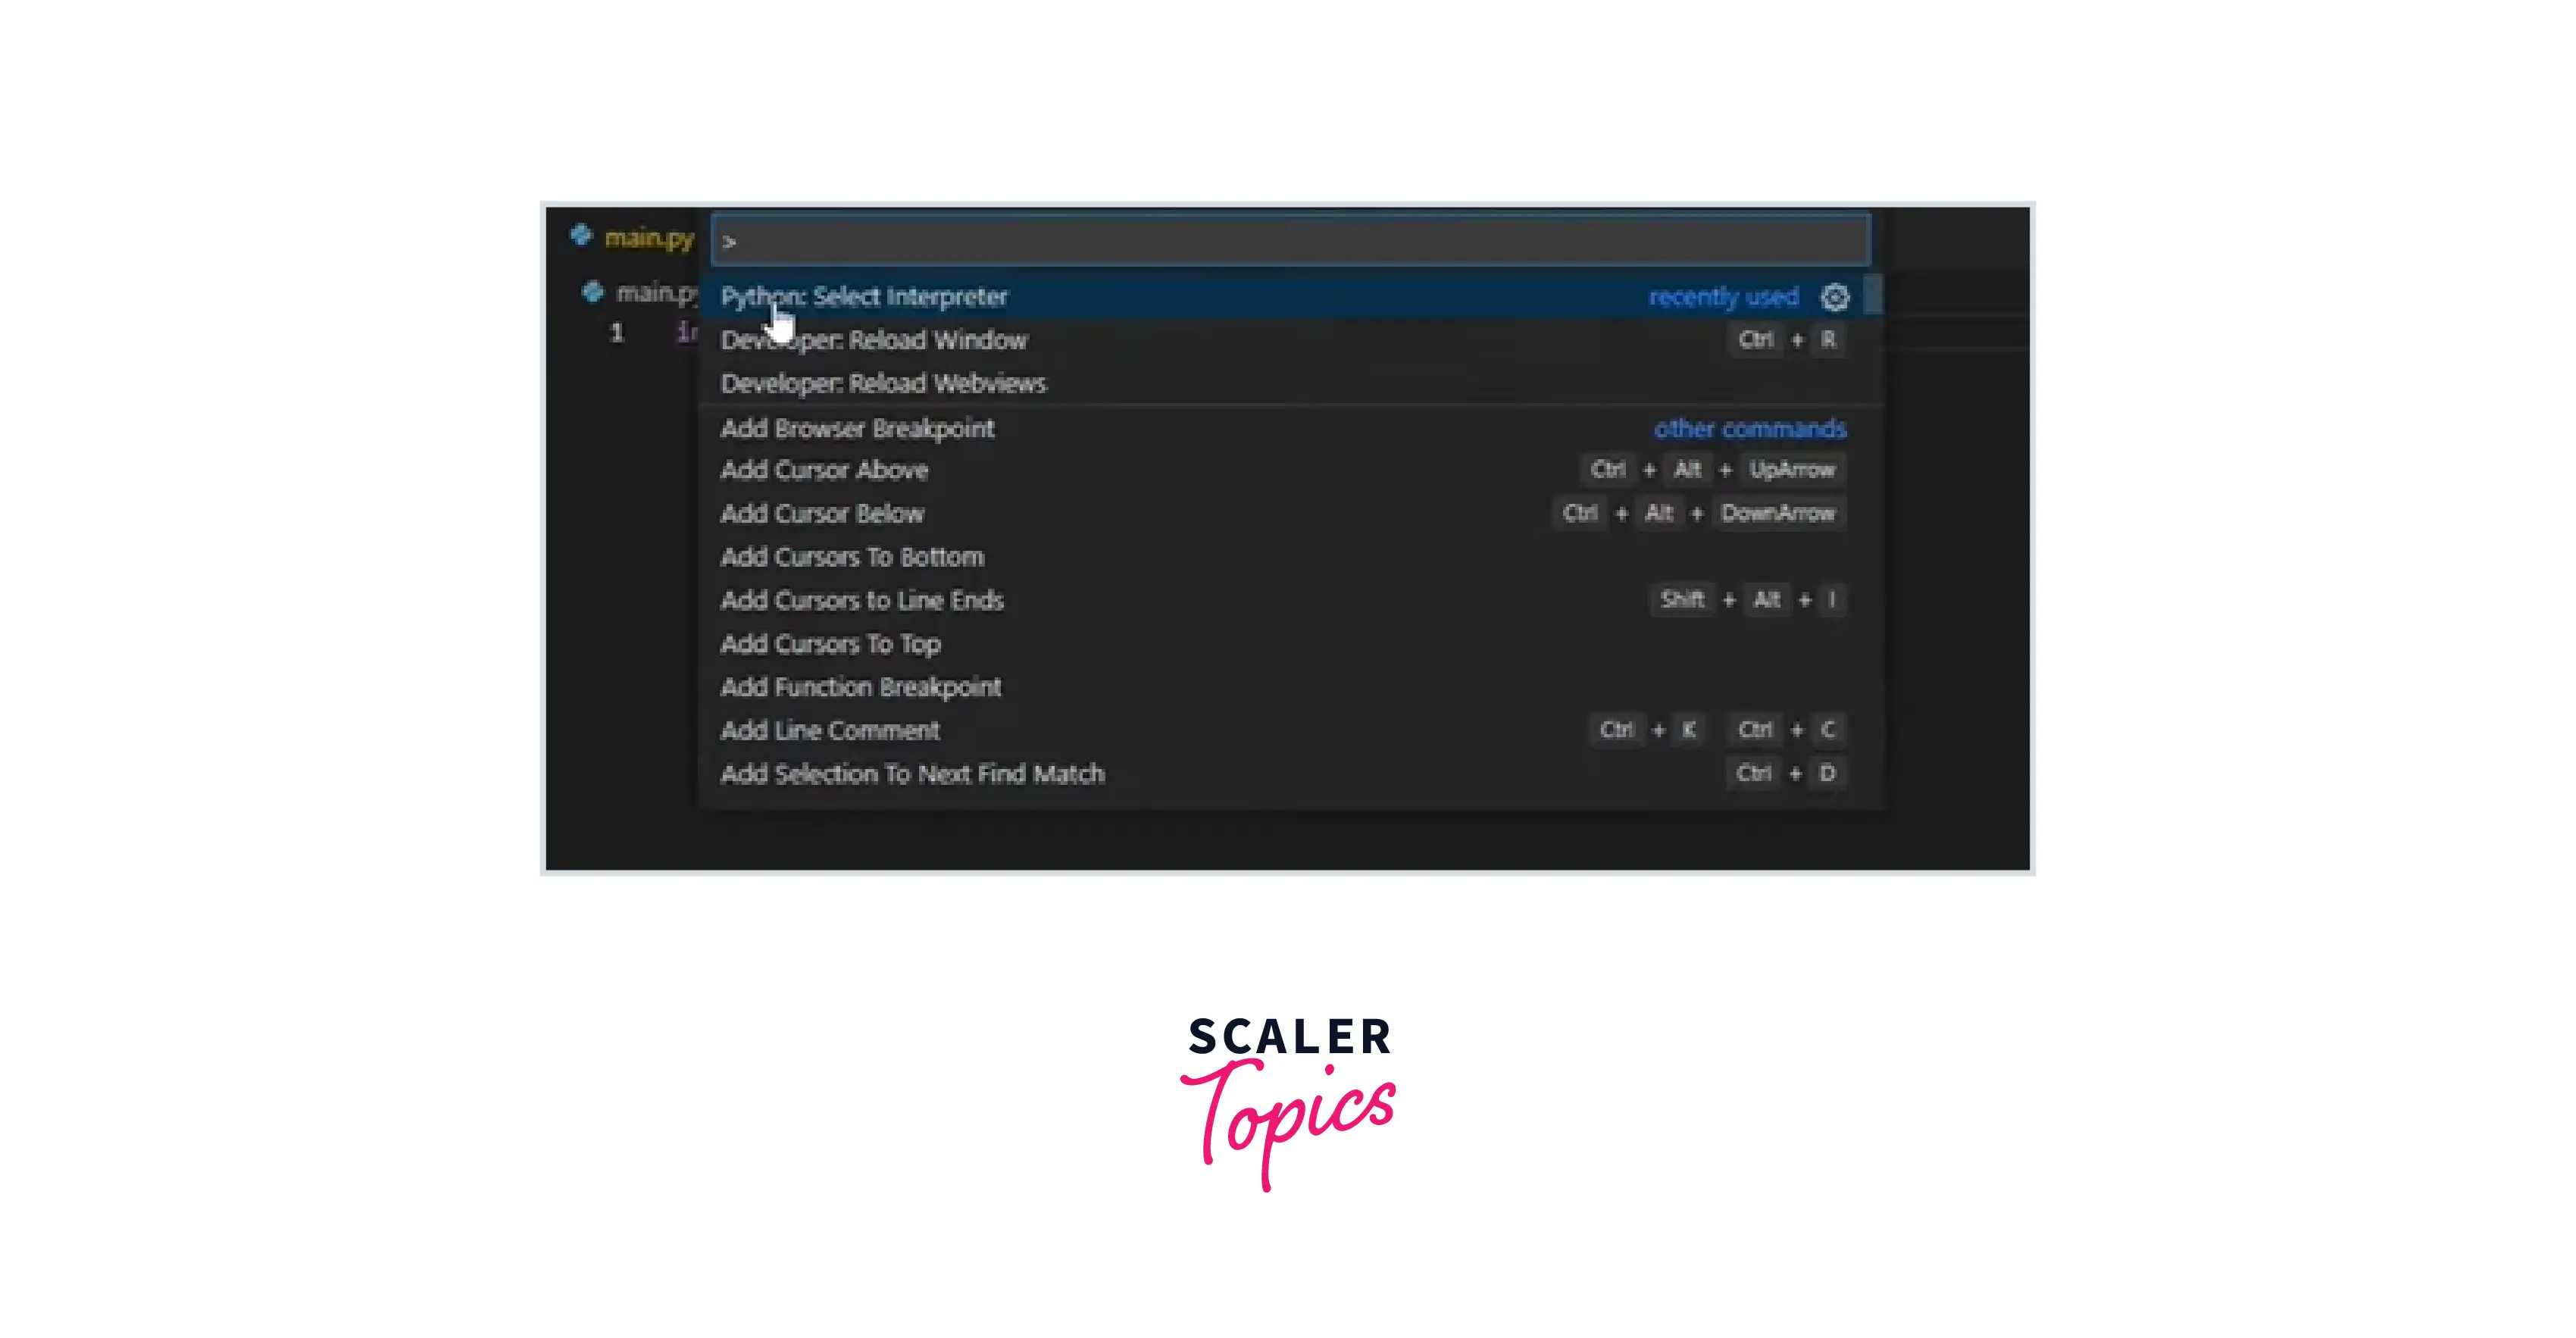
Step 4: Select 'Enter intepreter path' as shown:
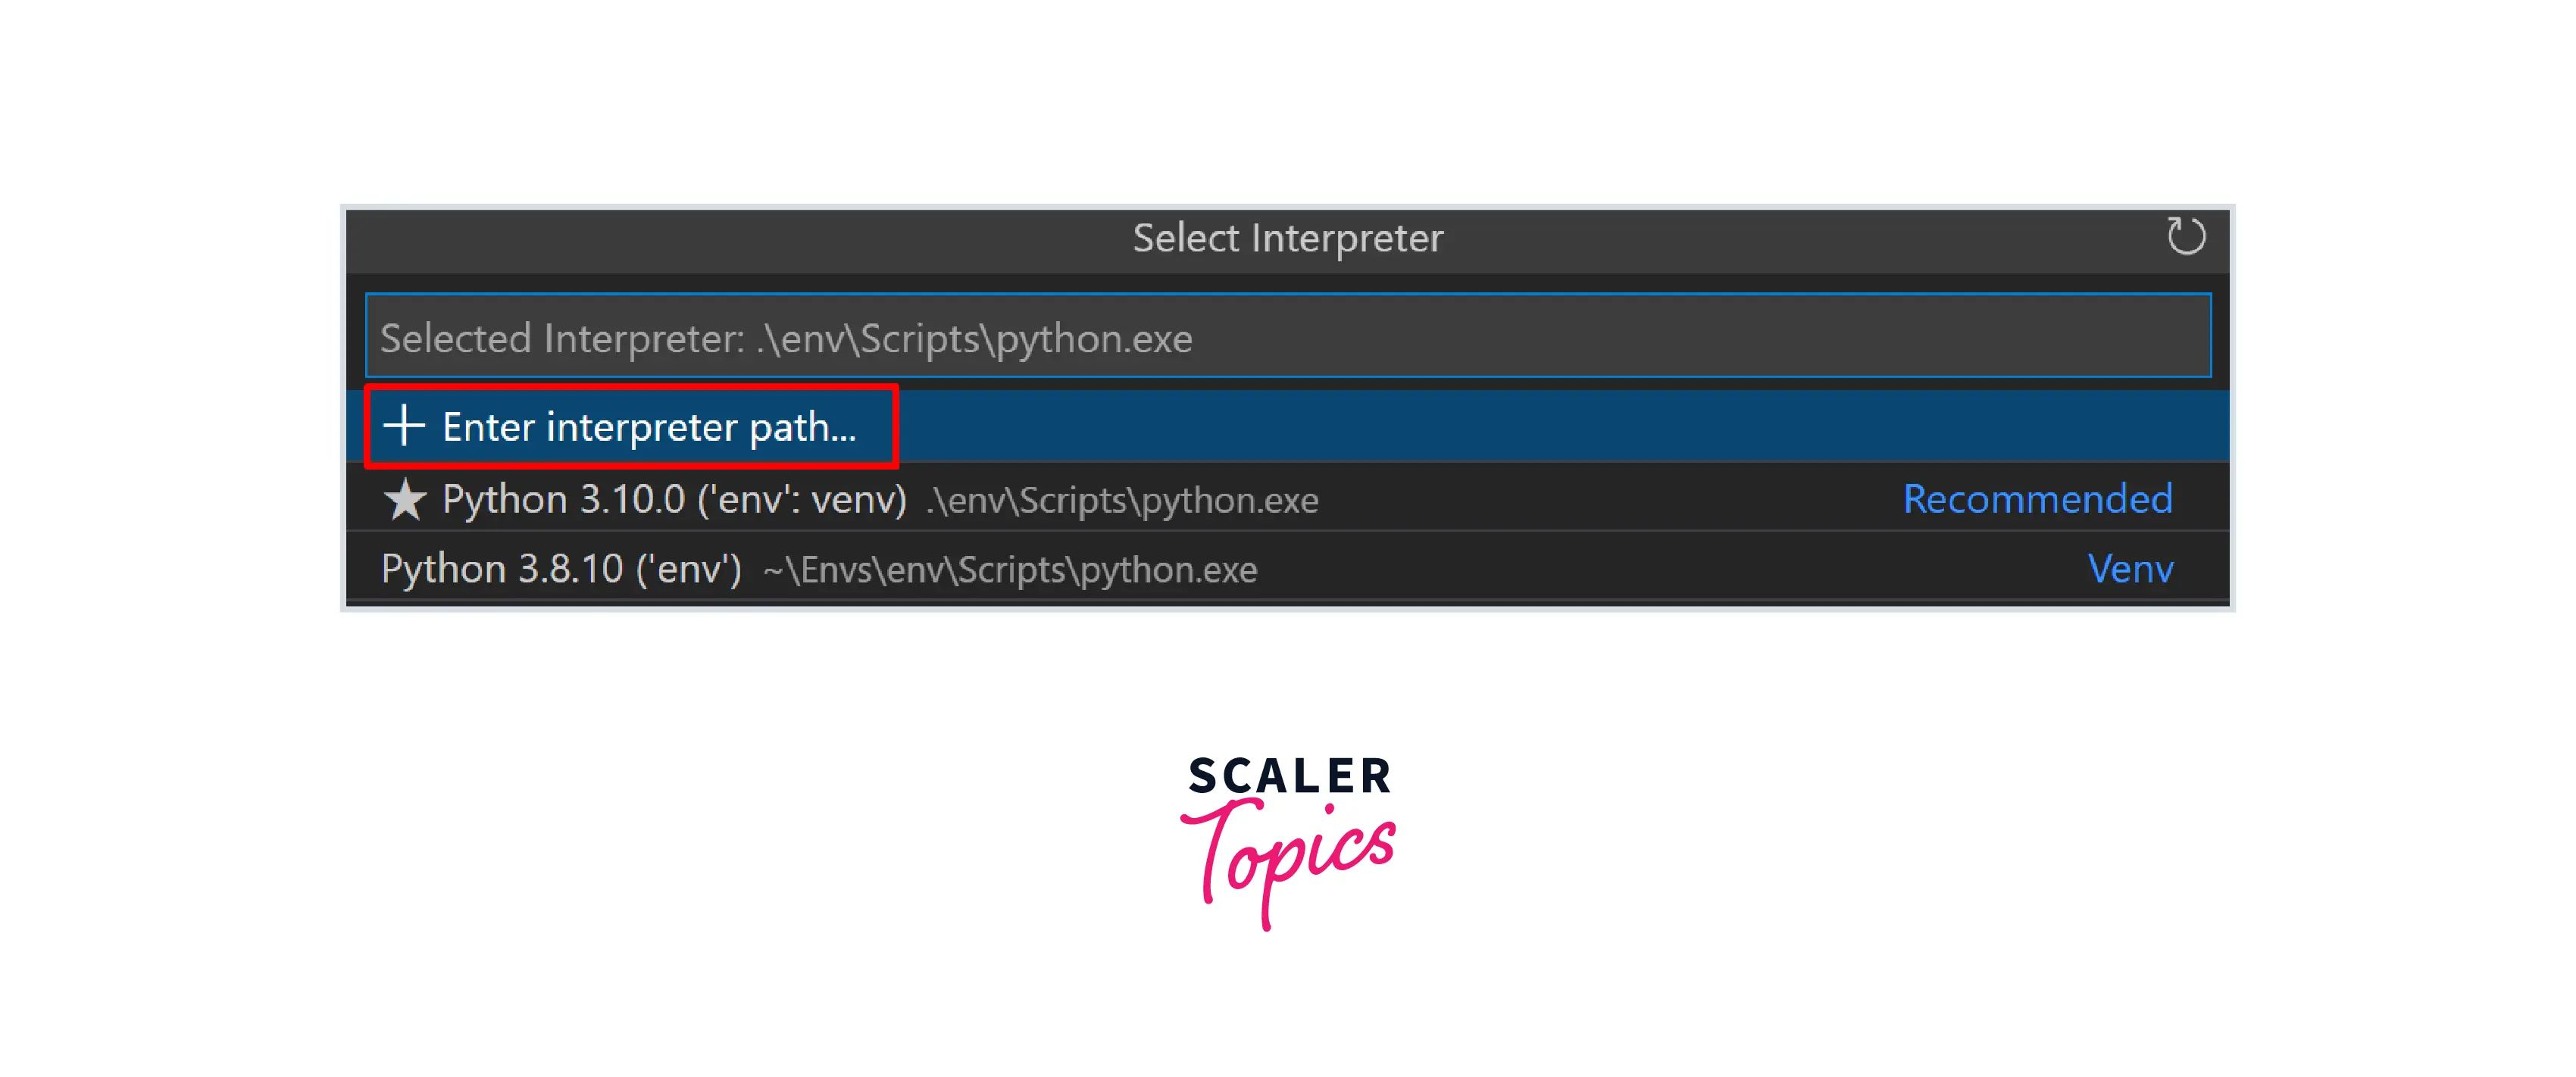
Step 5: Click on Find
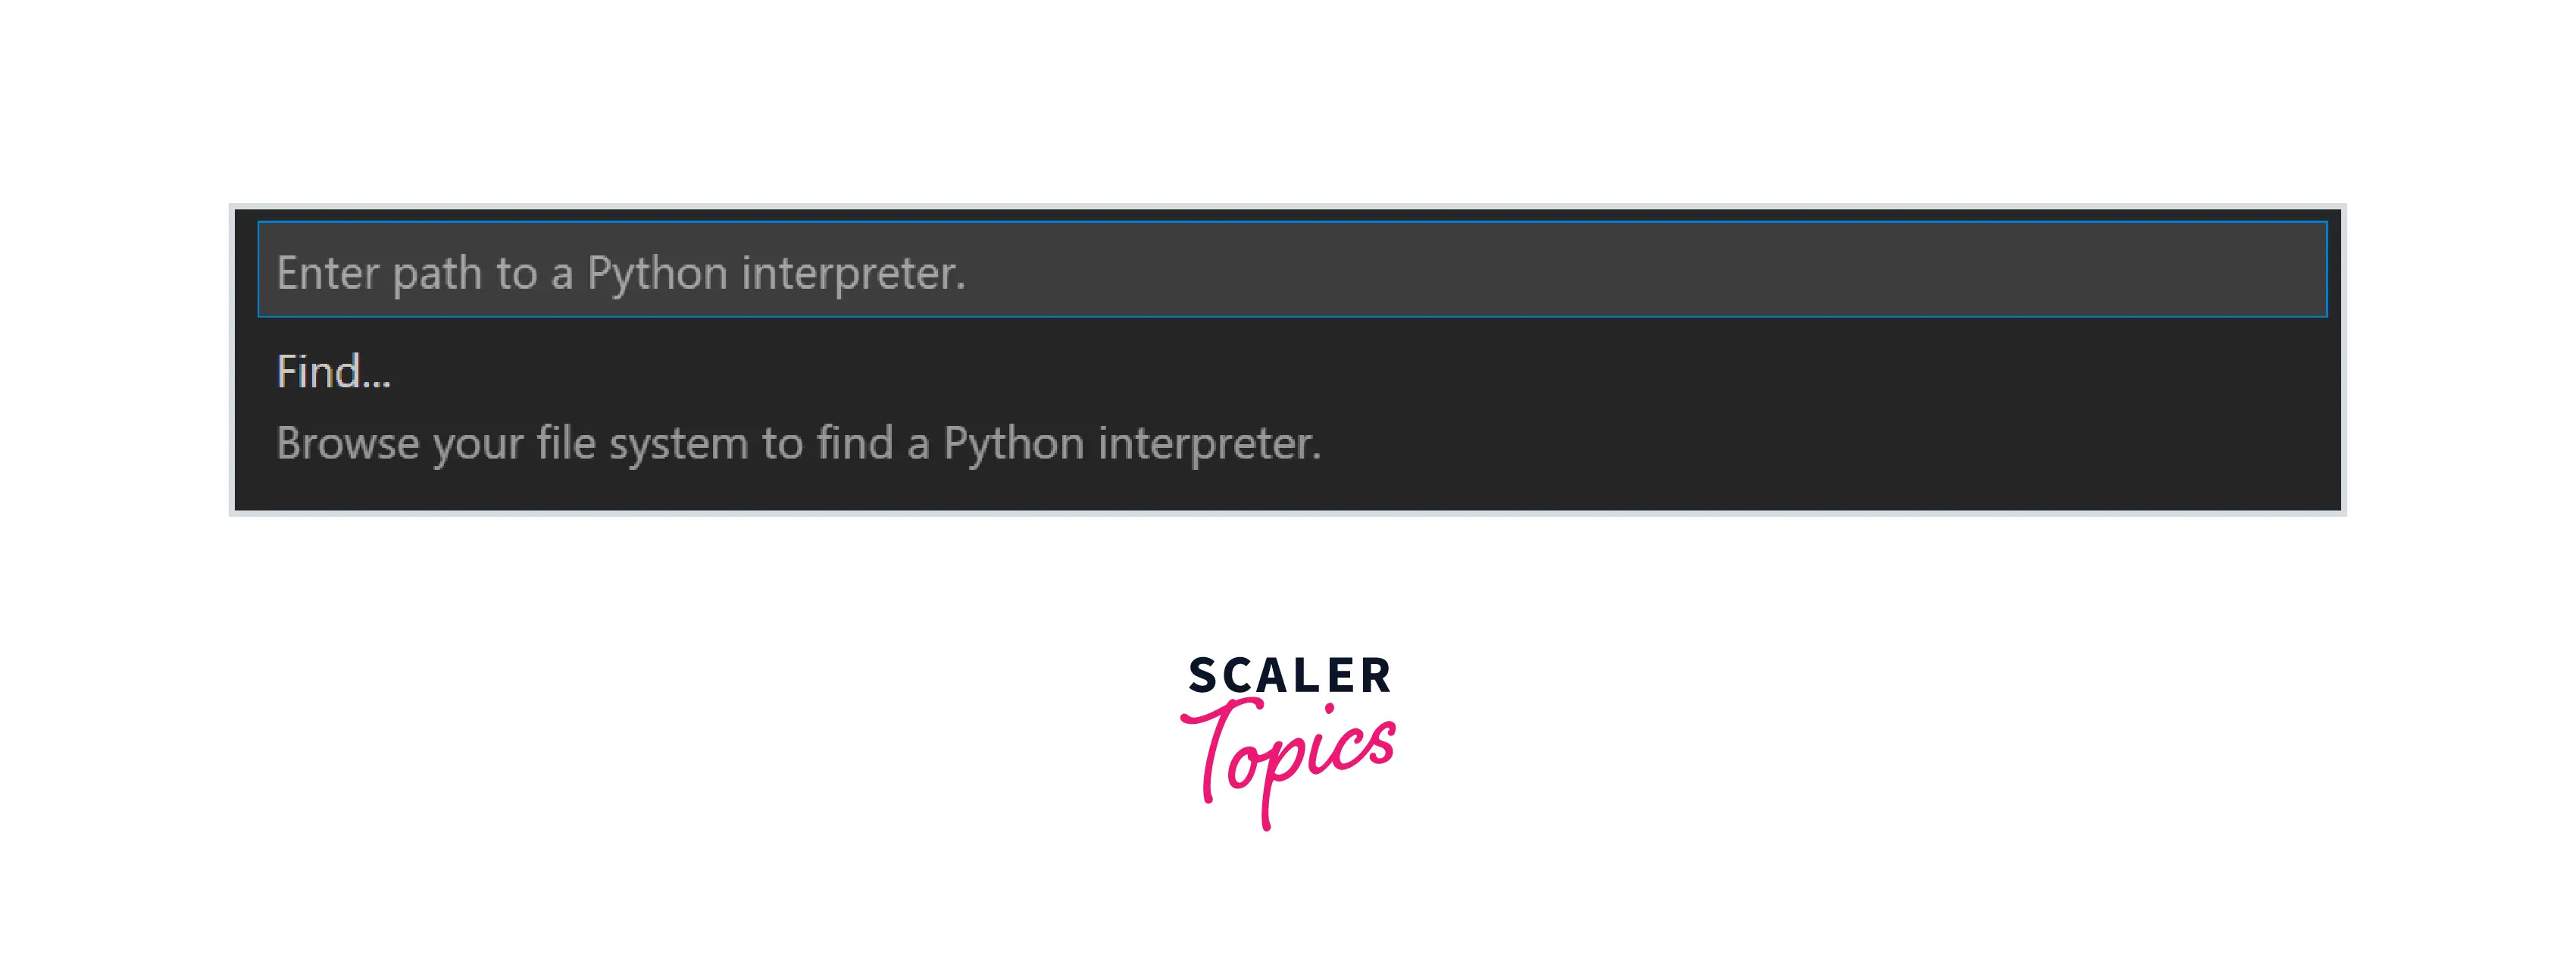
- It takes you to the venv file as shown below:

Step 6: After clicking on venv go to the scripts folder:

Step 7: Select python.exe file as interpreter as shown in below image:
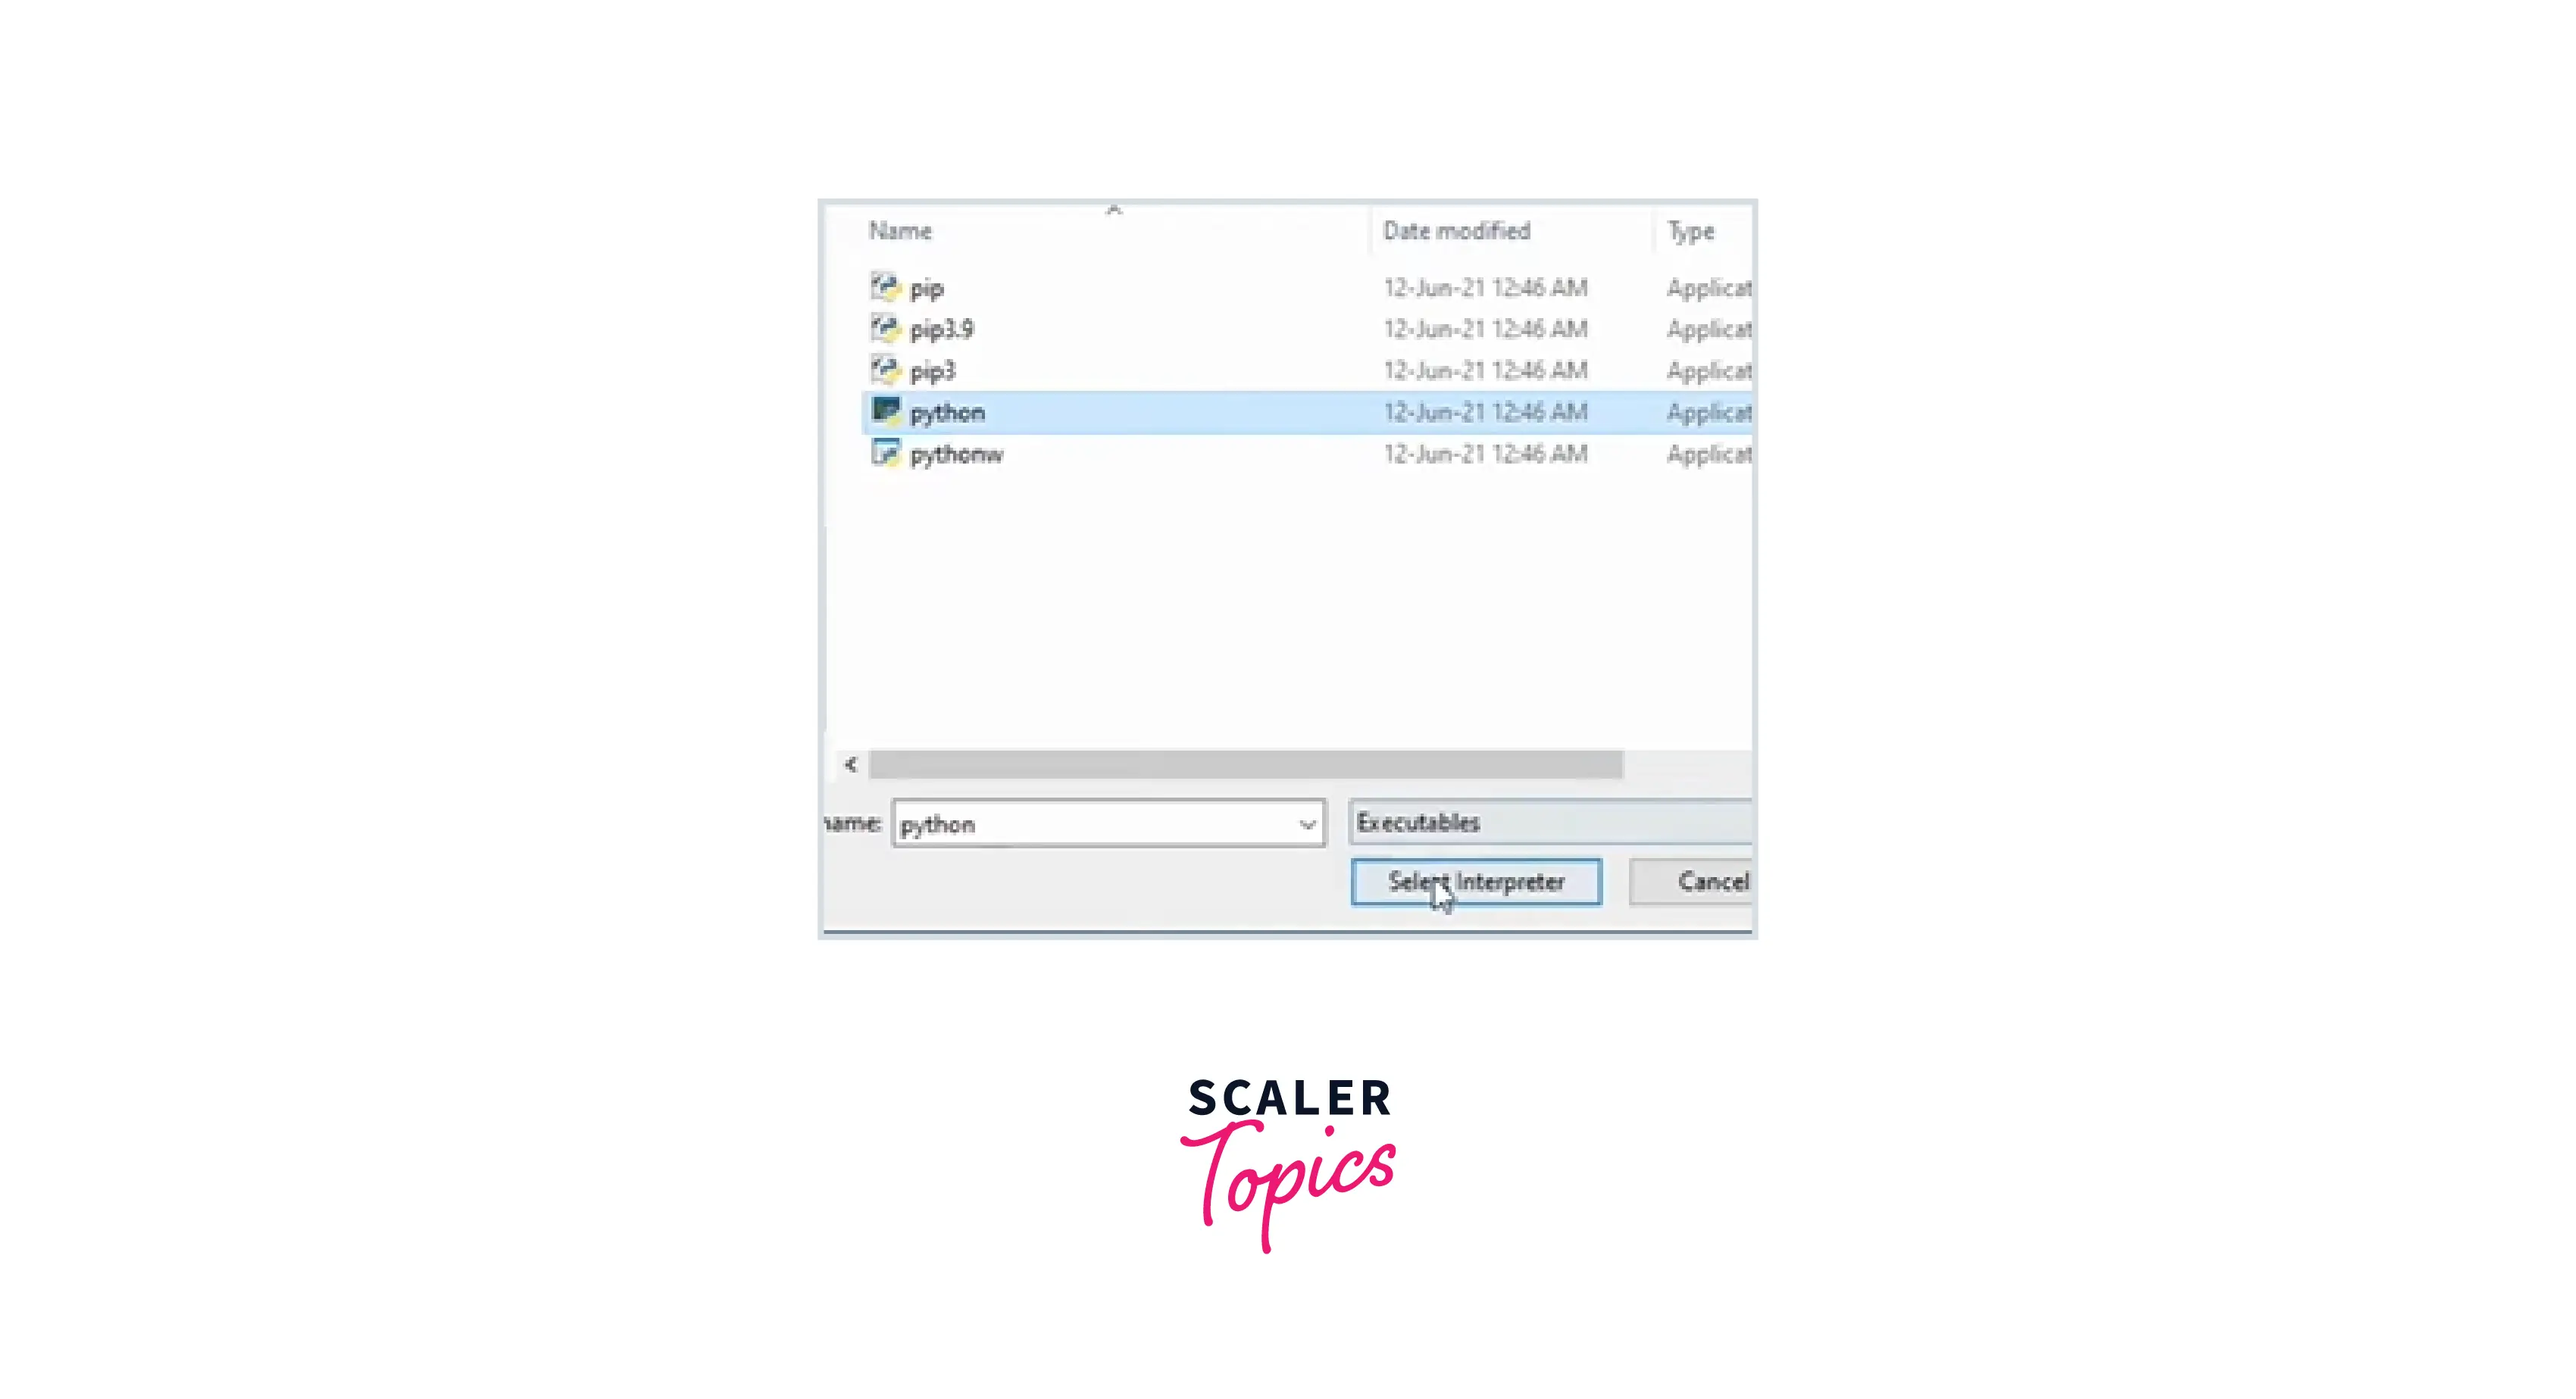
Once virtual environment is created. Now, go to the new terminal and type the command:
Now, you are ready to work with numpy in your Visual Studio code.
Import error numpy core multiarray failed to import
Numpy is used by the majority of machine learning and deep learning Python libraries, including cv2, matplotlib, pyinstaller, PyTorch, etc. The majority of the time, we require multiple libraries to create our program. Sometimes we install each module separately to fulfill that requirement. According to its compatibility, each module then modifies the NumPy version.
Now, when we use two or more modules, both modules may use different versions of Numpy. The system raises the "ImportError: numpy.core.multiarray failed to import" error when the dependable requirement is not met.
Let's see how to solve this error:
Step 1: For can fix this error by updating the versions of our module. For this, first, we need to check the current version of python by typing the command python --version in the terminal.
Step 2: If python is not up to date, we first need to uninstall modules by running the following commands:
Step 3: Then install then again all the above libraries by entering the following commands:
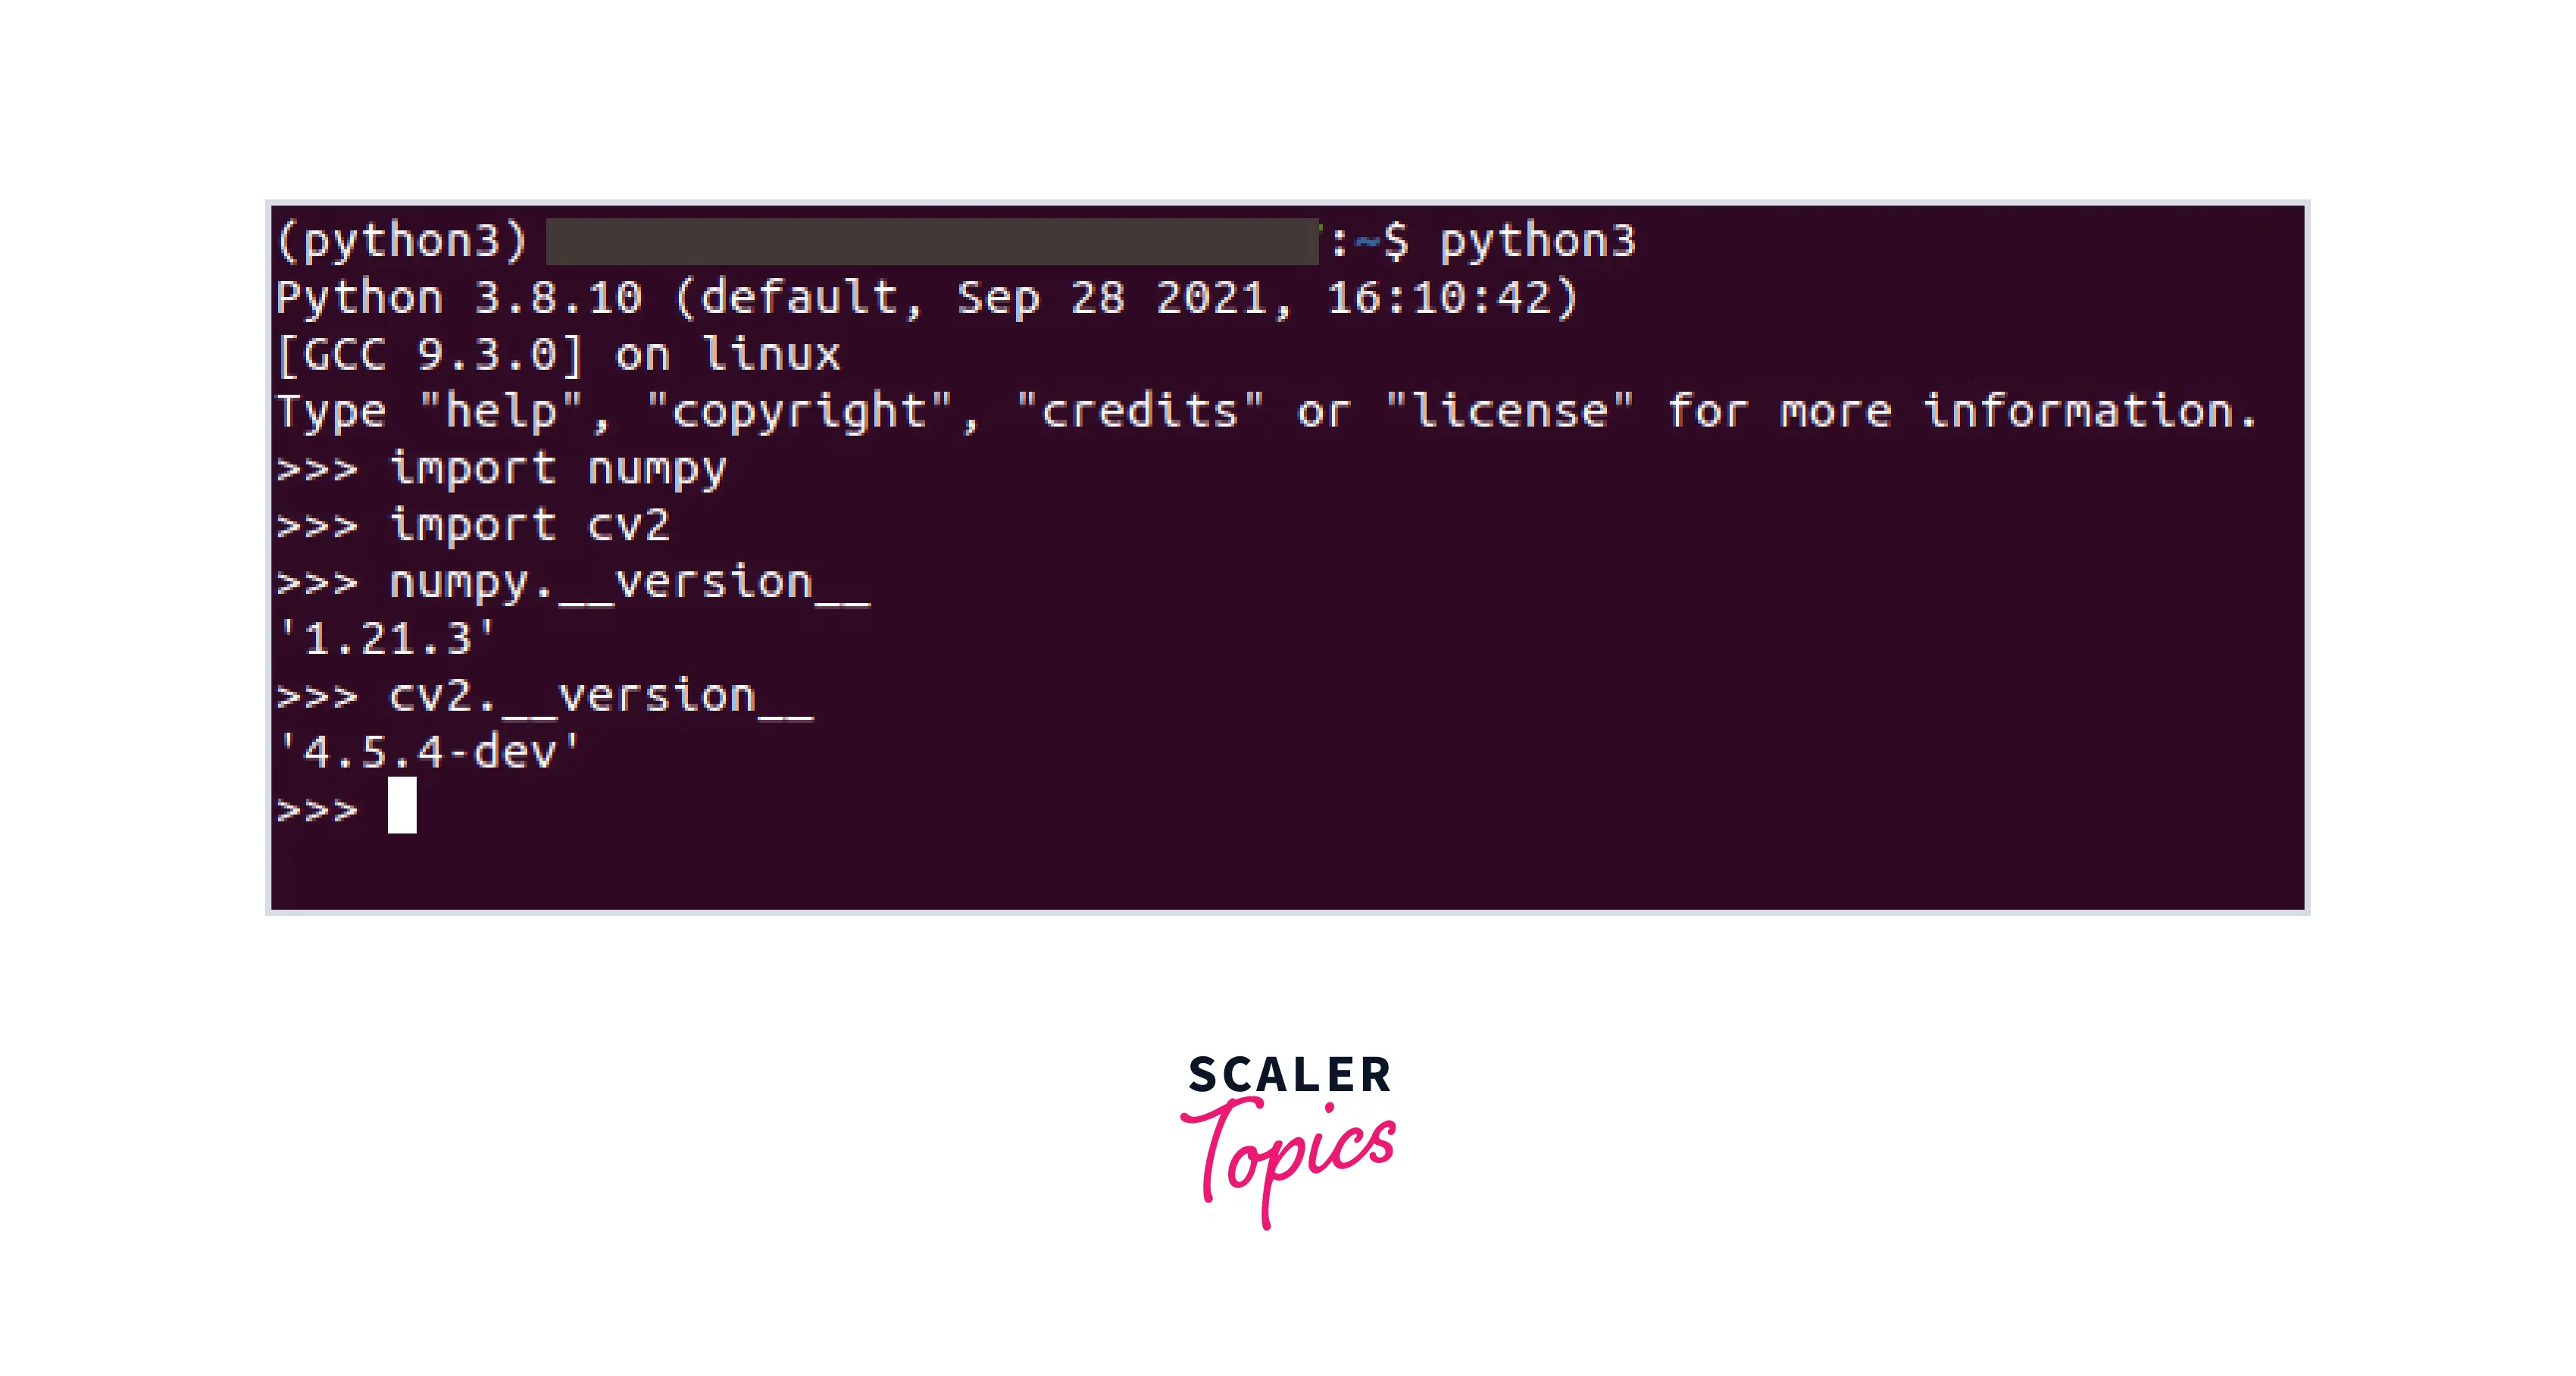
Step 4: Now check the numpy, OpenCV, and other versions
Versions can be checked by using the following command: --version-- with the module or package as shown in the below image.
Conclusion
- Python and Compilers are prerequisites for installing NumPy.
- NumPy can be installed using different packages like conda and pip python packages. Pip contains python libraries. On the other hand, conda has python libraries, c libraries, and also executables like C compilers, etc.
- Numpy can be installed and upgraded on different operating systems like Mac, Linux, etc., using different commands.
- If code breaks or it's results change because the libraries are updated, use Reproducible Installs. dora operating system.
Type command `pip install NumPy
- Troubleshooting is used to find and fix problems in complex electronic, and software systems.
